
Desserts
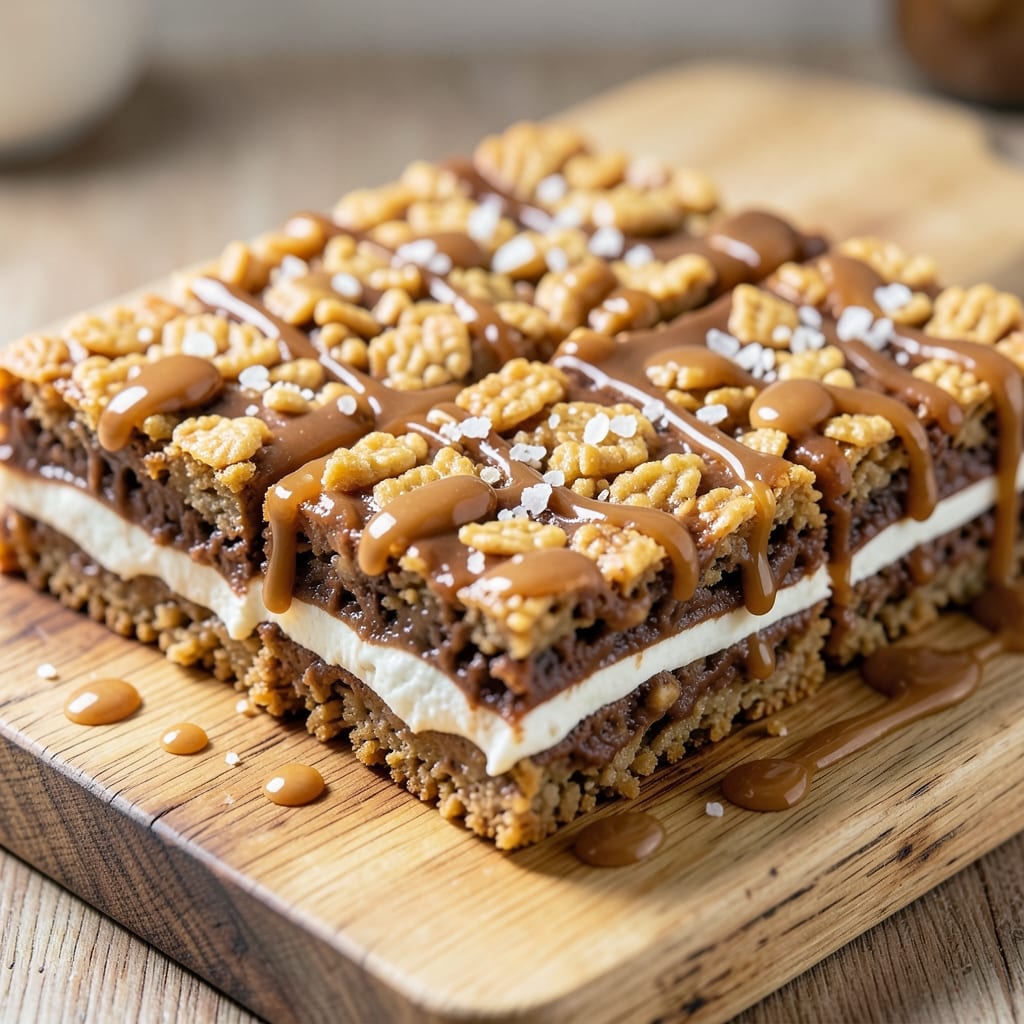
This 3-ingredient peanut butter Rice Krispie treats recipe delivers no-bake convenience without sacrificing texture or flavor. The magic happens when creamy peanut butter, crispy Rice Krispies, and melted marshmallows combine into a fudgy, crunchy masterpiece—no oven required. I developed this version after burning through three batches of traditional treats, and it’s now my go-to for quick desserts that impress without the effort. The beauty of this recipe lies in its simplicity: 15 minutes from start to finish, with just three core ingredients (plus optional mix-ins). Creamy peanut butter binds everything together while adding rich flavor, and chilling the mixture ensures clean slices every time. The result is a perfect balance of crispy Rice Krispies and chewy peanut butter pockets—no more crumbly or overly sticky disasters. What sets this apart is the foolproof technique for texture control. A quick chill in the fridge (just 15 minutes) firms up the mixture enough to slice neatly, while the right peanut butter (natural or creamy) makes all the difference. No fancy equipment, no complicated steps—just restaurant-quality treats with minimal cleanup. Whether you’re prepping for a party, satisfying a sweet tooth, or teaching kids to bake, this recipe delivers. The best part? It’s endlessly customizable—add chocolate chips, chopped nuts, or even a sprinkle of sea salt for extra depth. Let’s make these treats!
Ingredients for 3 ingredient peanut butter rice krispie treats
Three core ingredients plus a few finishing touches create these foolproof no-bake treats.
| Ingredient | Amount | Notes |
|---|---|---|
| Creamy Peanut Butter 🥜 | 1 ½ cups | Natural or creamy, unsweetened preferred |
| Mini Marshmallows 🍬 | 6 cups | Standard size, not jumbo |
| Rice Krispies Cereal 🍚 | 6 cups | Original flavor, tightly packed |
| Unsalted Butter 🧈 | ¼ cup | Cold, cubed for even melting |
| Vanilla Extract 🌿 | 1 tsp | Pure vanilla for subtle flavor |
| Sea Salt 🧂 | ¼ tsp | Fine grain for sprinkling |
The peanut butter is non-negotiable here—creamy (not crunchy) delivers that signature texture, while natural adds subtle depth. Jif or Skippy are reliable brands, but any store-bought creamy variety works. For the marshmallows, mini marshmallows (not regular) ensure consistent melting and texture. Rice Krispies should be the original flavor—no honey or chocolate-coated varieties. The butter needs to be unsalted to control the final seasoning, and cold cubes melt more evenly than softened sticks. I always grab the Rice Krispies from the bulk bin at Whole Foods for freshness, but the boxed version is fine too.
No vanilla extract? Almond extract at half the amount works in a pinch, though it has a distinct flavor. Running out of sea salt? Kosher salt at half the quantity is a direct swap. For the marshmallows, Dandies brand melts perfectly, but any standard mini marshmallows will do. The butter can be melted first if you're in a hurry, but cold cubes create smoother pockets. If you're making these for a crowd, double the batch—just be prepared for them to disappear faster than you can slice. The key to texture is not overmixing after adding the Rice Krispies, so keep stirring to a minimum.
These treats firm up beautifully in the fridge for clean slicing after just 15 minutes, but they taste even better after 1 hour when fully chilled. Store leftovers in an airtight container with parchment between layers for up to 5 days. For longer storage, wrap tightly in plastic wrap and freeze for up to 3 months. The texture holds up surprisingly well after freezing—just let them sit at room temperature for 10 minutes before serving. These are perfect for holiday parties or last-minute desserts—just assemble and chill while you finish other preparations.
Why You'll Love This Recipe
- Here’s what sold me: zero oven required. I’ve burned enough cookies in my life to avoid the oven at all costs, and this treat delivers that perfect chewy-crunch combo without a single hot pan. The peanut butter’s rich warmth and the marshmallows’ gooey pull? It’s like dessert hugs your taste buds.
- I’ll be real: this recipe costs me less than $5 for a batch that feeds a crowd. Peanut butter, marshmallows, and cereal? Basic stuff that doesn’t break the bank. Plus, the leftovers disappear faster than I can say “second helping,” so no sad, wilted treats sitting around. Solid. Reliable. My secret weapon.
Step-by-step instructions for 3-Ingredient peanut butter Rice Krispie treats
Here's how to transform simple pantry staples into decadent treats with zero oven time.
Melt Butter and Peanut Butter Together
In a large, heavy-bottomed saucepan, combine the 0.25 cup unsalted butter and 1.5 cups creamy peanut butter. Place the pan over medium-low heat and stir constantly with a silicone spatula until the butter melts completely and the mixture becomes smooth. This should take about 3-4 minutes—watch carefully to prevent scorching.
Once fully melted, remove the pan from heat and stir in the 1 tsp vanilla extract and 0.25 tsp sea salt. Let the mixture cool slightly for 2-3 minutes while you prepare the marshmallows. The peanut butter mixture should be thick but still pourable—this consistency is crucial for binding the treats properly.
Melt Marshmallows Over Low Heat
Return the saucepan to low heat and add the 6 cups mini marshmallows all at once. Stir constantly with a wooden spoon, breaking up any large clumps as they melt. The marshmallows will foam vigorously at first, but continue stirring until they're completely melted and the mixture becomes glossy and smooth.
This process takes about 5-7 minutes, but don't rush it—uneven melting can create grainy textures in your treats. If the mixture starts to darken or stick to the pan, reduce the heat slightly and continue stirring. The marshmallow mixture should coat the back of a spoon smoothly when ready.
Combine with Rice Krispies Cereal
Immediately after removing the marshmallow mixture from heat, add the 6 cups Rice Krispies Cereal all at once. Using a wooden spoon or rubber spatula, stir vigorously for 1-2 minutes until every cereal piece is fully coated in the peanut butter-marshmallow mixture. The treats will look wet and sticky at this stage.
Work quickly but carefully—this is where the magic happens. The residual heat from the marshmallow mixture will help the cereal absorb the coating evenly. If you notice dry spots, add a few teaspoons of warm water to help bind everything together. The mixture should hold its shape when pressed between fingers.
Press into Pan and Cool
Transfer the mixture to a 9x13-inch baking dish lined with parchment paper. Press down firmly and evenly using a spatula or the back of a spoon, creating a smooth, even layer. For extra crisp edges, press the mixture against the sides of the pan as well. The treats will look glossy and slightly sticky when finished.
Let the treats cool completely at room temperature for at least 1 hour before cutting. This cooling period allows the peanut butter to fully set and the marshmallow mixture to firm up. For best results, refrigerate for 30 minutes before cutting into 1-inch squares—this ensures clean cuts and prevents crumbling.
Cut and Serve
Once fully cooled, lift the treats from the pan using the parchment paper for easy handling. Using a sharp knife, cut into 1-inch squares or your preferred shape. The treats should hold their shape when lifted and have a crisp exterior with a soft, gooey center.
Store in an airtight container at room temperature for up to 5 days, or refrigerate for up to 2 weeks to maintain freshness. These treats are best enjoyed at room temperature—they'll soften slightly in the fridge, so let them sit for 10 minutes before serving for optimal texture.
Pro Tips For Making 3 Ingredient Peanut Butter Rice Krispie Treats
- MELT THE BUTTER FIRST: I learned this the hard way—skipping this step means your peanut butter won’t incorporate smoothly. Melt the butter in the same pot you’ll use for the mixture (medium heat, about 2 minutes), then immediately remove it from heat before adding peanut butter. The residual heat helps emulsify everything faster without scorching.
- USE ROOM-TEMP PEANUT BUTTER: Cold peanut butter from the fridge is a nightmare to mix—it clumps and fights you. Let that jar sit out for 10-15 minutes before scooping. If you’re in a rush, microwave it for 10 seconds (yes, even if it sounds sacrilegious). Smooth peanut butter = no grainy surprises in your treats.
- DON’T OVERMIX AFTER MARSHMALLOWS: The moment you add marshmallows, stop stirring. Lift the pot off heat and let the mixture sit for 30 seconds—it’ll thicken on its own. Overmixing after this point makes the treats dense and chewy instead of light and airy. Trust me, your future self will notice the difference.
- SWAP MINI MARSHMALLOWS FOR REGULAR IF NEEDED: Mini marshmallows are ideal, but if you’re in a pinch, chop regular marshmallows into ¼-inch pieces. They melt faster, so watch the pot like a hawk—you’ll need to remove it from heat 10-15 seconds earlier. No one will know the difference, but your timing will be smoother.
Dietary considerations for these flavors
Allergen-Free Adaptations
These treats are naturally nut-free if you skip the peanut butter, but the original recipe relies on it for that signature flavor. For a nut-free version, replace the peanut butter with sunflower seed butter (like SunButter) or tahini—both work well and provide a similar creamy texture. Just reduce the amount slightly (1.25 cups) since these alternatives are thicker. 🥜
Vegan-Friendly Swaps
The original recipe contains butter and marshmallows, which are typically not vegan. For a fully plant-based version, swap the butter for coconut oil (0.25 cup) and use vegan marshmallows (like Dandies Vegan Marshmallows or homemade marshmallow fluff with agar-agar). Keep the peanut butter as-is if it's vegan-certified (most natural peanut butters are).
Gluten-Free Options
Rice Krispies are naturally gluten-free, so no changes are needed for gluten-sensitive diets. Just ensure your peanut butter and marshmallows are certified gluten-free. Brands like Enjoy Life make excellent gluten-free marshmallows. Double-check labels on all ingredients to avoid cross-contamination in shared facilities.
Dairy-Free Adjustments
For those avoiding dairy, replace the butter with vegetable shortening or coconut oil (0.25 cup) and use dairy-free marshmallows (like Dandies Vegan). The texture remains crispy and gooey, though coconut oil may add a subtle coconut flavor—balance it with an extra 0.5 tsp vanilla extract if needed.
Sugar-Free Versions
To reduce sugar, use sugar-free marshmallows (like Great Value Sugar-Free) and natural peanut butter without added sugars. The texture will be slightly firmer, but the sweetness remains. For extra richness, add 1 tbsp powdered erythritol to the peanut butter mixture. Keep in mind that sugar-free marshmallows may melt differently, so monitor closely.
Keto Considerations
This recipe isn't keto-friendly as written, but you can adapt it with low-carb swaps. Replace the Rice Krispies with crushed pork rinds or almond flour (1.5 cups), and use sugar-free peanut butter (like PB2) and sugar-free marshmallows. The result will be more like a peanut butter fudge than traditional treats, but it fits a keto lifestyle.
Nutrition facts
Frequently asked questions
Why do my peanut butter treats turn out crumbly or dry?
Crumbly treats usually mean the peanut butter mixture cooled too much before adding the Rice Krispies. Keep everything warm until the final step, and press firmly when shaping. If they're still dry, add 1-2 teaspoons of warm water when combining with cereal. The key is working quickly after melting the marshmallows—the residual heat helps bind everything.
Can I make these treats without a stove?
Use a microwave-safe bowl to melt the butter and peanut butter together in 30-second intervals, stirring between each. For marshmallows, melt them in the microwave in 20-second bursts while stirring vigorously. Just be careful not to overheat—microwave melting requires close attention to prevent burning.
How do I get cleaner cuts when slicing?
Chill the treats in the fridge for 30 minutes before cutting for perfectly clean edges. Use a sharp knife and dip it in warm water between cuts to prevent sticking. Press down firmly but steadily—don't saw back and forth. The treats should hold their shape when lifted from the pan.
What's the difference between natural and regular peanut butter?
Natural peanut butter has no added sugars or oils, giving it a slightly grainier texture and deeper flavor. Regular creamy peanut butter is smoother and often contains hydrogenated oils. For these treats, natural peanut butter works best—its thickness helps bind the cereal better, while regular peanut butter can make them slightly softer.
Can I make these treats ahead of time?
Yes! These keep beautifully for 5 days at room temperature in an airtight container, or up to 3 months in the freezer. For freezing, wrap individually in plastic wrap, then place in a freezer bag. Thaw at room temperature for 10 minutes before serving—they'll be just as good as fresh.