
Main Courses
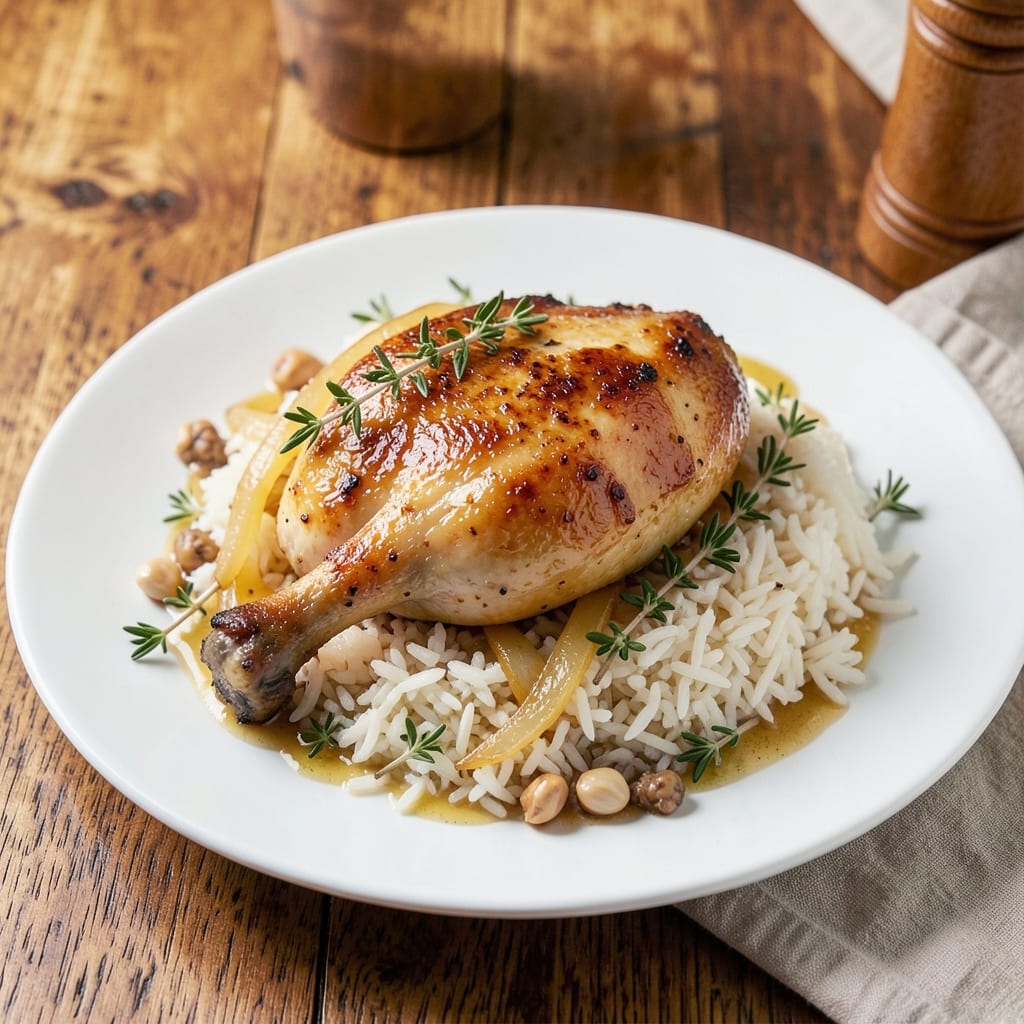
A chef's life chicken and rice recipe transforms a simple weeknight meal into a restaurant-worthy masterpiece with just one pot. The secret lies in building layers of flavor—juicy chicken thighs braised in aromatic spices, fluffy rice cooked in the same pot, and a crispy golden crust that seals in every savory note. This method isn’t just efficient; it’s a testament to how thoughtful technique elevates humble ingredients into something extraordinary.
The magic begins with perfectly seasoned chicken, cooked low and slow until tender, then finished with a crispy crust that adds texture and depth. Meanwhile, the rice absorbs all the rich flavors from the chicken and broth, creating a dish that’s both comforting and sophisticated. The one-pot approach ensures minimal cleanup while delivering maximum impact—ideal for busy weeknights or when you want to impress without the fuss.
By the time you’re plating, you’ll have a dish that’s visually stunning and packed with flavor: golden-brown chicken resting atop fluffy rice, garnished with fresh herbs for brightness. The aroma alone will have everyone at the table anticipating that first bite, where they’ll taste the harmony of tender meat, fragrant rice, and perfectly balanced spices. This is the kind of meal that makes cooking feel like a true craft.
Serve with a crisp white wine or a bright citrus cocktail to complement the dish’s rich, savory notes. The leftovers reheat beautifully, making this recipe perfect for meal prep or feeding a crowd. Here’s how to bring this chef-inspired technique to your kitchen—without the complexity.
Ingredients for a chef's life chicken and rice
Perfectly balanced ingredients for a restaurant-quality one-pot chicken and rice dish.
| Ingredient | Amount | Notes |
|---|---|---|
| Chicken Thighs, Bone-In 🍗 | 1 ½ lb | Skin-on, trimmed of excess fat |
| Long-Grain White Rice 🍚 | 1 cup | Uncooked, jasmine or basmati preferred |
| Chicken Broth 💧 | 2 cups | Low-sodium, homemade or high-quality |
| Yellow Onion 🧅 | 1 whole | Diced, medium size |
| Garlic Cloves 🧄 | 4 cloves | Minced, fresh preferred |
| Fresh Thyme 🌿 | ¼ cup | Leaves only, chopped |
| Bay Leaves 🍃 | 2 whole | Dried, for deep flavor |
| Ground Cumin 🌶️ | 1 tsp | Freshly toasted for warmth |
| Smoked Paprika 🌶️ | 1 tsp | For subtle smokiness |
| Kosher Salt 🧂 | 1 ½ tsp | Diamond Crystal preferred |
| Ground Black Pepper 🌶️ | ½ tsp | Freshly cracked |
| Unsalted Butter 🧈 | 2 tbsp | Cold, cubed for crust |
| Fresh Parsley 🌿 | 0.1 cup | Chopped, for garnish |
| Lemon Juice 🍋 | 1 tbsp | Freshly squeezed |
The chicken thighs are the foundation—bone-in, skin-on for maximum flavor and juiciness. Trader Joe's or local butchers often carry them at a great price, and look for pieces with good marbling. Fresh thyme and bay leaves elevate the dish without overpowering; dried thyme works in a pinch, but fresh is ideal. The rice should be long-grain—jasmine or basmati absorb flavors beautifully. For the broth, homemade or high-quality low-sodium makes all the difference, so skip the bouillon cubes if you can. The onions and garlic are your aromatic base, so don’t rush the mincing—smaller pieces mean more flavor.
No fresh thyme? Dried works at one-third the amount, but toast it lightly first to deepen the flavor. Out of jasmine rice? Basmati or even brown rice will work, though cooking times may vary. The smoked paprika adds depth, but if you prefer a sweeter touch, swap it for regular paprika. For the butter crust, cold cubes are essential—they melt into golden perfection when the dish finishes. The lemon juice brightens everything at the end, so use freshly squeezed if possible. The chicken broth can be substituted with vegetable broth for a lighter version, though the flavor will shift slightly.
This dish reheats beautifully—even better the next day as flavors meld. Store leftovers in an airtight container for up to 4 days in the fridge or freeze for 3 months. For meal prep, double the recipe and portion into containers. The golden crust is best served immediately, so hold off on adding butter until the very end. Fresh parsley adds a pop of color and freshness, but it’s purely decorative—skip it if you’re short on time. The one-pot method makes cleanup effortless, so embrace the simplicity.
Why You'll Love This Recipe
- One-Pot Magic: I swear by this recipe when I’m too tired to wash dishes. Toss everything—chicken, rice, broth, onions, garlic—into one pot and let it simmer. The rice soaks up all that rich broth while the chicken gets tender, and honestly? The cleanup is just a quick rinse of one pot. That’s it.
- Deep Savory Crunch: Between us, bone-in chicken thighs are a game-changer here. They stay juicy but develop this incredible crispy skin, while the garlic and onions caramelize into something so rich, it’s like a hug in a bowl. The rice? Perfectly fluffy, not mushy, and every bite has that underlying depth from the broth.
- Lunchbox Champion: This recipe is my go-to for meal prep. The flavors only get better the next day, so I make a big batch on Sunday and pack it for lunches all week. My kids actually eat it cold—no complaints—and I can even reheat portions without drying it out. (Yes, even on a Tuesday night.)
- Budget Win: Chicken thighs and rice are affordable, but this recipe stretches them further than you’d think. A single batch feeds four, and leftovers reheat like a dream. I’ll be real: I’ve made this with store-brand broth and cheap rice, and it’s still solid. That’s the kind of dish that doesn’t break the bank but feels like a treat.
Step-by-step instructions for one-pot golden crust chicken and rice
Here's how to create restaurant-quality chicken and rice with a crispy golden crust—all in one pot.
🍳 Step 1: Sear the Chicken for Maximum Flavor
Heat a large, heavy-bottomed pot with a tight-fitting lid over medium-high heat. Add the 1.5 lb chicken thighs, bone-in, skin-side down, leaving space between pieces. Let them sear undisturbed for 5-6 minutes until the skin turns deep golden brown and crispy in spots.
This initial sear creates the signature golden crust while building deep flavor through the Maillard reaction. Watch carefully—the skin should release easily from the pot when ready. Flip the chicken pieces and sear the other side for another 4-5 minutes. Remove the chicken and set aside temporarily on a plate.
👨🍳 Step 2: Build the Aromatic Base
In the same pot, reduce heat to medium and add 2 tablespoons unsalted butter. When the butter foams, add the 1 whole yellow onion (diced) and cook for 3-4 minutes until softened and translucent. Add the 4 cloves garlic (minced) and cook for 30 seconds until fragrant.
Next, stir in the 1 tsp ground cumin, 1 tsp smoked paprika, 1.5 tsp kosher salt, and 0.5 tsp ground black pepper. Cook for 1 minute to toast the spices and release their aromas. This aromatic base forms the flavor foundation for your entire dish.
🥘 Step 3: Layer and Combine Ingredients
Add the 1 cup long-grain white rice to the pot and stir to coat it evenly with the spices and butter. Pour in the 2 cups chicken broth and add the 2 whole bay leaves and 0.25 cup fresh thyme (chopped). Return the chicken thighs to the pot, skin-side up.
Bring everything to a gentle boil, then immediately reduce heat to low. Cover tightly with the lid and let it simmer for 20 minutes without disturbing. The rice will begin absorbing the liquid, and the chicken will start cooking through. This initial simmering period is crucial for developing the rice texture.
⏰ Step 4: Create the Golden Crust
After 20 minutes, carefully remove the lid and increase heat to medium-high. Let the mixture simmer uncovered for 5-7 minutes until the top forms a crispy, golden-brown crust. You'll see the edges pull away slightly from the pot and develop a beautiful caramelized color.
Here's the thing—don't walk away during this step. The crust forms quickly and can burn just as fast. Once the top is golden and crispy, immediately reduce heat to low again and cover the pot. Let it steam for another 5 minutes to finish cooking the rice and chicken through.
🍽️ Step 5: Finish and Serve
Remove from heat and let the dish rest for 5 minutes covered. This resting period allows the rice to finish absorbing any remaining liquid and the chicken to redistribute its juices. Stir in the 1 tbsp lemon juice and 0.1 cup fresh parsley (chopped) just before serving.
Serve immediately, starting with the crispy golden crust on top. The contrast between the crispy top layer and tender rice below creates the perfect texture experience. Each bite should deliver juicy chicken, fluffy rice, and layers of aromatic spices—all in one perfect mouthful.
Pro Tips For Making A Chef'S Life Chicken And Rice
- CRISP THE SKIN FIRST: I used to skip browning the chicken thighs, thinking they’d get tender enough in the broth. Wrong. Pat them very dry, then sear them skin-side down in a cold pan over medium heat—no oil needed. The skin will render fat and crisp up in 8-10 minutes, adding flavor that just simmering alone can’t match.
- SWEAT THE ONIONS LOW: After burning three batches of onions, I finally figured out: low and slow. Dice them into ¼-inch pieces, then cook them in the same pan used for the chicken (with that rendered fat) over the lowest heat setting for 10 minutes. Stir occasionally—you want them soft and translucent, not golden. This builds flavor without burning.
- USE LESS BROTH THAN YOU THINK: The recipe might call for 4 cups of broth, but I’ve learned to start with 3. The rice will absorb most of it, but the chicken and onions release moisture too. If it looks dry after 15 minutes, add a splash—not the whole extra cup. You’re aiming for tender rice, not soup.
- REST THE CHICKEN UNDER FOIL: After pulling the chicken from the pan, tent it loosely with foil and let it sit for 5-10 minutes. This keeps the meat juicy while you finish the rice. I know, I know—you’re eager to serve. But cutting into it too soon turns those perfect thighs into dry, sad bites. (Yes, even if you’re impatient like me.)
Common mistakes when making great a chef's life chicken and rice
Overcooking the Rice
One of the biggest mistakes is letting the rice absorb too much liquid, resulting in a dry, gritty texture. I’ve seen this happen when people don’t account for the chicken’s moisture release. After the initial 20-minute simmer, check the rice consistency before creating the crust—it should be tender but still slightly firm to the touch. If it’s mushy, you’ve overcooked it. To fix this, reduce the broth by ¼ cup next time and adjust based on your pot’s size. 🌱
Skipping the Resting Period
Rushing to serve immediately after cooking disrupts the dish’s harmony. The 5-minute rest allows juices to redistribute, ensuring each bite is moist and flavorful. I’ve learned this the hard way—skipping it leaves you with dry chicken and uneven rice. Cover the pot and let it sit; trust the process. The crust will stay intact, and the flavors will meld beautifully. ✨
Uneven Heat Distribution
Using a pot that’s too small or has thin walls can lead to uneven cooking, where some areas burn while others stay undercooked. I recommend a 5-6 quart Dutch oven or heavy-bottomed pot like Le Creuset for even heat distribution. If your pot lacks a tight lid, use aluminum foil to seal any gaps. This ensures the crust forms evenly and the chicken cooks through without hot spots. 🔥
Ignoring the Butter Crust Timing
The golden crust is the star of this dish, but it’s finicky. Adding the butter too early causes it to melt into the rice instead of forming a crust. Wait until the final 5-7 minutes of cooking, then sprinkle the 2 tbsp cold butter cubes evenly over the top. Watch closely—it should sizzle and turn golden in just a few minutes. If it browns too quickly, reduce the heat immediately to prevent burning. 💫
Overcrowding the Pot
Packing too much chicken into the pot steams instead of sears, leading to pale, bland meat. Leave ½ inch of space between thighs for even browning. If your pot feels crowded, cook the chicken in batches—sear half, remove, then sear the rest. This ensures a crispy skin and juicy interior every time. Trust me, your taste buds will thank you. 🍗
Neglecting the Aromatics
Rushing the onion and garlic step robs the dish of its depth. Cook the onions until they’re truly soft and translucent (3-4 minutes), then toast the garlic until fragrant (30 seconds). This builds the flavor base that carries through the entire dish. Skipping this step means missing out on layers of savory complexity. Take your time here—it’s worth it. 🧄
Nutrition facts
Frequently asked questions
Can I use chicken breasts instead of thighs?
While you can substitute, thighs are ideal for this recipe because their higher fat content stays juicier during long cooking. If using breasts, pat them dry and add 1 extra tablespoon butter to the pot. Cook them for 3-4 minutes less per side since they cook faster than thighs. The golden crust will still form beautifully, but expect slightly leaner meat.
What if I don't have a Dutch oven?
Any heavy-bottomed pot with a tight lid will work—even a stainless steel or cast iron skillet. For best results, choose a pot that's at least 5 quarts to accommodate the chicken and rice without overcrowding. If your pot lacks a tight lid, cover it with aluminum foil to trap steam and create the golden crust. The key is even heat distribution to prevent hot spots.
How do I adjust this for two people?
Halve all ingredients: use ½ lb chicken thighs, ½ cup rice, and 1 cup broth. Keep the same proportions for spices and butter. Cook time remains identical since the pot size stays the same. This maintains the dish's rich flavors while reducing waste—perfect for a cozy meal for two.
Can I make this dish ahead of time?
This recipe reheats beautifully. Cook it completely, then refrigerate in an airtight container for up to 4 days. To reheat, cover the pot and warm over low heat for 10-15 minutes, adding 1-2 tablespoons water if needed. The crust may not be as crispy, but the flavors will be even more developed. Freeze for up to 3 months—thaw overnight in the fridge before reheating.
What wine pairs best with this dish?
A crisp Sauvignon Blanc or Pinot Grigio complements the dish's aromatic spices and golden crust beautifully. For red wine lovers, try a light Pinot Noir—its acidity cuts through the richness. If you prefer cocktails, a gin and tonic with cucumber or rosemary-infused vodka lemonade adds refreshing contrast. The key is balancing the dish's savory notes with bright, acidic flavors.