
Desserts
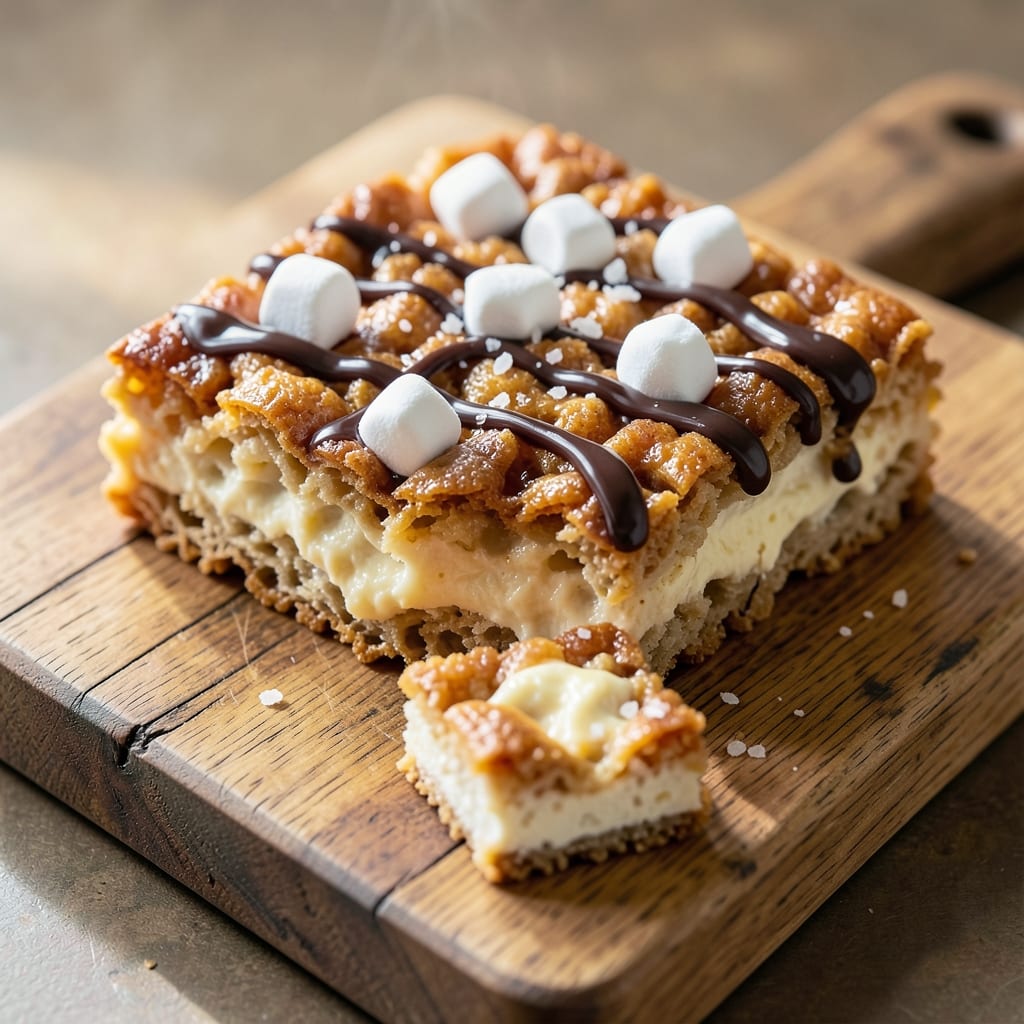
This amazing Rice Krispie treat recipe delivers the perfect balance of crispy edges and gooey marshmallow centers—no more dry, crumbly squares or overly sticky messes. 🔥 The secret lies in precise timing and a few pro techniques that transform this childhood classic into something restaurant-worthy. I’ve been perfecting this version for years, and it’s now my go-to for parties, gifts, or just satisfying that sweet tooth craving.
What makes these treats truly special is the texture contrast: shatteringly crispy edges from the buttered cereal hold up to the creamiest, melt-in-your-mouth marshmallow filling. The recipe uses just 6 simple ingredients (plus optional mix-ins), and the whole process takes less than 20 minutes of active time—plus 15 minutes of cooling. No fancy equipment needed, just a sturdy mixing bowl and a little patience for the perfect set.
Once you cut into these golden squares, you’ll understand why they’re worth the effort. The marshmallow stays gloriously gooey while the edges stay crisp enough to hold their shape, even when dipped in chocolate or rolled in nuts. And the best part? These treats taste even better the next day, making them perfect for meal prep or gifting.
Ready to level up your Rice Krispie game? Whether you stick with the classic version or get creative with swirls of peanut butter, drizzles of caramel, or even a vegan twist, this recipe delivers every time. Let’s get baking!
Ingredients for amazing rice krispie treat
Six core ingredients plus optional mix-ins—transforming childhood treats into restaurant-worthy magic.
| Ingredient | Amount | Notes |
|---|---|---|
| Mini Marshmallows 🍫 | 10 oz | Classic or jumbo size preferred |
| Butter 🧈 | ½ cup | Unsalted, melted and cooled slightly |
| Rice Krispies Cereal 🍚 | 6 cups | Original or lightly buttered flavor |
| Vanilla Extract 🌿 | 1 tsp | Pure, high-quality vanilla |
| Salt 🧂 | ¼ tsp | Fine sea salt for balance |
| Unsweetened Almond Milk 🥛 | 2 tbsp | For extra creaminess (optional) |
| Dark Chocolate Chips 🍫 | ½ cup | For optional drizzle (70% cocoa) |
| Chopped Nuts 🥜 | ½ cup | Pecans or almonds for topping (optional) |
| Peanut Butter 🥜 | ¼ cup | Creamy, for swirls (optional) |
| Caramel Sauce 🍯 | ¼ cup | Store-bought or homemade (optional) |
| Cooking Spray 💦 | 1 tbsp | For greasing pan (non-stick) |
The butter is non-negotiable here—unsalted gives you control over the flavor. Melt it gently (microwave 40 seconds, stir, repeat) and let it cool just enough to handle. Kirkland Signature or Land O'Lakes are my go-tos, but any good-quality unsalted works. The marshmallows? Jumbo size creates those glorious melty pockets—classic mini size works too, but you'll get more squares. Pro tip: if your kitchen gets humid, chill the marshmallows 10 minutes before melting to prevent clumping. And yes, you can use vegan marshmallows for a plant-based version!
No vanilla extract? Vanilla bean paste or even a pinch of vanilla sugar works in a pinch. Short on almond milk? Heavy cream or coconut milk adds richness. The optional mix-ins are where creativity shines—peanut butter swirls (use creamy, not crunchy), caramel drizzlecrushed pretzelsEnjoy Life brand
These treats taste better the next day, so make them ahead—they keep for 5 daysup to 3 months. The secret to cutting perfect squares? Chill them 2 hours first. Use a sharp knife and dip it in hot water between cuts for clean edges. And if you're gifting these, cellophane bags with ribbon make them look extra special. Trust me, they'll be gone before you know it!
Why You'll Love This Recipe
- No-Fuss Magic: I swear, this takes less time than waiting for the microwave to ding—just melt butter, fold in cereal and marshmallows, and boom. The kind of recipe that makes you feel like a baking genius without any actual effort.
- Crunchy-Creamy Bliss: That perfect balance? Crispy Rice Krispies with gooey mini marshmallows, all tied together by warm vanilla butter. Honestly, the first bite makes me question why I ever bought store-bought versions.
- Party in a Box: Pack them in squares for potlucks, break into chunks for lunchboxes, or stash in the freezer for last-minute dessert emergencies. They’re my go-to for birthdays, game days, or just because I’m feeling generous.
- Budget Win: A single batch costs pennies but fills my kitchen with the smell of buttery sweetness. Plus, leftovers? They last for days—if they even make it that long, because they disappear faster than I can say “second helping.”
Step-by-step instructions for marshmallow-melty squares with crunchy edges
Here's how to make these next-level treats that are gooey inside, crispy outside, and packed with flavor!
🔥 Step 1: Melt Butter and Marshmallows to Perfect Gooeyness
Line a 9x13-inch baking dish with parchment paper, leaving an overhang for easy removal. Lightly spray the bottom with the 1 tablespoon cooking spray to prevent sticking. In a large microwave-safe bowl, combine the 10 oz mini marshmallows and ½ cup butter.
Microwave on high for 2 minutes, then stir vigorously with a wooden spoon. Return to the microwave and cook in 30-second intervals, stirring after each, until the marshmallows are completely melted and the mixture is smooth and glossy. You're aiming for a thick, ribbon-like consistency—it should coat the back of a spoon but still hold its shape when drizzled. This is your secret to that perfect marshmallow-melty texture!
🍳 Step 2: Add Flavor and Mix in Cereal
Remove the melted marshmallow-butter mixture from the microwave and let it cool for 1 minute—it'll thicken slightly as it sits. Stir in the 1 teaspoon vanilla extract, ¼ teaspoon salt, and 2 tablespoons unsweetened almond milk until fully combined. The almond milk adds a subtle creaminess that makes these treats next-level.
Now for the fun part! Quickly fold in the 6 cups Rice Krispies cereal using a silicone spatula. Work fast—the mixture will start to set up as it cools. You want the cereal to be evenly distributed, with no dry spots. If the mixture looks too thick, microwave it for 10 seconds to loosen it up again. The goal is a crumbly, dough-like consistency that holds together when pressed.
🥘 Step 3: Press and Shape for Perfect Texture
Transfer the mixture to your prepared baking dish and press it down firmly and evenly using a greased 8x8-inch pan or the bottom of a drinking glass. Press down with steady pressure until the surface is smooth and the edges are compacted. This step is crucial—it creates those beautiful crispy edges while keeping the inside gooey. Don't worry if it looks too thick; it'll soften as it cools.
Once pressed, smooth the top with the back of a spoon for an even finish. Here's the thing—if you press too lightly, you'll end up with crumbly treats. If you press too hard, you might compact it too much. Aim for firm but not dense. Let it sit at room temperature for 10 minutes to firm up slightly before cutting.
🍽️ Step 4: Add Optional Swirls and Toppings
After the 10-minute rest, use a butter knife to create swirls in the top of the treats. Drop spoonfuls of the ¼ cup peanut butter and ¼ cup caramel sauce onto the surface, then gently swirl them together with the knife. For extra decadence, sprinkle the ½ cup chopped nuts evenly over the top. The peanut butter adds protein-rich richness, while the caramel brings sweet, buttery depth.
If you're using the ½ cup dark chocolate chips, melt them in 10-second intervals in the microwave, then drizzle over the top in zigzags. Let the chocolate set slightly at room temperature for 5 minutes before cutting. This gives you that professional bakery look with minimal effort!
⏰ Step 5: Cut and Serve with Confidence
Once all toppings are set, use the parchment paper overhang to lift the treats out of the pan. Cut into 24 squares (about 2x2 inches each) using a sharp knife dipped in hot water and wiped dry between cuts. This prevents the treats from smudging. For extra crispy edges, press down firmly on each square as you cut—it'll give you that satisfying crunch with every bite.
Serve immediately while still warm for the ultimate marshmallow-melty experience, or let them cool completely for crispy, handleable treats. Store leftovers in an airtight container at room temperature for up to 5 days. These aren't your average Rice Krispie treats—they're a showstopping dessert that'll have everyone asking for seconds!
Pro Tips For Making Amazing Rice Krispie Treat
- STOP WHEN IT LOOKS WET: Mixing the marshmallow-butter combo until it’s just shiny—not sticky—makes all the difference. I used to overmix, thinking more was better, but you’re fighting the cereal’s ability to clump properly. Aim for a glossy, thick ribbon when you lift the spoon—like warm caramel, not syrup.
- USE SALTED BUTTER (YES, REALLY): Skip the extra salt if you’re using salted butter—it’s the sneaky ingredient that throws off the balance. I learned this the hard way after a batch tasted bland, then realized I’d double-salted. Trust the butter’s seasoning; you’re adding salt for depth, not rescue.
- PRESS FAST, RELEASE SLOW: Don’t linger with the spatula—press the mixture into the pan in one swift motion, then let it settle for 30 seconds before tapping the edges. I used to jiggle the pan to check for air pockets, but that collapses the structure. Patience here = cleaner cuts later.
- SWAP MINIS FOR REGULARS (IF YOU DARE): Regular marshmallows melt slower, giving you more time to work with the mix without it setting too fast. Sounds counterintuitive, but I’ve made this upgrade when I’m short on minis—just toast them for 2 minutes less to avoid burning. The texture’s slightly chewier, too.
Regional styles of these flavors
Southern Comfort Twist
In the South, Rice Krispie treats get a warm, buttery upgrade with a touch of pecan praline or peanut butter swirls. I like adding ½ cup chopped pecans to the marshmallow-butter mix before folding in the cereal for extra crunch. For a true Southern touch, drizzle with homemade pecan praline sauce (melt ½ cup butter with 1 cup brown sugar and ¼ cup pecans, then cool slightly). These treats become a crowd-pleaser at potlucks or holiday gatherings. 🥜
Midwest Classic
The Midwest keeps it simple and nostalgic with extra marshmallow pockets—using jumbo marshmallows instead of mini creates those iconic gooey surprises. I’ve seen local bakeries add crushed Oreos (about ½ cup) to the cereal mix for a cookie-crumble texture. For a festive twist, sprinkle crushed candy canes on top during the holidays. The result? A treat that’s crispy on the outside but packed with melty surprises inside. 🎄
Pacific Northwest Vegan
Out West, vegan adaptations are all the rage. Swap vegan marshmallows (like Dandies brand) and vegan butter (like Miyoko’s) for a plant-based version. Add 2 tablespoons maple syrup to the marshmallow mix for extra sweetness and ¼ cup sunflower seeds for crunch. Drizzle with melted vegan chocolate (like Enjoy Life brand) for a decadent finish. These treats are just as satisfying and perfect for vegan gatherings. 🌱
New England Maple Glaze
New Englanders love their maple syrup, so why not incorporate it into Rice Krispie treats? After pressing the cereal mix, brush the top with a maple glaze made by mixing ½ cup powdered sugar with 2 tablespoons maple syrup and 1 teaspoon vanilla. Let it set before cutting, and the result is a sticky, sweet treat with a crispy edge. Pair it with walnuts for a nutty contrast. 🍁
Texas BBQ Twist
For a Texas-sized treat, add a savory-sweet kick with crushed tortilla chips (about ½ cup) mixed into the cereal. Drizzle with BBQ caramel sauce (mix ½ cup caramel sauce with 1 teaspoon smoked paprika) and top with crushed peanuts. The smoky-sweet combo is unexpected but delicious—perfect for BBQ parties or tailgates. 🌶️
Global Fusion
Get creative with global flavors! Try a matcha version by adding 1 teaspoon matcha powder to the marshmallow mix for an earthy twist. For a Mexican-inspired treat, fold in ½ cup crushed churro bits and drizzle with chocolate-habanero sauce. Even a British-style version with crushed digestive biscuits and a white chocolate drizzle works surprisingly well. 🌎
Nutrition facts
Frequently asked questions
Why do my Rice Krispie treats turn out crumbly instead of crispy?
The key is pressing the cereal mix firmly into the pan—too light pressure creates crumbly treats. Use a greased 8x8-inch pan or drinking glass to press down evenly. Also, make sure your marshmallow-butter mixture is fully melted but not overcooked (it should be thick but pourable). Let it cool 1 minute before adding cereal, and work quickly when folding!
Can I make these treats without a microwave?
Use a double boiler—place a heatproof bowl over a pot of simmering water. Melt the ½ cup butter and 10 oz marshmallows together, stirring constantly until smooth. This method gives you more control over the temperature, preventing overcooking. Just monitor closely to avoid burning!
How do I store these treats so they stay fresh longer?
Store in an airtight container at room temperature for 5 days. For longer storage, wrap individually in parchment paper and freeze for up to 3 months. The parchment prevents moisture loss, and freezing preserves that perfect marshmallow-melty texture. Let them sit at room temperature for 10 minutes before serving after freezing.
What’s the best way to cut clean, crispy-edged squares?
Chill the treats for 2 hours first—they’ll hold their shape better. Dip your knife in hot water, wipe dry between cuts, and press firmly down as you slice. This creates clean edges and prevents smudging. For extra crispiness, press each square gently after cutting to compact the edges.
Can I make these treats ahead for a party?
Yes! These taste even better the next day. Assemble them 1 day ahead, then store in an airtight container. Reheat in the microwave for 10-15 seconds before serving to restore that gooey texture. For gifting, wrap squares in cellophane bags with ribbon—they’ll stay fresh for 3 days at room temperature.