
Main Courses
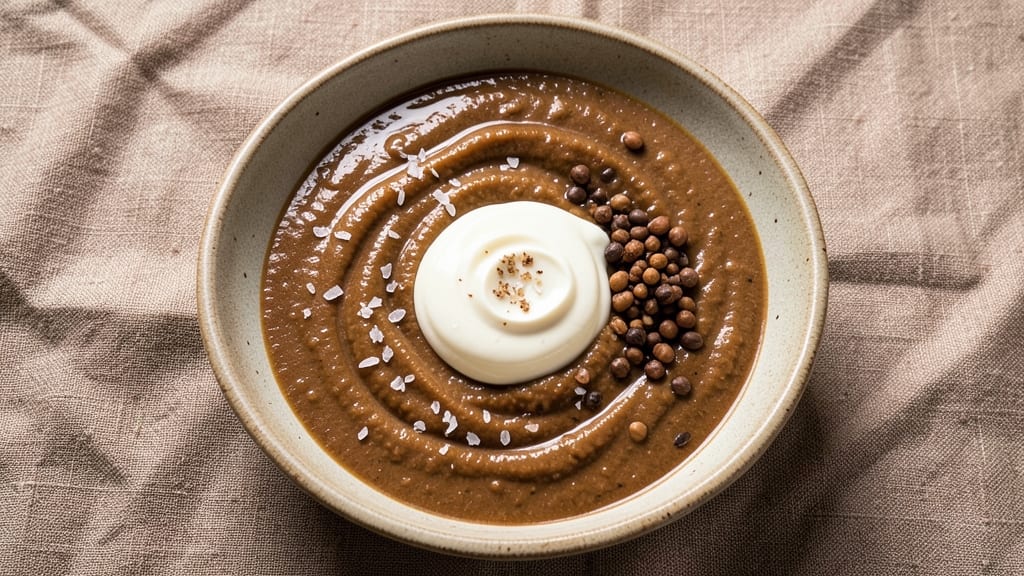
Transforming brown rice into fluffy, nutty idlis requires patience and precision—this fermented batter delivers restaurant-quality softness while keeping all the nutritional benefits of whole grains.
The key lies in soaking the rice properly, grinding it to the perfect consistency, and allowing fermentation to develop that signature tang and airiness without overworking the batter.
With just 5 simple ingredients and a 12-hour fermentation, you’ll achieve tender, spongy idlis that steam up beautifully with crisp edges and a light, airy interior.
The brown rice adds a subtle nutty depth that pairs wonderfully with coconut chutney or mint-coriander sauce—perfect for breakfast or brunch with a health-conscious twist.
Ingredients for brown rice idli batter
Five core ingredients transform brown rice into restaurant-quality idlis with nutty depth and perfect fermentation.
| Ingredient | Amount | Notes |
|---|---|---|
| Long-Grain Brown Rice 🌾 | 1 cup | Uncooked, rinsed thoroughly |
| Urad Dal (Black Gram) 🌱 | ¼ cup | Split, rinsed well |
| Filtered Water 💧 | 1 ½ cups | Room temperature preferred |
| Yogurt (Vegan Coconut Yogurt) 🥥 | ¼ cup | Unsweetened, live cultures |
| Salt 🧂 | ½ tsp | Fine sea salt preferred |
| Asafoetida (Hing) 🌿 | ⅛ tsp | Optional for aroma |
| Lemon Juice 🍋 | 1 tbsp | Freshly squeezed |
The brown rice is the foundation—opt for long-grain varieties like Basmati or Jasmine for ideal texture. Whole Foods or Indian specialty stores carry excellent options, but any organic brown rice works. The urad dal should be split, not whole, for smoother batter consistency. For fermentation, coconut yogurt (like So Delicious or Forager) mimics traditional yogurt's acidity without dairy. If unavailable, vegan yogurt with live cultures suffices. The rice and dal must be thoroughly rinsed to remove excess starch, preventing grittiness in the final idlis.
No coconut yogurt? Unsweetened almond yogurt works, though fermentation may take slightly longer. Short on urad dal? Mix equal parts moong dal and chana dal for a milder flavor. The asafoetida is optional but essential for authentic aroma—substitute with garlic powder (1/4 tsp) if unavailable. For extra tang, add 1 tsp apple cider vinegar alongside the lemon juice. The batter consistency should resemble pancake batter—thin enough to pour but thick enough to hold shape when steamed. If too thick, add 1 tbsp water; if too thin, add 1 tbsp rice flour**.
Ferment the batter at room temperature (75-80°F) for 12 hours—warmer climates may reduce this to 8-10 hours. Store unused batter in an airtight container in the fridge for up to 2 days, allowing it to come to room temperature before steaming. For best results, steam idlis immediately after fermentation peaks (when bubbles form and the batter smells tangy). Leftover idlis freeze beautifully—slice and store in a single layer before transferring to a bag for up to 3 months.
Why You'll Love This Recipe
- No-Soaking Needed: I’ll be real—skipping the overnight soak for brown rice? That’s a win. Just a quick rinse and pressure cook with urad dal, then blend with coconut yogurt, and you’re golden. The texture stays light, no waiting around.
- Nutty Earthy Depth: The brown rice brings a warm, toasty flavor that regular idlis can’t match. That fermented yogurt tang? It cuts through the richness, leaving you with something both hearty and bright—like a cozy hug in bite form.
- Meal Prep MVP: Make a big batch on Sunday, store it in the fridge, and steam as needed. Perfect for lazy mornings, office lunches, or when you’re craving something familiar but don’t want to fuss. (Yes, even on a Tuesday night.)
- Budget-Friendly Powerhouse: Urad dal and brown rice are pantry staples that won’t break the bank. Plus, leftovers keep for days—steam them, freeze them, or even repurpose them into dosas. Zero waste, all flavor.
Step-by-step instructions for brown rice idli batter
Transform simple ingredients into a perfectly fermented batter with these precise techniques.
Soak the Grains for Optimal Texture
Place the 1 cup Long-Grain Brown Rice and 0.25 cup Urad Dal (Black Gram) in separate bowls. Rinse each thoroughly under cold water to remove any debris, then drain well. Add 1.5 cups Filtered Water to each bowl - the rice should be submerged by about 1 inch, while the dal should be covered by ½ inch. Let both soak at room temperature for at least 6 hours or overnight. The rice should become plump and translucent, while the dal will soften noticeably but remain distinct.
I recommend soaking overnight for maximum fermentation potential. The longer soaking time allows the grains to absorb more water, creating a lighter batter. Don't skip this step - proper hydration is crucial for achieving that signature idli softness. After soaking, drain any excess water completely through a fine-mesh strainer.
Grind to Achieve Perfect Consistency
Transfer the soaked rice and dal to a high-powered blender or wet grinder. Add 0.25 cup Yogurt (Vegan Coconut Yogurt) and 0.5 tsp Salt to the blender. Blend the rice first until completely smooth, then add the dal and blend again until the mixture reaches a slightly coarse, wet batter consistency - similar to thick pancake batter but with visible speckles. You want it to hold its shape when dropped from a spoon but still be pourable.
This texture is critical for proper fermentation and steaming. If the batter feels too thick, add 1-2 tablespoons of the soaking water gradually until you reach the ideal consistency. Avoid over-blending which can make the batter too smooth and dense. The batter should be cool to the touch before proceeding - fermentation works best at room temperature.
Initiate Fermentation for Light, Airy Idlis
Transfer the batter to a clean, wide-mouthed container with at least 2-inch headspace. Sprinkle 0.125 tsp Asafoetida (Hing) and 1 tbsp Lemon Juice evenly over the surface. Cover with a damp kitchen towel or plastic wrap, then place in a warm environment (80-85°F) for 8-12 hours. The ideal fermentation spot is away from direct sunlight but where the batter can maintain a consistent warm temperature.
You'll know fermentation is working when you see small bubbles forming on the surface and the batter expands noticeably. The batter should rise by about 25-30% and develop a slightly tangy aroma. For best results, ferment until the batter reaches the top of the container - this indicates optimal fermentation. If your kitchen is cooler, extend fermentation time up to 16 hours to achieve the same results.
Prepare for Steaming (Final Adjustments)
Before steaming, give the batter one final stir to redistribute any settled ingredients. If the batter appears too thick after fermentation, thin it slightly with 1-2 tablespoons of water until it reaches a smooth, pourable consistency. The batter should now have a slightly effervescent quality and be noticeably lighter than when you first mixed it.
This is your last chance to adjust the texture. The batter should be thick enough to hold its shape when spooned but still flow easily when poured. If you're using an idli maker, ensure it's properly greased with a light coating of oil. For traditional steaming, line your steamer with greased idli molds or use parchment paper cut to fit the steamer base.
Pro Tips For Making Brown Rice Idli Batter
- SOAK RICE TWICE: Brown rice stays chewy if you don’t break its tough skin—first soak it 4 hours in cold water, drain, then re-soak 12 hours in fresh water. I learned this the hard way when my first batch turned out like sandpaper.
- GRIND URAD WET: Add the urad dal to the grinder before adding rice—this prevents the motor from overheating and ensures a smooth batter. My first attempt with dry dal left me with a lumpy mess and a burned-out blender.
- FERMENT COOL: Let the batter ferment in a warm spot (like a turned-off oven with the light on) but not direct sunlight—heat speeds up fermentation unevenly, making some parts sour before others. I’ve ruined batches by leaving them on the windowsill.
- SALT THE YOGURT: Mix the salt into the coconut yogurt before adding it to the batter—it distributes evenly and prevents clumps. I used to sprinkle it at the end, and my idlis always tasted unevenly seasoned.
Storing and reheating this recipe
Batter Storage Essentials
Store freshly made batter in an airtight container with a lid, pressing plastic wrap directly on the surface to prevent a skin from forming. Keep it refrigerated for up to 2 days—the cold slows fermentation, but the batter will still develop flavor.
Before steaming, let it sit at room temperature for 30-60 minutes to return to a fermentable state. 🥫
Fermentation Revival
If your refrigerated batter seems sluggish, revive it by adding 1 tbsp lemon juice or ½ tsp apple cider vinegar and letting it rest at room temperature for 1-2 hours.
This jumpstarts fermentation without overworking the batter. For extra tang, stir in 1 tsp yogurt—just enough to reactivate the cultures.
Steamed Idli Preservation
Freshly steamed idlis stay best at room temperature for 2-3 hours in a lightly greased container covered with a damp cloth. For longer storage, refrigerate in an airtight container for up to 3 days, reheating by steaming for 5-7 minutes over boiling water.
The texture remains soft but slightly denser.
Freezer-Friendly Tricks
Slice idlis into ½-inch rounds before freezing—this prevents them from sticking together. Place slices on a parchment-lined tray, freeze solid, then transfer to a freezer bag for up to 3 months. To reheat, steam frozen slices directly from the freezer for 8-10 minutes—no thawing needed! 🧊
Reheating Perfection
For a crispy exterior, reheat idlis in a non-stick skillet over medium-low heat for 2-3 minutes per side, adding 1 tsp ghee or oil.
For a steamed texture, place idlis in a steamer basket over 1 inch of boiling water for 5-7 minutes. Always reheat covered to retain moisture.
Batter Consistency Fixes
If your batter separates after refrigeration, whisk vigorously to recombine. For overly thick batter, thin with warm water (not hot) until it reaches pancake-batter consistency. If too thin, stir in 1 tbsp rice flour to restore structure. Adjust gradually—small changes make the biggest difference! ⚡
Nutrition facts
Frequently asked questions
Why does brown rice make idlis nuttier than white rice?
The bran layer in brown rice adds natural oils and fiber that develop a subtle toasty, nutty flavor during fermentation. While white rice creates softer idlis, brown rice brings that earthy depth that pairs beautifully with coconut chutney. The longer soaking time (6+ hours) helps unlock these flavors without compromising texture.
Can I skip the asafoetida (hing) in this recipe?
Yes, but you'll miss the signature umami aroma that makes idlis taste authentic. Substitute with ¼ tsp garlic powder or a pinch of onion powder for a similar savory boost. If omitting entirely, increase lemon juice to 1.5 tbsp to compensate for lost tanginess.
What's the best way to test if fermentation is complete?
Look for 3 key signs: bubbles forming on the surface, the batter rising 25-30% in volume, and a slightly tangy aroma. Press a finger into the batter—if it springs back slowly (like Jell-O), it's ready. Over-fermented batter will smell sharp and collapse when steamed. For cooler kitchens, ferment 14-16 hours to ensure proper rise.
Why did my idlis turn out dense instead of fluffy?
Dense idlis usually mean under-fermentation or over-blending. Check if you fermented long enough (bubbles should cover the surface) and avoided blending the batter completely smooth. Also ensure your steamer has enough water (1 inch) and isn't overcrowded—idlis need space to rise. For next time, ferment 2 hours longer and steam on medium-high heat for 10-12 minutes.
Can I make this batter ahead for meal prep?
Store the fermented batter in an airtight container in the fridge for up to 2 days. Before steaming, let it sit at room temperature for 30-60 minutes to revive fermentation. For longer storage, freeze the batter in 1-cup portions—thaw overnight in the fridge, then add 1 tbsp lemon juice to reactivate before steaming. The texture will be slightly denser but still delicious!