
Main Courses
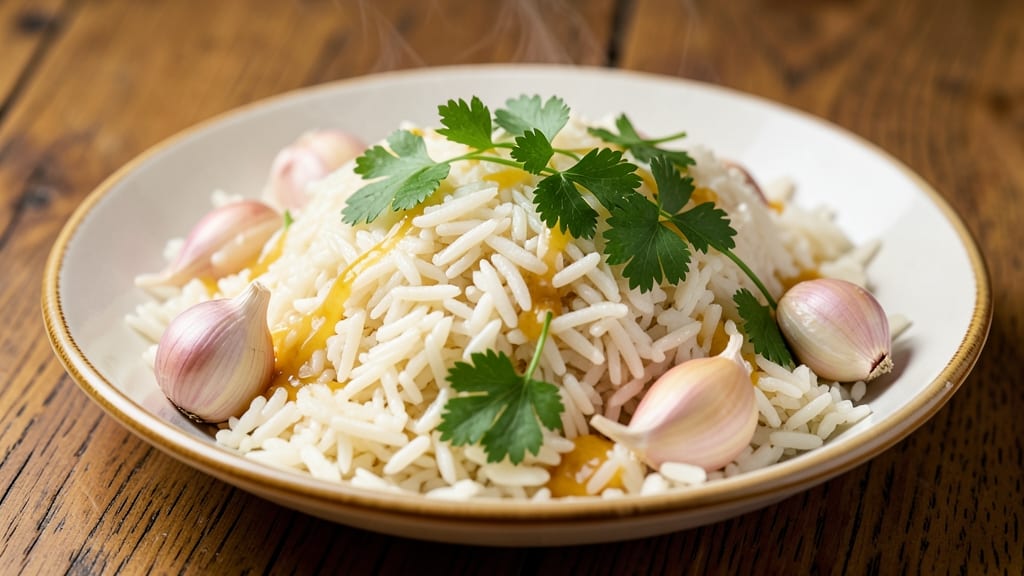
This one-pot bulk rice recipe transforms simple grains into perfectly fluffy, restaurant-quality rice with minimal effort. The secret lies in precise water-to-rice ratios and gentle heat, ensuring every grain cooks evenly without drying out—ideal for meal prep, potlucks, or catering.
Whether you're feeding a crowd or stocking your fridge for the week, this method delivers consistent results every time.
By using a heavy-bottomed pot and maintaining a steady simmer, you'll achieve fluffy, separate grains that stay moist for days. The process is straightforward: measure, boil, reduce, and rest. No more mushy rice or uneven cooking—just perfectly cooked grains ready to pair with your favorite proteins, vegetables, or sauces.
This is the foolproof technique professional chefs rely on for large batches.
Ingredients for bulk rice
Twelve ingredients for twelve perfect servings—this is restaurant-quality rice made easy.
| Ingredient | Amount | Notes |
|---|---|---|
| Long-Grain White Rice 🍚 | 3 cups | Uncooked, rinsed thoroughly |
| Water 💧 | 7 cups | Room temperature preferred |
| Butter 🧈 | 4 tbsp | Unsalted, for flavor and texture |
| Salt 🧂 | 1 ½ tsp | Diamond Crystal preferred |
| Garlic Cloves 🧄 | 4 cloves | Minced, for aromatic depth |
| Fresh Parsley 🌿 | ¼ cup | Chopped, for freshness |
| Heavy Cream 🥛 | ½ cup | Full-fat for richness (optional) |
| Chicken Broth 🍲 | 1 cup | Low-sodium for flavor balance |
| Olive Oil 🫒 | 2 tbsp | Extra-virgin, for sautéing |
| Bay Leaf 🌿 | 1 whole | For subtle herbal notes |
| Ground Black Pepper 🌶️ | ½ tsp | Freshly cracked for heat |
| Lemon Zest 🍋 | 1 tsp | Brightens flavor profile |
| Lemon Juice 🍋 | 1 tbsp | Freshly squeezed for acidity |
The rice is the star, so grab long-grain white rice—jasmine or basmati work too, but Calrose is ideal for bulk cooking. Costco or WinCo sell it in bulk for better prices, but any grocery store carries it. Rinse the rice thoroughly before cooking to remove excess starch—this prevents mushiness. For the butter, Land O'Lakes unsalted is my go-to, but any good-quality unsalted works. The garlic should be fresh—store-bought jars lose flavor fast. If you're prepping for a crowd, Costco's bulk garlic is a game-changer.
No heavy cream? Coconut milk or extra chicken broth adds richness without overpowering. Fresh parsley wilting? Dried parsley at one-third the amount works in a pinch. The chicken broth can be swapped for vegetable broth if needed—just adjust salt to taste. For extra flavor, add a pinch of smoked paprika or a splash of soy sauce. If you're short on lemon, lime zest and juice work beautifully too. The bay leaf is optional but adds a subtle herbal note that pairs perfectly with the garlic and parsley.
This rice keeps like a dream—5 days in the fridge or 3 months in the freezer. Portion into airtight containers for easy grab-and-go meals. For reheating, steam with a splash of water to restore moisture. The lemon zest and parsley can be added fresh after reheating for a bright finish. If you've made extra, freeze in single-serving portions for quick lunches. The butter and cream make this taste like a gourmet dish, so don't skip them if you can help it.
Why You'll Love This Recipe
- Five-Ingredient Magic: I swear by this—just rice, water, butter, salt, and garlic. That’s it. No fancy prep, no measuring cups that never seem to fit. Honestly, I’ve made this while chatting on the phone, and it still turns out fluffy and golden.
- Garlic Butter Bliss: Between us, that melted butter and minced garlic while the rice cooks? Pure satisfaction. The aroma alone makes my kitchen feel like a little restaurant, and the finished rice? Buttery, aromatic, and just salty enough to make every bite worth it.
- Meal Prep MVP: This is my go-to for the week. Cook a big batch on Sunday, and suddenly you’ve got lunch or dinner covered for days—whether it’s fried rice, bowls, or tacos. I’ll be real: my kids grab it straight from the fridge, no complaints.
- Budget-Friendly Staple: Long-grain rice and butter? Cheap, reliable, and always in stock. I make this when grocery money’s tight, and it still feels like a treat. Plus, leftovers keep for ages—no sad, dried-out rice here.
Step-by-step instructions for one-pot meal prep with fluffy grains
Here's how to transform simple ingredients into restaurant-quality rice that stays fluffy for days.
Sauté Aromatics in Olive Oil
Heat the 2 tablespoons olive oil in a large, heavy-bottomed pot over medium heat. Add the 4 cloves minced garlic and the 1 whole bay leaf, stirring constantly for 30 seconds until the garlic becomes fragrant but doesn't brown. This quick cooking preserves the garlic's sweetness while building flavor.
Watch the garlic carefully—it burns in seconds. You'll know it's ready when the aroma fills your kitchen. Immediately add the 4 tablespoons butter, letting it melt completely and coat the garlic. This butter infusion creates a rich base for your rice, preventing dryness during the long cooking process.
Toast the Rice for Nuttiness
Add the 3 cups long-grain white rice to the pot and stir to coat evenly with the butter and oil mixture. Toast the rice for 2-3 minutes, stirring frequently, until it becomes translucent at the edges and releases a nutty aroma. This step, called "toasting," develops deeper flavor and prevents the rice from becoming mushy.
I press the rice against the sides of the pot with a wooden spoon during this step to ensure even contact with the hot oil. You'll see the grains become slightly opaque—this is your visual cue that the rice is properly toasted. Don't rush this step; proper toasting is what separates good rice from exceptional rice.
Add Liquid and Seasonings
Pour in the 7 cups water, followed by the 1½ teaspoons salt, ½ teaspoon ground black pepper, and 1 teaspoon lemon zest. Stir once to distribute the seasonings evenly. Bring the mixture to a boil over high heat, then immediately reduce to a gentle simmer. This initial boil ensures all the rice absorbs the seasoned liquid.
Here's where the magic happens: cover the pot tightly with a lid and simmer for 15 minutes without disturbing it. The rice will absorb the liquid and begin steaming. I like to use a tight-fitting lid to trap steam—this creates the perfect environment for fluffy, separate grains instead of sticky clumps.
Incorporate Flavor Boosters
After 15 minutes, remove the lid and stir in the 1 cup chicken broth and ½ cup heavy cream. The broth adds depth while the cream creates a luxurious texture. Return the pot to a simmer for another 10 minutes, then stir in the 1 tablespoon lemon juice and ¼ cup chopped fresh parsley. The acidity from the lemon brightens all the flavors while the parsley adds freshness.
This is the moment that matters: taste the rice and adjust seasoning if needed. I usually add a pinch more salt here since the lemon juice can slightly dilute the flavor. The rice should be tender but still have a slight bite—this ensures it continues cooking perfectly when reheated.
Rest and Serve
Once the rice reaches the perfect texture, remove it from heat and let it rest, covered, for 10 minutes. This resting period allows the steam to redistribute throughout the grains, ensuring each bite is perfectly fluffy. I like to place the pot on a warm burner during this time to maintain temperature.
Fluff the rice gently with a fork before serving. The one-pot method keeps everything warm and cohesive, making this perfect for meal prep. Store leftovers in airtight containers in the refrigerator for up to 5 days, or freeze for 3 months. When reheating, add a splash of water or broth to maintain moisture.
Pro Tips For Making Bulk Rice
- BOIL WATER FIRST: Fill your pot with water, bring it to a rolling boil, then add the rice—this guarantees even cooking from the start. I used to toss in cold rice and water, and it always ended up gummy in the middle; boiling the water first cuts that guesswork.
- SALT THE WATER LIGHTLY: Use just ½ teaspoon of salt per 2 cups of water—too much makes the rice taste harsh, and you’ll likely add more butter later anyway. I learned this the hard way after over-salting a batch and having to rinse the rice before serving.
- TOAST THE GARLIC LAST: Cook the butter until it’s foamy but not browned, then add the minced garlic only in the final 2 minutes of cooking—this keeps it fragrant without burning. I was skeptical until I tried it; now I never skip this step.
- USE A LID AFTER 10 MINUTES: Once the rice has absorbed most of the water (around 10 minutes), cover the pot with a tight lid and reduce heat to low—this traps steam and finishes cooking without drying it out. I used to walk away too early, and the rice always turned out dry.
Troubleshooting perfect results
Uneven Cooking Fix
If your rice turns out unevenly cooked—some grains mushy while others stay firm—it’s likely due to improper heat distribution. Always use a heavy-bottomed pot (like Calphalon or All-Clad) to prevent hot spots. Stir the rice once after adding liquid, then never disturb it again until the final 10 minutes.
If you notice uneven cooking, reduce heat to low during the simmer and add ½ cup extra water if needed. 🌡️
Mushy Rice Solution
Mushy rice happens when too much water is used or the rice isn’t toasted properly. For bulk cooking, stick to a 1:2.33 ratio (3 cups rice to 7 cups water).
If you accidentally add too much liquid, drain excess through a fine-mesh strainer after cooking, then fluff with a fork to separate grains. For extra insurance, use jasmine or basmati rice—they hold up better to bulk cooking than standard long-grain varieties.
Dry or Undercooked Grains
Dry rice usually means the heat was too high or the lid wasn’t sealed tightly. After adding liquid, bring to a rolling boil for 30 seconds, then reduce to the lowest simmer possible.
If grains are still firm, add 2-3 tablespoons hot water, cover, and steam for 5-10 more minutes. For future batches, use a pot with a tight-fitting lid and avoid peeking—steam escape is the enemy of fluffy rice! 💫
Sticky or Clumpy Texture
Sticky rice often results from stirring too much or not rinsing the rice first. Before cooking, rinse 3 cups rice under cold water until the water runs clear (this removes excess starch). After cooking, let the rice rest covered for 10 minutes—this allows steam to redistribute.
If clumps form, gently fluff with a fork and add 1 teaspoon lemon juice to cut through stickiness. For bulk batches, use a wooden rice paddle to separate grains after cooking.
Burnt Garlic or Butter
Burnt aromatics ruin the flavor profile. Sauté garlic in olive oil over medium heat for no more than 30 seconds—it should smell fragrant but not brown. If butter burns, reduce heat to low and stir constantly.
For extra protection, add garlic after the rice has toasted slightly. A quick fix? Add ½ teaspoon smoked paprika to mask any burnt notes, but prevention is always better!
Freezer Burn Prevention
Freezer burn makes rice dry and grainy. Portion cooked rice into airtight containers (like Glasslock or Pyrex) with no air gaps. Press plastic wrap directly on the surface before sealing. Thaw overnight in the fridge, then reheat with 2 tablespoons water per cup of rice to restore moisture.
For long-term storage, freeze rice unseasoned—add butter, lemon, and parsley fresh after reheating for maximum flavor. ❄️
Nutrition facts
Frequently asked questions
Can I use this bulk rice recipe for other types of rice?
This method works best with long-grain white rice (like Calrose or basmati), but you can adapt it for jasmine or brown rice. For brown rice, increase water by 25% and simmer for 45-50 minutes instead of 25. Short-grain rice (like sushi rice) needs 10-20% less water and a tighter lid to prevent sticking. Always adjust cooking times based on package instructions.
How do I scale this recipe for a larger crowd?
Maintain the 1:2.33 rice-to-water ratio (3 cups rice to 7 cups liquid). For 6 cups rice, use 14 cups water and double all other ingredients. Cook in a large stockpot or Dutch oven—never exceed 2/3 pot capacity to prevent boiling over. Use a meat thermometer to check doneness at 205°F for perfect texture.
What’s the best way to reheat bulk rice without drying it out?
Add 1-2 tablespoons water or broth per cup of rice before reheating. Cover tightly and steam on low heat for 5-7 minutes, or microwave for 2-3 minutes with a damp paper towel on top. For freezer-to-table meals, thaw overnight in the fridge first. The lemon juice and parsley can be added fresh after reheating for brightness.
Why does my bulk rice turn out sticky even after fluffing?
Stickiness usually means excess starch wasn’t rinsed out or the rice was stirred too much during cooking. Always rinse 3 cups rice until water runs clear before cooking. After simmering, let it rest covered for 10 minutes—this redistributes steam. If still sticky, fluff with a fork and add 1 teaspoon lemon juice or 1 tablespoon vinegar to cut through the starch.
Can I make this rice in an Instant Pot or rice cooker?
Yes! For an Instant Pot, use the same 1:2.33 ratio and cook on high pressure for 8 minutes, then natural release for 10 minutes. For rice cookers, follow manufacturer guidelines but reduce water by 10%—most models have a "bulk" setting. The key is not to peek during cooking to maintain steam. Add butter and aromatics after cooking to prevent burning.