
Desserts
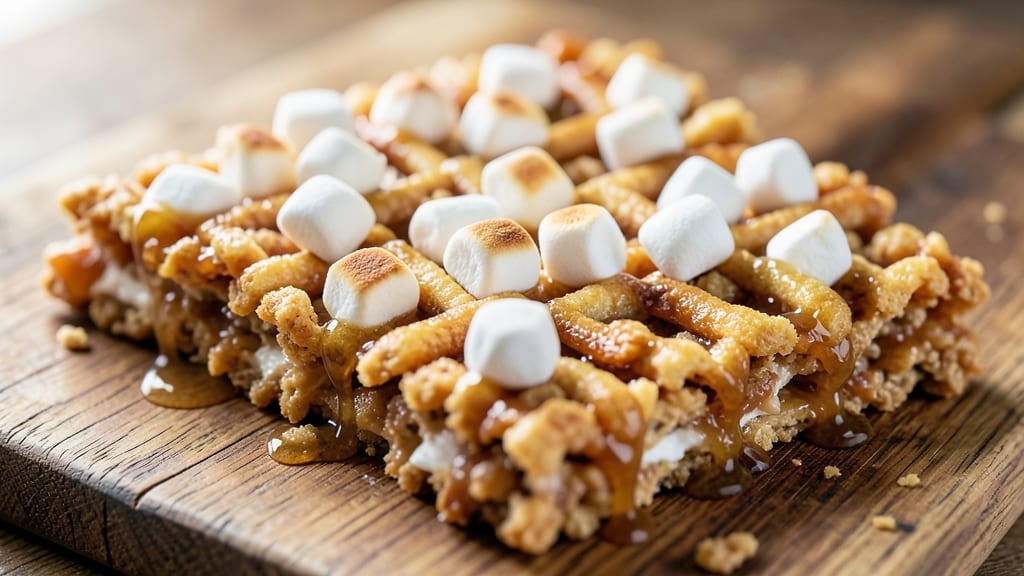
This Captain Crunch Rice Krispie treats recipe brings back childhood nostalgia with every crunchy, cereal-packed bite—no baking required. 💛 The secret lies in melting butter and marshmallows into a gooey base, then folding in crisp Captain Crunch cereal for that perfect mix of sweetness and crunch.
It’s a one-pan wonder that’s foolproof for beginners and irresistible to kids (and adults who never grew up). What makes these treats special is the textural contrast: tender marshmallow strands holding together crisp cereal clusters, all bound by a buttery, golden crust.
Serve them as whole squares for easy grabbing or slice into bars for a classic Rice Krispie treat experience. The best part? They’re ready in just 15 minutes—perfect for last-minute desserts or party snacks.
Ingredients for captain crunch rice krispie treats
Six cups of crispy cereal, gooey marshmallows, and buttery magic—this nostalgic treat is pure joy in one pan.
| Ingredient | Amount | Notes |
|---|---|---|
| Captain Crunch Cereal 🍪 | 6 cups | Original flavor preferred |
| Unsalted Butter 🧈 | ½ cup | Cut into small pieces |
| Mini Marshmallows 🍬 | 3 cups | Original size, not jumbo |
| Vanilla Extract 🌿 | 1 tsp | Pure, high-quality |
| Granulated Sugar 🍚 | ½ cup | For extra sweetness |
| Light Corn Syrup 🍯 | ¼ cup | Or honey as substitute |
| Sea Salt 🧂 | ¼ tsp | Fine grain, optional |
| Vegetable Oil 🫒 | 1 tbsp | For greasing pan |
Captain Crunch is the star here, so grab the original flavor—none of that chocolate or fruit stuff. The cereal should be crisp, not soggy. Kroger or Target usually have it in the cereal aisle, and it keeps for months in an airtight container. For the marshmallows, mini size is key—they melt evenly and create those perfect pockets of gooeyness. If you're feeling fancy, Trader Joe's has organic marshmallows that add a subtle vanilla depth. And that butter? Use unsalted—you're controlling the saltiness here with the optional sea salt sprinkle.
No Captain Crunch? Cocoa Puffs or Froot Loops work in a pinch (though texture changes), and mini marshmallows can be swapped for regular if you're desperate—just chop them first. Running low on corn syrup? Honey or maple syrup at the same amount will work, though the texture might be slightly denser. The vanilla extract is non-negotiable for that classic flavor, but if you're out, almond extract at half the amount gives a similar depth. Pro tip: Toast your cereal lightly before mixing—it gets even crunchier. Just spread it on a baking sheet and microwave for 30 seconds.
This treat is best made fresh, but if you've got leftovers, store in an airtight container for up to 5 days—though honestly, they rarely last that long. For parties, double the recipe and press into a 9x13-inch pan for easy slicing. The marshmallow mixture sets as it cools, so don’t rush it—let it sit for 10 minutes before cutting. Freezes beautifully too—just wrap individual squares in plastic wrap for up to 3 months. And if anyone asks, no, you can’t make these with Rice Krispies—the texture is all wrong!
Why You'll Love This Recipe
- No Boil, No Stress: I swear by this method—just melt the butter, mix in the sugar and vanilla, then dump in the Captain Crunch and marshmallows. The cereal stays crispy, the marshmallows melt just enough, and I’m not standing over a hot stove for 20 minutes.
- Crunchy-Sweet Magic: That citrusy Captain Crunch punch cuts through the gooey marshmallows like a dream. Honestly, the vanilla and sugar make it taste like a grown-up Rice Krispie treat, but with a nostalgic kick that hits different.
- Party in a Box: These disappear at picnics, potlucks, or even as a last-minute dessert for the kids’ soccer game. I’ve wrapped them in cellophane with a ribbon, tossed them in a bowl with sprinkles, or just served them straight from the pan—no judgment.
- Budget Breakfast Hack: A single box of Captain Crunch and a bag of mini marshmallows stretch into way more treats than you’d think. Leftovers? I freeze them and pull them out for quick breakfasts or after-school snacks—no one ever complains.
Step-by-step instructions for Captain Crunch Rice Krispie treats
Here's how to make these nostalgic treats with a crispy cereal twist—easier than you think!
🍳 Step 1: Melt Butter, Sugar, and Syrup for Perfect Glue
In a large saucepan, combine the 0.5 cup unsalted butter, 0.5 cup granulated sugar, and 0.25 cup light corn syrup. Place over medium heat and bring to a gentle boil, stirring occasionally with a wooden spoon. You'll see the mixture bubble softly and turn translucent—this is your marshmallow glue.
Once boiling, immediately reduce heat to low and let it simmer for 2-3 minutes until it reaches a thick, syrupy consistency. It should coat the back of a spoon smoothly but still flow freely. This step is crucial—if it's too thin, your treats will be sticky; if too thick, they'll be dry.
👨🍳 Step 2: Add Marshmallows and Vanilla for Creamy Perfection
Carefully pour in the 3 cups mini marshmallows all at once, stirring vigorously with a wooden spoon to break them up completely. Add the 1 tsp vanilla extract and 0.25 tsp sea salt, mixing until the marshmallows are fully melted and the mixture is smooth and glossy.
Here's the thing—don't rush this part. You want every marshmallow completely dissolved, creating that signature creamy texture. If you see any unmelted bits, return the pan to low heat for 30 seconds to finish melting them. The mixture should now look like thick, glossy caramel.
🥘 Step 3: Grease the Pan Like a Pro
While your marshmallow mixture is still warm, generously brush the bottom and sides of a 9x13-inch baking pan with the 1 tbsp vegetable oil using a paper towel. This ensures your treats won't stick no matter how crispy they get. I like to use a folded paper towel for even coverage—just rub it over the pan's surface.
For extra insurance, I sprinkle a thin layer of Captain Crunch cereal into the pan, then tilt it to coat the bottom evenly. This creates a non-stick barrier that makes removal effortless later. Tap out any excess cereal—you want just enough to prevent sticking, not a cereal crust.
🍳 Step 4: Assemble the Treats in Layers
Quickly pour the marshmallow mixture into the prepared pan and spread it evenly with a spatula. Immediately sprinkle half of the 6 cups Captain Crunch cereal over the top, pressing down gently but firmly. You want the cereal to be evenly distributed but not packed too tightly—this ensures that perfect balance of crunch and creaminess.
Here's where it gets fun—press down gently on the cereal layer with the spatula. I like to use a back-and-forth motion to create those classic Rice Krispie Treat ridges. This step is what gives these treats their signature texture, so don't skip the pressing!
⏰ Step 5: Cool and Cut for Maximum Crunch
Let the treats cool at room temperature for 1 hour until completely set. I know it's tempting to cut them earlier, but patience here ensures clean slices. The cereal should be crispy on the outside while maintaining that creamy marshmallow center.
Once fully cooled, use a sharp knife dipped in hot water and wiped dry between cuts to slice into 1-inch squares. The hot knife creates clean edges without crushing the cereal. Serve immediately or store in an airtight container for up to 5 days—though they rarely last that long!
Pro Tips For Making Captain Crunch Rice Krispie Treats
- STIR CONSTANTLY: Captain Crunch cereal sticks like glue if you let the butter-marshmallow mix boil unevenly. Keep that pot moving with a wooden spoon—no breaks, no lazy stirs—until the marshmallows fully dissolve and the mixture turns glossy. I learned this the hard way when my first batch looked like a cereal swamp instead of a treat.
- USE TOASTED CAPTAIN CRUNCH: Dry-toast the Captain Crunch in a skillet over medium heat for 3-4 minutes before mixing it in. The extra crunch and nuttier flavor cut through the sweetness, and it prevents the cereal from turning mushy when the hot mixture hits it. (Yes, even if you're impatient like me.)
- MEASURE MARSHMALLOWS BY VOLUME: Don’t eyeball those mini marshmallows—use the cup measurement from the recipe. A handful "looks like" too much, and suddenly you’ve got a sticky, gummy mess instead of a crispy treat. Pack them lightly into the measuring cup for accuracy.
- PRESS FAST, SPREAD THIN: Work quickly to press the mixture into the pan—before it starts setting up. Use a damp spatula to smooth the top, then let it cool just enough to handle before cutting. If you linger, the edges will harden while the center stays soft, and you’ll end up with uneven slices. (Your future self will thank you.)
Essential equipment for captain crunch rice krispie treats
One-Pan Essentials
You only need one sturdy pan—I recommend a 9x13-inch baking pan (like Wilton Premium Baking Pan)—to make these treats. The pan should be non-stick or well-seasoned if using stainless steel, but I always grease it anyway for foolproof release. For extra insurance, I line the pan with parchment paper (cut to fit), which makes removal effortless and eliminates any sticking. Just
Heat Control Tools
A medium-sized saucepan (like Cuisinart MultiClad Pro) is perfect for melting the butter and marshmallows. You’ll need a wooden spoon for stirring—it won’t melt like a metal spoon would—and a heatproof spatula (like OXO Good Grips) for spreading the mixture in the pan. A kitchen thermometer (optional but helpful) ensures the marshmallow mixture reaches the right temperature without burning.
Mixing & Pressing Gear
For pressing the cereal into the marshmallow layer, a wide, flexible spatula (like Microplane Food Press) works best—it lets you press evenly without crushing the cereal. I also keep a small bowl nearby to catch any stray cereal that falls off the spatula.
A sharp chef’s knife (like Wüsthof Classic) is essential for cutting the cooled treats, and dipping it in hot water between cuts keeps the edges clean and crisp.
Optional Upgrades
If you’re feeling fancy, a mini marshmallow melter (like the Wilton Mini Marshmallow Melter) speeds up the melting process and creates a smoother texture. For storage, I love amber glass jars (like Le Parfait) to keep the treats fresh and protected from light.
And if you’re making these often, a stand mixer (like KitchenAid Artisan) can help mix the marshmallow mixture more quickly, though it’s not strictly necessary.
Nutrition facts
Frequently asked questions
Can I substitute Captain Crunch with another cereal?
Yes, but the texture changes! For a similar crunch, try Cocoa Puffs or Froot Loops—they melt slightly but still hold shape. Avoid flakes like Cheerios (too soft) or puffed rice (too light). If you're desperate, Rice Krispies work in a pinch, but they won't give that signature Captain Crunch crunch.
Why did my treats turn out sticky instead of crispy?
This usually happens when the marshmallow mixture isn't thick enough or the cereal wasn't pressed firmly. Let the syrup boil longer (until it coats a spoon) and press the cereal layer with a spatula to create ridges. Also, make sure your pan is well-greased—oil prevents sticking better than butter.
Can I make these treats without corn syrup?
Swap the corn syrup for honey or maple syrup at the same amount. Just know the texture will be slightly denser. For a lighter version, use agave nectar—it mimics the stickiness of corn syrup while keeping the treats moist. Always reduce other liquids slightly if substituting.
How do I store Captain Crunch Rice Krispie Treats?
Store in an airtight container at room temperature for up to 5 days. For longer storage, freeze individual squares wrapped in plastic wrap for 3 months. To prevent sogginess, place a slice of bread in the container to absorb moisture—it works like a charm!
Can kids help make these treats?
Yes! Kids can safely help with the cereal pressing (supervised) and cutting (with a butter knife). For younger kids, let them sprinkle the cereal or mix the marshmallows with a wooden spoon. Just remind them to avoid the hot stove and melted butter—this is a great bonding (and learning) activity!