
Main Courses
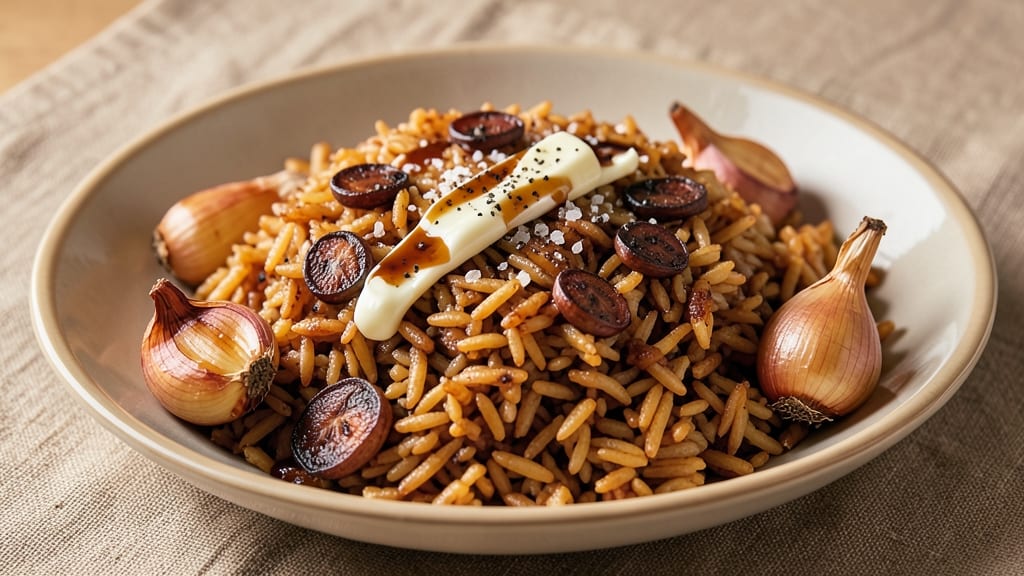
This caramelized rice recipe transforms ordinary grains into a sweet-savory masterpiece with a signature sticky bottom and crispy edges. The secret lies in sautéing rice in butter until golden, then deglazing with a touch of sugar or soy sauce to create that addictive caramelized crust.
I developed this technique after years of experimenting with Japanese yaki meshi and Spanish arroz caldoso—now it’s my go-to for restaurant-quality sides that steal the show.
The result is perfectly tender rice with a crunchy, caramelized exterior that adds texture and depth to any meal. Whether paired with grilled meats, roasted vegetables, or used as a base for stir-fries, this rice elevates simple dishes into something extraordinary.
The process is straightforward but requires attention to timing—just 20 minutes for a dish that tastes like it took hours. Ready to master this flavor-packed technique?
Ingredients for caramelized rice
Master this technique with premium rice, rich butter, and precise timing for restaurant-quality caramelized edges.
| Ingredient | Amount | Notes |
|---|---|---|
| Long-Grain White Rice 🍚 | 1 ½ cups | Uncooked, jasmine or basmati preferred |
| Unsalted Butter 🧈 | ½ cup | Cold, cut into 1/2-inch cubes |
| Granulated Sugar 🍯 | 2 tbsp | Light or dark brown preferred |
| Low-Sodium Soy Sauce 🥢 | 1 ½ tbsp | Kikkoman or San-J recommended |
| Vegetable Oil 🫒 | 1 tbsp | Light, like canola or grapeseed |
| Garlic Cloves 🧄 | 3 cloves | Thinly sliced, skin on |
| Shallots 🧅 | 2 whole | Thinly sliced, or sub 2 tbsp onion |
| Water 💧 | 2 cups | Room temperature preferred |
| Diamond Crystal Kosher Salt 🧂 | 1 ½ tsp | Adjust to taste after cooking |
| Black Peppercorns 🌶️ | ¼ tsp | Freshly cracked, coarse grind |
| Toasted Sesame Seeds 🌾 | 1 tbsp | For garnish, optional |
| Fresh Parsley 🌿 | ¼ cup | Chopped, for garnish |
The rice quality makes all the difference—jasmine or basmati grains hold up best to the caramelization process. Lundberg Family Farms or Calrose are my go-tos for consistent results. Butter should be cold when added to create that signature golden crust; Plugrá or European-style brands melt more evenly. For the sugar, light brown adds subtle molasses notes that complement the soy sauce, but dark brown works too if you prefer deeper caramelization. Garlic and shallots should be thinly sliced to release flavor without overpowering the rice—peeling the garlic first saves time during prep.
No soy sauce? Mirin or a touch of honey can mimic the umami-sweet balance, though the saltiness is key. Short on butter? Olive oil works but lacks richness—use it only if you're okay with a less luxurious finish. The water must be room temperature; cold water slows the caramelization. For extra depth, toast the rice in the oil for 2 minutes before adding butter to develop nuttier undertones. If using pre-sliced shallots from a jar, rinse and dry thoroughly to prevent excess moisture in the pan.
This rice reheats beautifully—steam for 3-5 minutes with a splash of water to restore moisture. Store in an airtight container for 4-5 days at room temperature, though texture softens over time. For longer storage, freeze portions in single-serving containers; thaw overnight in the fridge. The caramelized bottom becomes even more intense after chilling, so always serve directly from the pan if possible. Garnishes like sesame seeds and parsley should be added fresh—toasted seeds lose crunch quickly
Why You'll Love This Recipe
- One-Pan Magic: I swear by this recipe when I’m too tired to wash pots—just toast the rice in oil, add butter and sugar, and let it caramelize. The grains turn golden and sticky without any extra bowls or strainers.
- Sweet-Savory Crunch: That perfect balance of buttery richness and just a touch of caramelized sugar? It’s like rice got a gourmet upgrade. The soy sauce ties it all together with a subtle umami punch that makes it taste restaurant-worthy.
- Meal Prep MVP: I make a big batch on Sundays and use it all week—under eggs, with grilled chicken, or even as a side for takeout. It reheats beautifully and keeps for days, so you’re never scrambling for a side dish.
- Budget Bright Spot: Five ingredients, zero fancy tools, and it costs pennies per serving. The butter and sugar might seem indulgent, but the small amounts stretch the flavor—and your wallet—without breaking the bank.
Step-by-step instructions for sweet-savory caramelized rice
Master the art of perfect caramelization with this method that delivers crispy edges and a sticky, flavorful base.
Build the Sweet-Savory Base
Heat the 1 tablespoon vegetable oil in a heavy-bottomed skillet or Dutch oven over medium heat. Add the 2 whole shallots and 3 cloves garlic cloves, cooking for 4-5 minutes until the shallots soften and turn translucent. This foundational step develops the aromatic base for your rice.
Push the shallots and garlic to one side of the pan, then add the 0.5 cup unsalted butter and 2 tablespoons granulated sugar. Stir constantly for 2-3 minutes until the butter melts and the sugar begins to caramelize—watch for a golden color and the scent of buttery caramel filling your kitchen. This is where the sweet-savory magic begins.
Toast the Rice for Depth of Flavor
Add the 1.5 cups long-grain white rice to the pan, stirring vigorously for 2-3 minutes until every grain is coated in the caramelized butter mixture. The rice should develop a light golden hue and release its natural starches, creating a flavorful crust. This toasting step is crucial—it prevents mushy rice and builds complex flavor.
Pour in the 2 cups water and 1.5 tablespoons low-sodium soy sauce, then sprinkle with the 1.5 teaspoons diamond crystal kosher salt and 0.25 teaspoon black peppercorns. Stir gently once to distribute the seasoning, then bring the mixture to a simmer over medium-high heat. This is where the rice begins its transformation into something extraordinary.
Cook with Precision for Perfect Texture
Reduce heat to low and cover the pan tightly with a lid. Let the rice cook undisturbed for 15 minutes, allowing the liquid to absorb and the rice to steam gently. This low-and-slow approach prevents burning while developing that coveted sticky texture.
After 15 minutes, remove the lid and stir the rice gently with a wooden spoon, scraping up any browned bits from the bottom of the pan. These bits are flavor gold—don't miss them. Return the lid and cook for another 15 minutes, then check the rice. It should be tender but still slightly firm in the center with a thin layer of liquid remaining. This residual moisture ensures that final caramelization step works perfectly.
Create the Sticky Bottom Magic
Remove the lid and increase heat to medium-high. Let the rice cook uncovered for 3-5 minutes, stirring occasionally, until the bottom develops a deep golden-brown crust. This is where the name of the game comes into play—the sticky bottom should be caramelized but not burned, with a glossy sheen that indicates perfect caramelization.
Once the bottom is beautifully caramelized, remove the pan from heat. Let the rice sit covered for 5 minutes to allow any remaining steam to redistribute. This resting period is essential—it prevents the rice from becoming dry and allows the flavors to meld completely.
Finish and Garnish for Presentation
Fluff the rice gently with a fork, then transfer it to a serving dish. Sprinkle with 1 tablespoon toasted sesame seeds and 0.25 cup chopped fresh parsley for color and freshness. The sesame seeds add a nutty crunch that contrasts beautifully with the creamy, caramelized rice, while the parsley brightens the dish with a touch of freshness.
Serve immediately while the rice is still warm, allowing diners to experience the perfect balance of sweet and savory in every bite. This method delivers restaurant-quality caramelized rice with a crispy bottom and tender grains—each forkful is a symphony of texture and flavor.
Pro Tips For Making Caramelized Rice
- TOAST THE RICE FIRST: Before adding liquid, spread the dry rice in the pan and cook it over medium-high heat for 2-3 minutes—just until it smells nutty and the grains turn slightly opaque. This step guarantees your rice won’t turn mushy later, especially when you add the butter and sugar.
- MELT BUTTER SLOWLY: Don’t rush the butter—let it melt gently over low heat, swirling the pan constantly. If you crank the heat too high, it’ll burn before the sugar caramelizes properly, leaving you with a bitter, uneven mess.
- STIR CONSTANTLY AFTER SUGAR: Once you add the sugar, don’t walk away. Stir the rice aggressively for the first 3-4 minutes until the mixture turns golden brown—this is when the magic happens. I learned this the hard way when I walked away for "just a second" and ended up with burnt bits.
- ADD SOY SAUCE LAST: Wait until the rice is almost fully cooked before tossing in the soy sauce. Adding it too early can make the rice clump together and turn gluey. A splash at the end balances the sweetness and keeps the texture light.
Perfect pairings for caramelized rice
Protein Pairings
Grilled salmon with its rich, buttery texture complements caramelized rice beautifully. The sweet-savory crust mirrors the salmon's natural oils, creating a harmonious balance. I love serving this with miso-glazed salmon—the umami depth from the miso pairs perfectly with the rice's caramelized notes. 🍣
For a heartier option, try beef short ribs braised in red wine. The tender, fall-off-the-bone texture contrasts wonderfully with the crispy rice edges. A drizzle of the braising liquid over the rice adds an extra layer of flavor that ties everything together.
Vegetable Complements
Roasted asparagus with lemon zest and shaved fennel brighten the dish with their crisp, fresh flavors. The acidity cuts through the richness of the caramelized rice, creating a perfect balance. I often roast them at 425°F for 12-15 minutes until tender-crisp.
For a more substantial vegetable pairing, mushroom risotto-style medley works exceptionally well. Sauté cremini and shiitake mushrooms with garlic and thyme, then deglaze with a splash of white wine. The earthy flavors complement the rice's sweet-savory profile without overpowering it.
Sauce Enhancements
A drizzle of yuzu kosher dipping sauce adds a tangy, citrusy contrast that elevates the dish. Mix 2 tablespoons soy sauce, 1 tablespoon yuzu juice, 1 teaspoon honey, and a pinch of red pepper flakes for a bright, zesty finish.
This sauce also works as a dipping sauce for any protein pairings.
For a richer option, try sesame-ginger dressing. Whisk together 3 tablespoons tahini, 1 tablespoon rice vinegar, 1 teaspoon grated ginger, 1 teaspoon honey, and 2 tablespoons water.
Drizzle lightly over the rice or use it to moisten grilled vegetables for an extra layer of flavor.
Beverage Pairings
A crisp green tea like Sencha or Jasmine Pearl cleanses the palate between bites. The subtle sweetness and earthy notes complement the caramelized rice without competing with it. For a refreshing twist, serve it chilled over ice.
For a more robust pairing, a dry Riesling with its bright acidity and hints of citrus balances the dish's richness. The wine's crispness cuts through the sweetness of the caramelized rice, creating a harmonious dining experience. 🍷
Nutrition facts
Frequently asked questions
Can I use brown rice for this caramelized technique?
While you can try it, brown rice has a different texture and longer cooking time that makes caramelization more challenging. The bran layer absorbs moisture unevenly, risking dry or undercooked grains. If you're determined, use a 1:2 rice-to-water ratio and extend cooking time by 10-15 minutes, but expect less crispy edges. For perfect results, stick with white jasmine or basmati.
Why did my rice turn out mushy instead of crispy?
Mushy rice usually means either too much liquid or insufficient toasting time. Start by measuring water precisely—2 cups per 1.5 cups rice is ideal. More importantly, toast the rice in butter for a full 2-3 minutes until golden before adding liquid. If your pan isn't heavy-bottomed, the heat may distribute unevenly, causing uneven cooking.
How can I make this vegetarian-friendly?
Swap the soy sauce for 1.5 tbsp tamari (gluten-free) or 1 tbsp coconut aminos plus 1 tsp maple syrup for sweetness. For umami depth, add 1 tsp nutritional yeast when toasting the rice. Garnish with toasted pumpkin seeds instead of sesame seeds, and pair with roasted eggplant or tempeh for a complete meal.
Can I make this in an Instant Pot or rice cooker?
While possible, these methods won't give you the signature crispy bottom. For an Instant Pot, sauté the shallots, garlic, butter, and sugar first, then add rice and liquid. Use high pressure for 4 minutes, then quick-release and sear the bottom dry on the stovetop. Rice cookers won't achieve the caramelization—this technique truly requires stovetop control.
What's the secret to getting that perfect sticky bottom?
The magic happens in three key steps:
- Low-and-slow cooking (cover for 15 minutes on low heat),
- Residual moisture (leave a thin layer of liquid before uncovering), and
- High heat finish (stir occasionally on medium-high until golden). Use a heavy-bottomed pan—cast iron or stainless steel conducts heat evenly for even caramelization.