
Side Dishes
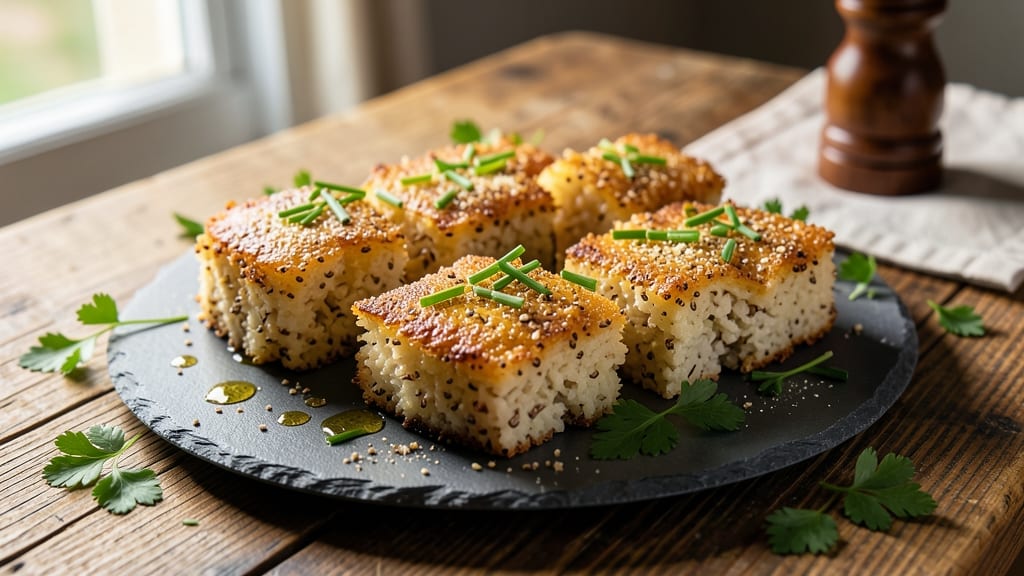
This cauliflower rice cakes recipe delivers crispy, golden bites that are lighter than traditional fried rice cakes but just as satisfying. The secret lies in the perfect blend of shredded cauliflower, flaxseed binder, and aromatic herbs that create a delightful crunch without heavy ingredients.
I developed this recipe after testing countless variations to achieve that ideal texture—crispy outside, tender inside, with a subtle herby flavor that elevates any meal.
The beauty of these rice cakes is their versatility and ease of preparation. With just 10 minutes of hands-on time and a 15-minute cooking process, you can transform simple ingredients into a restaurant-worthy side dish.
The flaxseed binder replaces eggs, making this recipe naturally vegan-friendly while still delivering that satisfying crispiness you crave. Whether you're serving them as an appetizer or a light lunch, they're guaranteed to impress.
What sets these apart is the herbed twist—fresh parsley and chives add brightness, while garlic powder and onion powder provide depth. The result is a dish that's crispy yet not greasy, flavorful yet not overpowering, and perfect for those looking to enjoy something lighter but still indulgent.
The golden-brown edges will have everyone reaching for seconds.
Serve these with a tangy dipping sauce or alongside a hearty main dish to balance the meal. They reheat beautifully, making them ideal for meal prep. Here's how to make them perfectly every time.
Ingredients for cauliflower rice cakes
Transform simple vegan ingredients into crispy, golden cauliflower rice cakes with this herbed twist.
| Ingredient | Amount | Notes |
|---|---|---|
| Fresh Cauliflower 🥬 | 1 ½ lb | Riced with food processor |
| Ground Flaxseed 🌾 | ½ cup | Mixed with 1.5 cups water |
| Fresh Parsley 🌿 | ¼ cup | Chopped finely, stems included |
| Fresh Chives 🌱 | 2 tbsp | Chopped finely, mild flavor |
| Garlic Powder 🧄 | 1 tsp | Freshly ground preferred |
| Onion Powder 🧅 | 1 tsp | For aromatic depth |
| Sea Salt 🧂 | 1 ½ tsp | Diamond Crystal preferred |
| Ground Black Pepper 🌶️ | ½ tsp | Freshly cracked preferred |
| Extra-Virgin Olive Oil 🫒 | 2 tbsp | Light spray for crispiness |
| Cornstarch 🌾 | 2 tbsp | For extra crisp texture |
| Nutritional Yeast 🧀 | 1 tbsp | For umami depth (optional) |
| Lemon Zest 🍋 | 1 tsp | Brightens flavor profile |
The cauliflower is the star here—opt for a firm head with no yellowing, as it yields the best texture. Whole Foods or Trader Joe's carry excellent organic options, but any fresh head works. Ricing it yourself (using a food processor) gives better texture than pre-riced bags, though those are fine in a pinch. The flaxseed binder is non-negotiable for crispiness—Bob's Red Mill ground flaxseed is my go-to, but any organic brand works. Let the flax mixture sit for 5 minutes before using to thicken properly, or your cakes will crumble.
No fresh parsley? Dried parsley at one-third the amount works, but fresh is ideal for that vibrant pop. Swap chives for green onion or scallions if needed—they bring similar freshness. Running low on garlic powder? Fresh minced garlic at half the amount adds depth, though it'll soften during cooking. For extra crispiness, add 1 tbsp arrowroot powder if you have it—it's a game-changer. The nutritional yeast isn't essential but adds a cheesy umami note that pairs beautifully with the herby flavors. If you're gluten-free, ensure your cornstarch is certified.
Store prepped cauliflower rice in an airtight container with parchment between layers for up to 3 days in the fridge. Freeze for 2 months by arranging on a tray first, then transferring to a bag—this prevents sticking. Reheat in a 350°F oven for 8-10 minutes until crispy again. For meal prep, make a double batch and portion into single-serving containers with a side of hummus or spicy mayo. The texture degrades after reheating, so enjoy fresh when possible for that perfect crunch.
Why You'll Love This Recipe
- No-Rice Pan Required: I swear by this trick—just pulse the cauliflower in a food processor until it’s rice-sized, then mix it with flaxseed and herbs. No straining, no rinsing, and the texture comes out just right every time. Honestly, my sheet pan stays cleaner than when I make regular rice.
- Herb-Packed Punch: That fresh parsley and chives? They turn this into something ridiculously flavorful—bright, fresh, and way more exciting than store-bought veggie patties. The garlic powder gives it a savory depth, so it doesn’t taste like "diet food" at all.
- Meal Prep MVP: I make a big batch on Sundays, and these cakes hold up perfectly for lunches or sides all week. Toss them in a container with a drizzle of olive oil, and they’re ready to reheat—no soggy rice vibes here.
- Budget-Friendly Flex: Cauliflower’s cheap, flaxseed stretches the mixture, and you can use whatever herbs you have on hand. Between us, I’ve made these for $1.50 a serving, and they’re still the star of the meal. (Yes, even on a Tuesday night.)
Step-by-step instructions for crispy cauliflower rice cakes
Achieve perfectly golden, crispy cauliflower bites with this precise method.
Prepare the Cauliflower Base
Rice the 1.5 lb fresh cauliflower using a food processor fitted with the grating disc. Pulse until you achieve a texture similar to coarse rice grains. Transfer the riced cauliflower to a clean kitchen towel and squeeze out all excess moisture by gently twisting and pressing. This step is critical—any remaining moisture will prevent crispiness.
In a separate bowl, whisk together the 0.5 cup ground flaxseed with 1.5 cups water. Let this mixture sit for 5 minutes to thicken into a gel-like consistency. This flax "egg" will bind your cauliflower mixture without adding eggs, making these cakes vegan-friendly.
Combine Wet and Dry Ingredients
In a large mixing bowl, combine the drained cauliflower with the thickened flax mixture. Add the 2 tbsp cornstarch, 1 tbsp nutritional yeast, 1 tsp lemon zest, 1.5 tsp sea salt, 0.5 tsp ground black pepper, 1 tsp garlic powder, and 1 tsp onion powder. Using your hands or a sturdy spoon, mix until all ingredients are thoroughly incorporated and the texture becomes uniformly moist but not sticky.
Fold in the 0.25 cup finely chopped fresh parsley and 2 tbsp finely chopped fresh chives, reserving a small portion for garnish. The herbs should be evenly distributed throughout the mixture. If the batter feels too dry, add 1 tablespoon of water at a time until it holds together when pressed gently.
Form and Chill the Cakes
Using a ¼-cup measuring scoop, portion the mixture into 16 equal balls (about 4 per serving). Gently flatten each ball into a ½-inch thick patty, creating uniform cakes that will cook evenly. Arrange them on a parchment-lined baking sheet, spacing them 1 inch apart to allow for expansion.
Cover the baking sheet with plastic wrap and refrigerate for at least 30 minutes (or up to 2 hours). This chilling step is essential—it firms up the mixture, preventing the cakes from spreading excessively during cooking and ensuring they hold their shape when transferred to the oven.
Achieve Crispy Perfection
Preheat your oven to 400°F. Lightly spray a second baking sheet with 2 tbsp extra-virgin olive oil (use an oil mister for even distribution). Transfer the chilled cauliflower cakes to this prepared sheet, maintaining the 1-inch spacing. Spray the tops of the cakes with another light coat of olive oil.
Bake for 20-25 minutes, flipping each cake once halfway through at the 12-minute mark. The cakes are done when they're deep golden brown on both sides and the edges appear crispy. For extra crispiness, increase the oven temperature to 425°F for the final 5 minutes of baking.
Serve Immediately for Maximum Crisp
Transfer the crispy cauliflower cakes to a wire rack to cool for 5 minutes—this prevents them from becoming soggy. Garnish each serving with the reserved chopped parsley and chives. Serve warm with a side of spicy mayo or tahini-lemon dip for dipping, ensuring the cakes maintain their crisp texture.
These cauliflower rice cakes should hold their shape while delivering a satisfying crunch with each bite. The golden exterior contrasts beautifully with the tender, herbed interior. Store any leftovers in an airtight container for up to 3 days, though they're best enjoyed fresh from the oven.
Pro Tips For Making Cauliflower Rice Cakes
- Pulse, Don’t Grind: Your food processor will try to turn cauliflower into puree—resist the urge. Short, sharp pulses (about 10-12 seconds total) keep the texture right for cakes that hold together without turning to mush. I learned this the hard way after making a sad, gluey mess the first time.
- Mix Flax Last: Add ground flaxseed to your wet ingredients after everything else is combined. Stir it in quickly—it thickens fast—and fold it into the cauliflower mixture just before shaping. Skip this, and your cakes will either be dry or turn out like dense, flavorless hockey pucks.
- Press, Don’t Pack: When forming the cakes, press the mixture gently into the pan with your palm—don’t squeeze like you’re making a brick. Too much pressure = dense, heavy cakes. Think "light hand," not "iron fist," even if it means the edges look uneven.
- Skip the Pre-Cook: Resist the urge to microwave or steam the cauliflower first. Raw, freshly pulsed cauliflower releases more moisture as it cooks, which helps bind the cakes naturally. I was skeptical until I tried it—now I never go back to the soggy pre-cooked method.
Essential equipment for this dish
Food Processor Essentials
You’ll need a food processor with a grating disc to rice the cauliflower efficiently. I recommend the Ninja SP101 for its sharp blades and easy cleanup, or the Cuisinart DLC-2AC for durability.
If you’re on a budget, the Hamilton Beach 64630 works well too—just ensure the disc is designed for grating, not slicing. Avoid pre-riced cauliflower from bags; freshly processed yields better texture and absorbs flavors more effectively. 🥬
Oil Mister for Crispiness
A light oil mister (like the OXO Good Grips) is a game-changer for even oil distribution. Spraying the baking sheet and cakes with extra-virgin olive oil ensures a crispy exterior without soaking the interior.
If you don’t have a mister, use a paper towel to lightly coat the cakes with oil—just avoid oversaturating. For extra crunch, spray the cakes again after the first 12 minutes of baking.
Measuring Scoop Precision
Uniformity is key, so invest in a ¼-cup measuring scoop (like the OXO Good Grips) for consistent cake sizes. Press the mixture firmly into the scoop to avoid crumbling.
If you’re making a double batch, use a cookie scoop with a release mechanism—it speeds up the process and maintains shape. Pre-portioning also helps the cakes hold together during chilling.
Baking Sheet Upgrade
Use a half-sheet baking pan (like the Wilton Half-Sheet) for even heat distribution. Line it with parchment paper to prevent sticking, and avoid dark-colored pans—they can over-brown the edges.
For extra crispiness, place the sheet on the middle rack of your oven, where heat circulates evenly. If your oven runs hot, lower the temperature to 375°F to prevent burning.
Chilling Tools
Chilling the cakes is non-negotiable, so keep a large airtight container (like a Rubbermaid Brilliance) or plastic wrap handy. Place the baking sheet in the fridge uncovered for 30 minutes to firm up, then cover to prevent drying.
For faster chilling, transfer the cakes to a wire rack in the freezer for 15 minutes—just watch closely to avoid over-chilling, which can make them too firm.
Wire Rack for Serving
A cooling rack (like the OXO Good Grips) is essential for maintaining crispness post-baking. Place the cakes on the rack for 5 minutes before serving to prevent sogginess. If you’re short on time, use a clean kitchen towel instead—just avoid stacking them, as this traps steam and ruins texture.
For a restaurant-style finish, garnish with extra herbs right on the rack before serving. ✨
Nutrition facts
Frequently asked questions
Can I make these cauliflower rice cakes without a food processor?
If you don't have a food processor, use a box grater with the fine holes or pulse the cauliflower in a blender until it reaches a rice-like texture. Just be patient—this method takes longer but works perfectly. The key is removing all excess moisture afterward to maintain crispiness.
Why did my cauliflower cakes turn out dense instead of crispy?
This usually happens when moisture remains in the cauliflower or the batter isn't properly chilled. For crispy results, squeeze the riced cauliflower thoroughly in a clean kitchen towel, and always chill the cakes for at least 30 minutes before baking. The chilling step firms up the mixture so it develops that perfect golden crust.
What are the best dipping sauces for these rice cakes?
These crispy cakes pair beautifully with spicy mayo (mix mayo with sriracha and lime juice) or a tahini-lemon dip (tahini, lemon juice, garlic, and maple syrup). For something lighter, try a soy-ginger sauce (soy sauce, rice vinegar, grated ginger, and sesame oil). The herby flavors in the cakes complement all these options perfectly!
Can I make these gluten-free or nut-free?
Yes! This recipe is naturally gluten-free as long as you use certified gluten-free cornstarch. For nut-free, simply omit the nutritional yeast (which is derived from yeast, not nuts) or substitute with an extra ½ tsp garlic powder for umami depth. The flaxseed binder is also nut-free, making this recipe safe for most dietary restrictions.
How can I make these ahead of time for meal prep?
Prepare the batter up to 2 days ahead and store it in an airtight container in the fridge. Form the cakes the morning of cooking and chill them for 30 minutes. For freezing, bake the cakes, let them cool completely, then freeze on a tray before transferring to a bag. Reheat in a 350°F oven for 8-10 minutes until crispy again—though texture is best when served fresh!