
Desserts
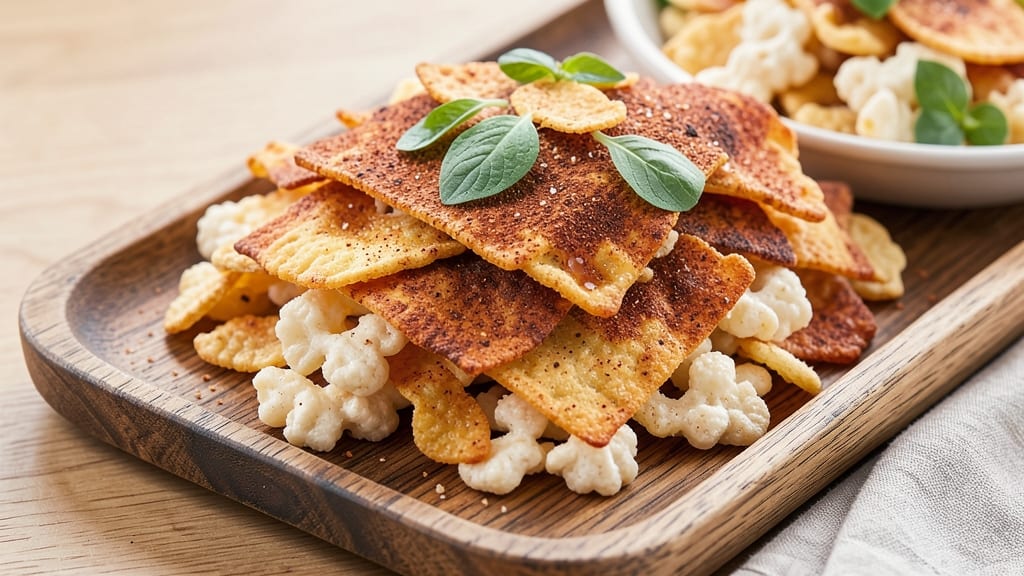
This cheese crisps recipe with Rice Krispies delivers crunchy, melt-in-your-mouth bites that rival anything from a snack aisle—but taste infinitely better. 🔥 The secret lies in balancing crispy Rice Krispies with melted cheese for a texture that’s addictively satisfying, whether you’re craving a salty snack or a quick appetizer.
Perfect for game day, movie nights, or satisfying that 3 PM hunger without the guilt.
With just five simple ingredients and 15 minutes of prep, you’ll achieve golden, shatteringly crisp edges that give way to gooey cheese centers. The magic happens at 375°F, where the Rice Krispies puff up while the cheese melts into pockets of creamy goodness.
For extra flavor, experiment with sharp cheddar, smoky gouda, or even a kick of chili powder—each variation adds a unique twist without complicating the process.
Ingredients for cheese crisps recipe with rice krispies
Five ingredients, one golden tray—these crispy bites disappear faster than you can say 'game day'.
| Ingredient | Amount | Notes |
|---|---|---|
| Rice Krispies Cereal 🍞 | 4 cups | Unsweetened, lightly crushed |
| Shredded Sharp Cheddar Cheese 🧀 | 2 cups | Freshly shredded, not pre-shredded |
| Unsalted Butter 🧈 | ½ cup | Melted, cooled slightly |
| Garlic Powder 🧄 | ½ tsp | For subtle savory depth |
| Paprika 🌶️ | ¼ tsp | Smoked variety for extra flavor |
The Rice Krispies are the star, so don't skimp—the unsweetened kind gives you that clean, crisp base. Trader Joe's or Kroger both carry it, and it keeps forever in an airtight container. For the cheese, sharp cheddar is non-negotiable—it melts perfectly and has that addictive tang. Pre-shredded gets clumpy, so grab a block and shred it yourself. The butter? European-style if you can find it—it's higher in fat and gives those crisps the extra crunch. And yes, you can use salted butter, but cut the garlic powder in half if you do.
No sharp cheddar? Smoked gouda or pepper jack work beautifully—just adjust the paprika to match. Running low on garlic powder? Onion powder at half the amount gets you close. The butter too soft to handle? Microwave it 20 seconds to just melt, then let it cool for 2 minutes. No need to stress about exact measurements here—eyeball the spices. And if you're feeling fancy, add a pinch of cayenne for a little kick. These crisps reheat perfectly, so double the batch if you're hosting.
Once baked, these crisps stay crisp for about 2 days in an airtight container at room temperature—though they rarely last that long. For extra crunch, store them in a paper bag instead of a container. Freezing? Not recommended—they lose their crispiness. But if you must, bake straight from frozen for 2-3 extra minutes. Pro tip: Sprinkle them with extra paprika right after baking while they're still warm—they'll stick just enough to add color and flavor without making them soggy.
Why You'll Love This Recipe
- No-Fuss Magic: I swear, this recipe is the kind of thing you’ll make just to prove you can turn pantry staples into something worth bragging about. Five minutes of stirring, spreading, and baking—no fancy equipment, no stress—just the perfect crunchy, cheesy bites that vanish faster than you can say "second helping."
- Cheese-Lover’s Dream: That sharp cheddar melts into these crispy clusters like a warm hug for your taste buds, while the garlic powder and paprika add this cozy, slightly spicy kick. Honestly, it’s the kind of flavor combo that makes you question why you ever bought store-bought cheese puffs.
- Party in a Box: Between us—these are my go-to for game day, movie nights, or when I need to feed a crowd without looking like I slaved over it. They stay crispy for hours, so you can prep a batch ahead and let guests dig in without the mess of a full spread.
- Budget Crunch: Three dollars’ worth of ingredients stretches to way more than you’d expect—especially when you’re sneaking them into lunches or using leftovers to top salads. (Yes, even on a Tuesday night.) It’s the kind of recipe that makes frugality feel like a win.
Step-by-step instructions for cheese crisps with Rice Krispies
Here's how to make these addictive cheese crisps—crispy outside, gooey inside, every time.
👨🍳 Step 1: Crush the Rice Krispies Perfectly
Place the 4 cups Rice Krispies Cereal in a sturdy resealable plastic bag. Using a rolling pin or heavy pan, gently crush the cereal until it breaks into small, irregular pieces—about the size of small pebbles. You're aiming for texture, not powder, so don't overdo it. I like to leave some larger clusters too for extra crunch contrast.
Here's the thing—if you crush them too finely, they'll turn into crumbly dust instead of crispy bites. Test a few pieces between your fingers: they should hold their shape but still be easily breakable. Spread the crushed cereal on a baking sheet and set aside—we'll use it in the next step.
🍳 Step 2: Melt the Butter and Season the Cheese
In a medium microwave-safe bowl, melt the 0.5 cup Unsalted Butter in 30-second intervals, stirring between each, until completely smooth. Let it cool for 2-3 minutes until it's warm to the touch but not hot—this prevents the cheese from separating later. While the butter cools, add the 2 cups Shredded Sharp Cheddar Cheese to the same bowl.
Now for the seasoning magic: sprinkle in the 0.5 tsp Garlic Powder and 0.25 tsp Paprika, then stir until the cheese is evenly coated. The paprika adds a subtle smokiness that pairs perfectly with the sharp cheddar, while the garlic powder gives these a sophisticated depth. Mix well so every bite gets that flavor punch.
🥘 Step 3: Combine and Shape the Crisps
Pour the melted butter-cheese mixture over the crushed Rice Krispies Cereal and stir gently with a silicone spatula until everything is evenly coated. You'll notice the cereal starts to soften slightly from the butter—this is good! The mixture should look like damp sand with visible cheese streaks throughout.
Using slightly wet hands (dampen with water and rub together), form the mixture into 1-inch diameter balls. Press gently but firmly—these should hold their shape when placed on the baking sheet. If the mixture is too sticky, chill it in the fridge for 5 minutes to firm up. Arrange the balls about 1 inch apart on a parchment-lined baking sheet.
🔥 Step 4: Bake Until Golden and Crispy
Preheat your oven to 350°F—this is the sweet spot for getting that perfect golden-brown exterior without burning. Bake the cheese crisps for 12-15 minutes, flipping them halfway through with a spatula. You're looking for deep golden brown spots that indicate crispiness, but the centers should still look slightly soft when you peek.
Here's where it gets tricky: don't overbake! The cheese continues cooking after you remove them from the oven, so pull them out when they're 80% done—they'll firm up as they cool. If you bake them too long, they'll turn into sad, rubbery cheddar balls instead of crispy delights.
⏰ Step 5: Cool and Enjoy (The Hardest Part!)
Let the cheese crisps cool on the baking sheet for 5-10 minutes—this is critical for developing that perfect texture contrast. They'll start firming up as they cool, but the centers will remain gooey and melty. The outside should be crisp enough to make a satisfying crunch, while the inside should be soft enough to ooze cheese when you bite in.
Serve immediately while still warm for maximum enjoyment. These disappear faster than you can say "cheese pull"—I've seen them vanish in minutes! Store any leftovers in an airtight container for up to 3 days, but real talk: they rarely last that long. Pair with marinara sauce or enjoy as a snack straight from the oven.
Pro Tips For Making Cheese Crisps Recipe With Rice Krispies
- PULSE THE MIX: Dump everything in the bowl and stir once or twice—just enough to break up clumps. Overmixing turns the cheese into a sad, greasy paste instead of crispy clusters. I used to go at it like I was kneading dough, and it was a disaster. Two seconds of stirring is all it takes.
- USE COLD CHEESE: Grab that block of cheddar straight from the fridge and shred it yourself—no pre-shredded junk. The moisture in pre-shredded cheese ruins the texture, and cold cheese melts slower, giving you better control. (Yes, even if you’re impatient like me.)
- WATCH THE BUTTER: Melt the butter just until it’s liquid, then let it cool for 2 minutes before mixing. Hot butter zaps the moisture out of the Rice Krispies too fast, leaving you with dry, dusty crisps instead of chewy, crispy bites. Trust me, two minutes saves you from regret.
- SPREAD THIN: Drop the dough in small, flat mounds—about the size of a walnut—on the baking sheet. Thick piles steam instead of crisp, and you’ll end up with gooey centers. Thin layers = even cooking. (And yes, you’ll need two sheets—just do it.)
Wine and beer pairings for this dish
Crispy Cheese Pairings
These cheese crisps shine with cool, creamy pairings that balance their salty, crispy texture. Try a chilled glass of milk—the fat content in whole milk enhances the cheddar's richness. I often grab a 2% or whole milk from Trader Joe's for that perfect balance.
For a non-dairy option, almond milk with a splash of vanilla adds a subtle sweetness that contrasts beautifully. 🥛
Light Beer Matches
Opt for crisp, light lagers like Heineken or Miller Lite to keep the palate clean without overpowering the cheese. The carbonation helps cut through the richness, making each bite feel refreshingly crisp.
If you prefer something with a bit more character, try a Belgian witbier like Hoegaarden—the citrus notes complement the smoky paprika in the crisps.
Dry White Wine
A dry Riesling or Sauvignon Blanc works wonders, especially if it has a slight mineral finish. The acidity in these wines cleanses your palate between bites, letting the cheese flavors stand out.
I reach for a chilled Dr. Loosen Blue Slate Riesling—it’s crisp enough to handle the saltiness while adding a touch of fruitiness that pairs surprisingly well. 🍷
Spicy Pairing Twist
If you cranked up the heat with chili powder or cayenne, balance it with a cooling beverage. A ginger ale or sparkling lime drink like San Pellegrino Aranciata adds a zesty contrast that tames the spice.
For something stronger, a cucumber-mint infused water keeps things refreshing while highlighting the crispy texture of the cheese bites.
Creamy Dessert Wine
For a dessert-style twist, serve with a demi-sec sparkling wine like Veuve Clicquot. The sweetness and bubbles create a fun contrast to the salty, savory crisps—it’s like ending the night with a sophisticated snack. Just be sure to serve it well-chilled to keep the bubbles lively. 🥂
Nutrition facts
Frequently asked questions
Can I use sweetened Rice Krispies for this recipe?
While it's possible, unsweetened Rice Krispies are the way to go for the best flavor. Sweetened cereal adds a sugary note that doesn't complement the savory cheese, and it can make the crisps taste overly sweet. If you only have sweetened on hand, try balancing it with extra garlic powder or smoked paprika to mask the sweetness.
Why did my cheese crisps turn out crumbly instead of crispy?
This usually happens when the Rice Krispies are crushed too finely or the butter-cheese mixture is too wet. Try crushing the cereal into slightly larger pieces (about the size of small pebbles) and chill the mixture for 5 minutes before shaping. Also, make sure your butter is only warm—not hot—to prevent the cheese from separating.
Can I make these cheese crisps ahead of time?
They're best enjoyed fresh, but you can prep the mixture up to 24 hours ahead and store it in the fridge. Shape the balls just before baking for the best texture. For short-term storage, keep them in an airtight container for up to 3 days—though they rarely last that long! Freezing isn't recommended as it makes them lose their crispiness.
What's the best cheese alternative if I don't have sharp cheddar?
Try smoked gouda for a rich, caramelized flavor or pepper jack for a mild kick. Both melt beautifully and add depth. If you want something milder, monterey jack works well—just increase the garlic powder to 1 teaspoon for extra flavor. Avoid pre-shredded cheese as it contains anti-caking agents that prevent proper melting.
How do I get extra crispy edges on my cheese crisps?
Bake them at 375°F instead of 350°F for 10-12 minutes total, flipping halfway. The higher heat creates a better Maillard reaction for browning. Also, spread the shaped balls 1.5 inches apart on the baking sheet—this allows hot air to circulate and crisp them evenly. For even more crunch, bake them on the middle rack.