
Main Courses
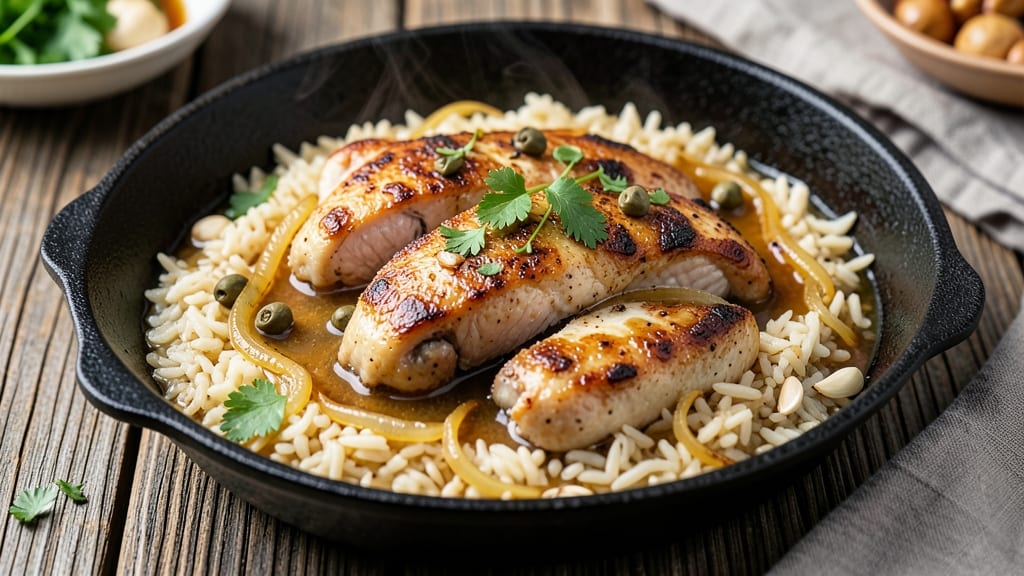
This chicken and rice cast iron skillet recipe delivers restaurant-quality flavor with minimal cleanup—crispy golden edges on the rice and perfectly juicy chicken in every bite.
The secret lies in preheating that heavy skillet until it's screaming hot, then searing the chicken until deeply browned before adding the rice and broth. That initial crust on the chicken and rice transforms a simple weeknight meal into something special.
The magic happens when the skillet's retained heat creates a caramelized crust on the rice while keeping the chicken impossibly tender inside.
You'll start with aromatics—garlic, onions, and maybe a splash of white wine—to build flavor, then let the rice cook slowly in the same pan where the chicken rendered its juices.
By the time you're done, you'll have a one-pan meal that's foolproof, satisfying, and ready in under 45 minutes with just 10 ingredients.
Ingredients for chicken and rice cast iron skillet
Ten simple ingredients for one-pan magic—crispy edges, juicy chicken, and perfectly caramelized rice.
| Ingredient | Amount | Notes |
|---|---|---|
| Boneless, Skinless Chicken Thighs 🍗 | 1 ½ lb | Cut into 1-inch pieces |
| Long-Grain White Rice 🍚 | 1 ½ cups | Uncooked, rinsed well |
| Yellow Onion 🧅 | 1 whole | Diced into 1/4-inch pieces |
| Garlic Cloves 🧄 | 4 cloves | Minced finely |
| Dry White Wine 🍷 | ½ cup | Like Sauvignon Blanc |
| Chicken Broth 💧 | 2 cups | Low-sodium preferred |
| Unsalted Butter 🧈 | 2 tbsp | Cold, cubed |
| Fresh Thyme Leaves 🌿 | ¼ cup | Chopped finely |
| Salt 🧂 | 1 ½ tsp | Kosher or sea salt |
| Ground Black Pepper 🌶️ | ½ tsp | Freshly ground |
The chicken thighs are the star here—bone-in, skin-on if you can find them, but boneless works too. Trader Joe's and Costco always have great deals on chicken thighs, and they hold up better to the long cooking time. For the rice, long-grain white is ideal—it stays separate and crispy at the edges. Rinse it well before adding to the skillet, or it'll turn out gummy. The white wine adds brightness, so don't skimp on quality—whatever's open in your fridge works, but Sauvignon Blanc or Pinot Grigio are my go-tos.
No white wine? Chicken broth with a splash of lemon juice works just as well. Fresh thyme is ideal, but dried works at one-third the amount if you're in a pinch. The butter matters—unsalted, cold, and cubed so it browns beautifully. If you're out of butter, olive oil works in a bind, but the flavor won't be quite the same. For the chicken broth, low-sodium is key—you'll be adding salt later, and you don't want to overdo it. The onions and garlic can be prepped ahead and stored in the fridge for up to 3 days.
This dish reheats beautifully—honestly tastes better the next day once everything melds together. Store leftovers in an airtight container in the fridge for up to 4 days. For extra crispy edges, pop it in the oven at 400°F for 5 minutes before serving. I always make a double batch because it's perfect for lunches—portion it into containers so you've got dinner sorted for the week.
Why You'll Love This Recipe
- One-Pan Magic: I swear by this recipe—no pots, no pans, just the cast iron doing all the work. Toss in the chicken, rice, and aromatics, then let the wine and onions caramelize while it simmers. Honestly, I’ve made it while scrolling through my phone, and it still comes out ridiculously good.
- Wine-Infused Richness: That splash of dry white wine? It’s not just for show—it deglazes the skillet into a savory sauce that clings to every grain of rice. The garlic and onions get sweet and sticky, then the chicken stays juicy with a crispy edge. Between us, my picky husband asks for seconds every time.
- Weeknight to Weekend: Throw this together on a Tuesday when you’re exhausted, or serve it at a dinner party when you want to impress. The rice soaks up all the flavor, so it’s hearty enough for a crowd but simple enough for two. I’ll be real: my college-age kids still think it’s “fancy” because of the wine, even though it’s basically dump-and-go.
- Leftovers That Don’t Suck: Unlike takeout that turns to glue, this reheats like a dream—just a splash of water, a minute in the microwave, and it’s back to its crispy, saucy glory. Plus, chicken thighs are cheaper than breasts, and rice stretches forever. My freezer’s full of portions I can grab when I’m too tired to cook. Solid.
Step-by-step instructions for chicken and rice cast iron skillet
Here's how to get that perfect mix of crispy edges and juicy chicken with fluffy rice—all in one skillet.
Sear the Chicken for Maximum Flavor
Heat your cast iron skillet over medium-high heat until it's smoking hot. Add the 1.5 lb boneless, skinless chicken thighs, cut into 1-inch pieces, and cook undisturbed for 4-5 minutes until golden brown on one side. I press down gently on the pieces during the first minute—this prevents them from curling and ensures even contact with the pan.
Flip the chicken and cook for another 4-5 minutes until all sides are golden and the internal temperature reaches 165°F. The chicken should release easily from the pan when ready. Remove the chicken and set it aside on a plate, leaving all the delicious browned bits in the skillet—those are pure flavor.
Sauté the Aromatics and Toast the Rice
In the same skillet (no need to wipe it clean), add the 2 tbsp cold, cubed unsalted butter and let it melt over medium heat. Add the diced yellow onion and cook for 3-4 minutes until softened and translucent. Stir in the minced garlic cloves and cook for 30 seconds until fragrant—don't let it brown or it'll turn bitter.
Add the 1.5 cups rinsed long-grain white rice and stir to coat it in the butter and onions. Toast the rice for 2 minutes, stirring constantly, until it's slightly translucent at the edges. This step is what gives the rice that nutty flavor and prevents it from turning mushy later. Real talk: if you skip this, your rice will taste bland and sticky.
Deglaze and Simmer the Chicken and Rice
Pour in the 0.5 cup dry white wine and scrape up all those browned bits from the bottom of the skillet with a wooden spoon. Let the wine simmer for 2-3 minutes until it's mostly evaporated. Then add the 2 cups chicken broth, the 0.25 cup chopped fresh thyme leaves, 1.5 tsp salt, and 0.5 tsp ground black pepper.
Return the chicken to the skillet, nestling it into the rice. Bring everything to a gentle simmer, then reduce the heat to low. Cover the skillet with a tight-fitting lid and cook for 20 minutes, letting the steam work its magic. Don't peek—every time you lift the lid, you let out steam and add time to the cooking process.
Rest and Develop the Crispy Edges
After 20 minutes, remove the lid and increase the heat to medium. Let the mixture cook uncovered for another 5-7 minutes until the liquid is mostly absorbed and the edges of the rice are crispy. You'll see the bottom of the skillet develop a golden crust—that's what we're after. If the rice looks dry before all the liquid is absorbed, add 1-2 tablespoons of water and let it simmer for another minute.
Once the edges are crispy and the rice is tender, remove the skillet from the heat. Let it rest for 5 minutes before serving. This resting time allows the juices to redistribute throughout the chicken and rice, ensuring every bite is moist and flavorful. If you serve it immediately, the juices will pool at the bottom of the skillet.
Serve with Confidence
Use a spatula to gently fluff the rice and mix everything together. The chicken should be fork-tender, and the rice should be fluffy with crispy edges. Serve directly from the skillet for that rustic touch, or transfer to plates if you prefer. Garnish with extra thyme leaves if you like, but honestly, it's already packed with flavor.
Each bite should deliver juicy, tender chicken, fluffy rice with crispy edges, and a rich, savory sauce. The wine and thyme add depth, while the cast iron skillet ensures that crispy texture we all love. Don't forget to preheat your skillet next time—cold cast iron will steal heat from your food and leave you with bland results.
Pro Tips For Making Chicken And Rice Cast Iron Skillet
- SEAR CHICKEN FIRST: Get that cast iron screaming hot—medium-high heat, not simmering—and cook the chicken thighs until they develop a deep golden crust before touching anything else. I used to rush this, and the final dish tasted flat; that crust locks in flavor and keeps the thighs juicy through the rice cooking.
- SWEAT ONIONS LOW: Once the chicken’s out of the pan, drop the heat to medium-low and let those onions caramelize slowly—no rushing. If you crank it up, they’ll burn before the garlic even gets fragrant, and you’ll end up with bitter bits instead of sweet depth.
- USE TWICE THE WINE: After deglazing with wine, don’t pour it all in at once. Add half, scrape up the browned bits, then add the rest. The first splash cuts through the heat, but the second ensures the rice absorbs enough liquid without turning mushy—trust me, your future self will notice.
- COVER WITH A LID: Once the rice hits the pan, slap that lid on tight and turn the heat down to low. If you leave it uncovered, the edges will dry out before the center cooks, and you’ll end up with a sad, uneven mess. (Yes, even if you’re impatient like me.)
Troubleshooting this recipe
Skillet Not Hot Enough
The most common issue is a skillet that isn't hot enough when you start searing. If your chicken isn't browning properly or the rice turns out mushy, your skillet needs more time to heat up.
Place your cast iron skillet on the stove over medium-high heat for at least 5-7 minutes before adding the chicken. You should see a thin layer of steam or even slight smoke when it's ready—this means it's hot enough to create that critical Maillard reaction for flavor. 🔥
Rice Turning Mushy
Overcooking or adding too much liquid are the usual culprits for mushy rice. Make sure you're using the exact 2 cups of chicken broth called for in the recipe—don't substitute with water or more broth.
If your rice looks like it needs extra liquid, add just 1-2 tablespoons of water at a time and let it absorb completely before adding more. Also, avoid lifting the lid during cooking—every time you peek, you release steam and add unnecessary moisture.
Chicken Too Dry
If your chicken ends up dry, it likely cooked too long or was cut too small. Stick to 1-inch pieces and remove the chicken when it reaches 165°F internal temperature—no need to wait for it to be fully cooked through later.
The residual heat in the skillet will finish cooking it gently while it rests. Another tip: don't overcrowd the skillet when searing. Cook the chicken in batches if needed to give each piece room to brown properly. 🍗
Uneven Cooking
Uneven cooking often happens when the heat isn't distributed properly. Make sure your skillet is placed on a burner that heats evenly—some stoves have hot spots. If you notice one side cooking faster, rotate the skillet halfway through cooking.
Also, stir the rice gently but frequently during the toasting phase to ensure even browning. For the simmering stage, keep the heat at low and maintain a gentle simmer—too high heat will cause the edges to burn before the center cooks.
Stuck-on Food
Cast iron develops a natural non-stick surface over time, but stuck-on food usually means the skillet wasn't properly preheated or seasoned. Before cooking, make sure your skillet is dry and hot. If food still sticks, you might need to re-season your cast iron.
After cooking, let the skillet cool slightly, then scrub off any stuck-on bits with a chainmail scrubber or coarse salt while it's still warm. A quick oil rub and bake at 450°F for 1 hour will restore its non-stick properties. 💪
Nutrition facts
Frequently asked questions
Can I use chicken breasts instead of thighs?
Chicken breasts work, but they're leaner and more prone to drying out. If using breasts, cut them into 1-inch cubes and cook them for just 3-4 minutes per side until golden—don't overcook! For extra moisture, add 1 tablespoon butter when returning the chicken to the skillet after searing. Thighs are ideal because their fat keeps them juicy during the long cooking time.
How do I make this dish vegetarian?
Swap the chicken for 1 lb of diced firm tofu or 1.5 cups of chickpeas. Press tofu to remove excess water, then pan-fry it until golden before adding to the skillet. Boost flavor with 1 teaspoon smoked paprika or 1/2 teaspoon cumin. For protein, add 1/2 cup of lentils to the rice during cooking.
Can I prepare this ahead of time?
Yes! This dish actually tastes better the next day. Cook as directed, then let it cool completely before storing in an airtight container in the fridge for up to 4 days. Reheat in the skillet over medium heat for 5-7 minutes, stirring occasionally and adding 1-2 tablespoons of water if needed. For extra crispy edges, broil for 2-3 minutes before serving.
What if I don't have white wine?
No problem! Use 1/2 cup chicken broth plus 1 tablespoon lemon juice or apple cider vinegar for acidity. For depth, add 1/2 teaspoon soy sauce or 1/4 teaspoon Worcestershire sauce. The key is balancing the flavors—don't skip the acid component, or the dish will taste flat.
How do I clean my cast iron skillet after this?
Let the skillet cool slightly, then rinse with hot water while scrubbing with a chainmail scrubber or coarse salt. Avoid soap—just a tiny amount of dish soap if absolutely necessary. Dry thoroughly over medium heat for 2-3 minutes, then rub with a thin layer of flaxseed or vegetable oil while warm. Store upside down on the stove or rack to prevent rust.