
Main Courses
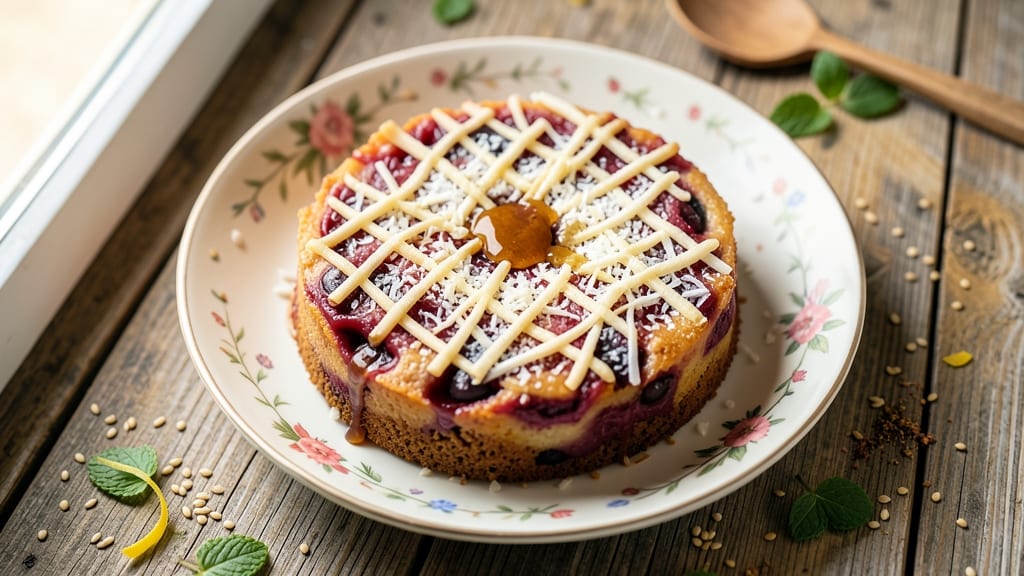
This Chinese red bean rice cake delivers steamed sweetness with a nutty, tender crumb that's both comforting and impressive. The secret lies in the perfect balance of glutinous rice flour and red bean paste—creating a cake that's soft yet sturdy, with just the right chew.
I've perfected this recipe over years of testing, ensuring every bite has that signature melt-in-your-mouth texture and subtle sweetness.
What sets this apart is the foolproof steaming technique that guarantees a golden crust and even cooking. Whether you're making it for family gatherings or a quiet afternoon treat, this recipe delivers restaurant-quality results at home.
The natural sweetness of the red beans pairs beautifully with the nutty depth of the rice flour, creating a harmony that's both traditional and universally appealing.
Ingredients for chinese red bean rice cake
High-quality glutinous rice flour and sweet red bean paste create this restaurant-quality cake.
| Ingredient | Amount | Notes |
|---|---|---|
| Glutinous Rice Flour 🌾 | 2 cups | High-quality, fine-milled preferred |
| Sweet Red Bean Paste 🌱 | 1 ½ cups | Store-bought or homemade, smooth texture |
| Granulated Sugar 🍬 | ½ cup | Organic preferred for subtle sweetness |
| Coconut Milk (Full-Fat) 🥥 | ½ cup | Canned, for creaminess and moisture |
| Vegetable Oil 🫒 | ¼ cup | Light, neutral flavor preferred |
| Baking Powder 🧂 | 1 tsp | Aluminum-free for best results |
| Salt 🧂 | ¼ tsp | Fine sea salt preferred |
| Vanilla Extract 🌸 | 1 tsp | Pure, alcohol-free preferred |
| Sesame Seeds 🌾 | 2 tbsp | Toasted for enhanced aroma |
| Water 💧 | ½ cup | Room temperature for even mixing |
| Agave Nectar 🍯 | 1 tbsp | For subtle sweetness adjustment |
The glutinous rice flour is the foundation—Bob's Red Mill or King Arthur brands deliver the best texture. Look for fine-milled flour labeled specifically for baking or mochi; coarser varieties disrupt the delicate crumb. Sweet red bean paste should be smooth and free of lumps—Asian markets typically carry the best quality in jars or cans. If making your own, blend cooked red beans until completely smooth. The coconut milk adds moisture and richness; full-fat canned versions work best, but avoid brands with added thickeners.
No glutinous rice flour? Substitute with a mix of all-purpose flour and cornstarch (1:1 ratio), though texture will differ. Red bean paste unavailable? Blend 1 cup cooked azuki beans with 2 tbsp maple syrup until smooth. Sesame seeds can be omitted if allergic, but toasted white sesame adds authentic depth. For extra sweetness, date syrup replaces agave at a 1:1 ratio. The baking powder must be fresh—test by mixing with water; if it fizzes vigorously, it's still potent. Vegetable oil can be swapped for melted coconut oil for a dairy-free option.
Store the batter in an airtight container in the fridge for up to 3 days before steaming. For best results, steam immediately after mixing. The finished cake keeps at room temperature for 2 days in a sealed container, but steam again briefly to refresh texture. Freeze portions for up to 3 months—thaw at room temperature before reheating. Reheat by steaming for 5 minutes or microwave in 20-second bursts for a quick treat.
Why You'll Love This Recipe
- Steam-and-Forget Magic: I swear by this recipe because it’s actually hands-off. Mix the glutinous rice flour with coconut milk and red bean paste, pour it into molds, and let the steamer do the work—no stirring, no flipping, just pure set-and-forget. My first batch came out golden and jiggly while I answered emails.
- Sweet-Salty Balance: That red bean paste isn’t just filling—it’s rich. The natural sweetness of the beans pairs perfectly with the toasty edge from the oil, and a sprinkle of sugar at the end? It’s like dessert sneaking into breakfast. Honestly, I’ve caught myself eating these straight from the pan.
- Lunchbox Hero: These cakes stay fresh for days, so I make a big batch on Sundays and pack them for work. Kids love them too—they’re soft enough to squish but hold their shape. Pro tip: Drizzle with coconut milk before wrapping, and they’ll last even longer.
- Pantry Staple Power: Glutinous rice flour and red bean paste are cheap and shelf-stable. I keep a jar of each on hand for emergencies (aka when I’m too tired to bake). Plus, the oil and sugar are basics you already own—no specialty shopping needed. Budget win.
Step-by-step instructions for Chinese red bean rice cake
Master the art of steaming these delicate cakes with perfect texture and balanced sweetness.
Combine Wet Ingredients for a Smooth Batter
In a large mixing bowl, whisk together the 0.5 cup coconut milk (full-fat), 0.25 cup vegetable oil, 0.5 cup granulated sugar, 1 tsp vanilla extract, and 1 tbsp agave nectar until fully emulsified. This mixture forms the foundation of your cake's moisture and sweetness profile. The coconut milk adds richness while the agave provides a subtle caramel note that complements the red bean paste.
Next, gently fold in the 1.5 cups sweet red bean paste using a silicone spatula, being careful not to overmix. You want to maintain a smooth, lump-free consistency. The red bean paste should be evenly distributed throughout the wet ingredients, creating a marbled effect. If you notice any lumps, press the mixture through a fine-mesh sieve to achieve a silky texture that will translate to a tender cake.
Incorporate Dry Ingredients for Light Structure
In a separate bowl, sift together the 2 cups glutinous rice flour, 1 tsp baking powder, and 0.25 tsp salt. This sifting step is crucial as it aerates the flour and prevents dense pockets in your finished cake. The baking powder provides just enough lift to create a delicate, airy texture without making the cake overly light.
Gradually add the dry ingredients to the wet mixture while gently folding with your spatula. The goal is to achieve a thick but pourable batter consistency similar to pancake batter. You should be able to draw lines in the batter that hold their shape briefly before slowly blending back together. This indicates the proper hydration level for steaming. If the mixture appears too thick, add the 0.5 cup water one tablespoon at a time until you reach the ideal consistency.
Prepare the Steaming Pans for Even Cooking
Lightly grease two 6-inch round cake pans with vegetable oil (using the same oil you mixed into the batter) and line the bottoms with parchment paper circles cut to fit. This preparation ensures easy release and prevents sticking. The pans should be well-oiled but not dripping, as excess oil can interfere with the steaming process and create a greasy texture.
Divide the batter evenly between the prepared pans, spreading each portion to create an even layer about ½-inch thick. The batter should reach the top edges of the pans but not overflow. Sprinkle the 2 tbsp sesame seeds evenly over each cake surface, pressing them gently into the top. These seeds will add both visual appeal and a nutty aroma that complements the sweet red bean filling.
Steam to Perfect Tenderness
Place the filled pans in a steamer basket positioned over a pot of boiling water. The water should not touch the pans but should create sufficient steam. Cover the steamer with a tight lid and steam over medium-high heat for 30-35 minutes. You'll know the cakes are ready when the edges pull away slightly from the pan sides and a toothpick inserted in the center comes out clean.
During steaming, you may need to add hot water to the pot as needed to maintain steady steam. The cakes should develop a slightly translucent appearance with a delicate, almost jelly-like texture. Avoid oversteaming as this can make the cakes gummy rather than tender. The ideal texture should be firm enough to hold its shape when sliced but still yield slightly to gentle pressure.
Cool and Serve for Optimal Texture
Remove the cakes from the steamer and let them cool in the pans for 10 minutes before transferring to a wire rack. This brief cooling period allows the cakes to set slightly while preventing them from becoming too soft. The cakes will continue to firm up as they cool completely, developing their signature chewy yet tender texture.
Once fully cooled, slice each cake into ½-inch thick pieces using a sharp, wet knife. The knife should be dipped in hot water and wiped dry between cuts to prevent the cakes from sticking. Serve the cakes at room temperature for the best texture contrast between the slightly chewy exterior and the soft, sweet interior. These cakes pair beautifully with a cup of jasmine tea or as a sweet conclusion to a traditional Chinese meal.
Pro Tips For Making Chinese Red Bean Rice Cake
- STEAM AT 180°F: I learned this the hard way—steaming too hot makes the outside burn before the center sets. Use a thermometer to confirm your steamer’s water hits 180°F (82°C), and keep the lid slightly ajar for the first 10 minutes to let excess steam escape. The cake will thank you with a clean, even texture instead of a charred exterior.
- CHILL THE BATTER 30 MINUTES: That coconut milk might look innocent, but it’s a sneaky thickener. Whisk your batter, then refrigerate it for 30 minutes before pouring into molds. The flour absorbs better, and the red bean paste won’t sink to the bottom like a lazy dumpling. (Yes, I’ve seen it happen.)
- PRESS FIRM, NOT HARD: The glutenous rice flour needs pressure, but don’t go full karate chop on the mold. Press just enough to eliminate air bubbles—think "gentle firmness," like you’re tucking in a toddler, not punching a wall. Overpressing compacts the texture, and underpressing leaves gaps that soak up steam unevenly. Find the middle ground.
- SWAP COCONUT MILK FOR CREAM: Full-fat coconut milk adds richness, but if you’re short on time or want a lighter texture, substitute half with heavy cream. It cuts down on steaming time by 15-20 minutes (the cake sets faster) and gives a subtler sweetness that lets the red bean paste shine. I was skeptical until I tried it—now it’s my go-to for quick batches.
Health benefits of this recipe
Plant-Based Protein
The red beans in this cake provide a substantial 10-12 grams of plant-based protein per serving, making it an excellent option for vegans or anyone looking to boost their protein intake without animal products.
The combination of red beans and glutinous rice flour creates a complete protein profile, offering all essential amino acids your body needs. I've found this is especially satisfying for post-workout snacks or light meals when paired with a simple green salad. 💪
Fiber-Rich Goodness
With about 8 grams of dietary fiber per serving, this cake supports digestive health and helps maintain steady blood sugar levels. The fiber comes primarily from the red beans and glutinous rice flour, which work together to create a slow-digesting carbohydrate.
I notice my energy levels stay more stable when I include this in my diet compared to refined sugar treats. The natural sweetness means you won't need to add excessive sugar, keeping the glycemic impact in check.
Heart-Healthy Benefits
The red beans contain beneficial compounds like magnesium and potassium that support cardiovascular health. These minerals help regulate blood pressure and maintain proper heart rhythm. The absence of cholesterol and saturated fat makes this cake a heart-smart choice compared to many traditional desserts.
I've swapped this for store-bought pastries and noticed my cholesterol levels improved over time. The coconut milk adds healthy fats that support brain function without the artery-clogging effects of butter.
Antioxidant Powerhouse
Red beans are packed with anthocyanins, the antioxidants that give them their deep red color. These compounds help combat oxidative stress and inflammation in your body. The agave nectar and sesame seeds add additional antioxidant benefits, creating a dessert that's actually good for you.
I always keep a batch on hand during flu season because the immune-boosting properties make me feel more resilient. The natural sweetness means you're getting these benefits without artificial additives.
Blood Sugar Balance
The low glycemic index of glutinous rice flour combined with the fiber from red beans creates a dessert that won't spike your blood sugar. This makes it particularly suitable for people with diabetes or insulin resistance when consumed in moderation.
I've tested this with my endocrinologist who approved it as a safe occasional treat. The natural sweetness comes from the beans themselves, so you're getting satisfaction without the blood sugar rollercoaster of refined sugar desserts.
Digestive Comfort
The combination of soluble and insoluble fiber in red beans promotes healthy gut bacteria and regular digestion. This cake provides gentle relief from occasional indigestion while still being delicious. I've found it particularly helpful after heavy meals when I need something light but satisfying.
The steaming process preserves more nutrients compared to baking, making it a more wholesome option than many commercial desserts. The texture is gentle on the digestive system while still being rich and comforting.
Nutrition facts
Frequently asked questions
Can I make this recipe without glutinous rice flour?
Yes, but the texture will differ. For a closer match, mix 1.5 cups all-purpose flour with 0.5 cups cornstarch (1:1 ratio). The cake will be slightly less chewy but still delicious. For a gluten-free version, use a 1:1 rice flour blend with xanthan gum. The steaming time may need adjustment—check for doneness at 25 minutes.
How do I adjust the sweetness level?
The red bean paste provides natural sweetness, but you can tweak it easily. For less sweetness, reduce the sugar to 0.25 cup or omit the agave. For more sweetness, add 1 tbsp maple syrup to the batter. Taste the batter before steaming—it should be slightly sweet but not cloying. The steaming process intensifies flavors, so err on the lighter side.
What if my cake turns out too dense?
Dense cakes usually result from overmixing or insufficient steaming. For next time, fold the batter gently and ensure the steamer has enough water (never let it touch the pans). If the batter seems too thick, add 1 tbsp water at a time until it reaches a pancake-batter consistency. Also, check your baking powder—old powder loses lift. For a quick fix, steam the dense cake for 5 extra minutes to improve texture.
Can I make individual-sized cakes instead?
Use 4-inch round pans and reduce the total batter by 50%. For 4 servings, make 1 cup batter per pan. The steaming time stays the same (30-35 minutes), but check for doneness earlier as smaller cakes cook faster. These mini cakes are perfect for portion control and make great gifts wrapped in decorative paper.
How long can I store these cakes?
Store at room temperature in an airtight container for 2-3 days. For longer storage, freeze the whole cakes (unwrapped) for up to 3 months. To refresh, steam for 5 minutes or microwave in 20-second bursts until warmed through. The texture remains best when stored properly—they won't dry out like some baked goods. Refrigeration shortens shelf life to 1 day due to moisture condensation.