
Side Dishes
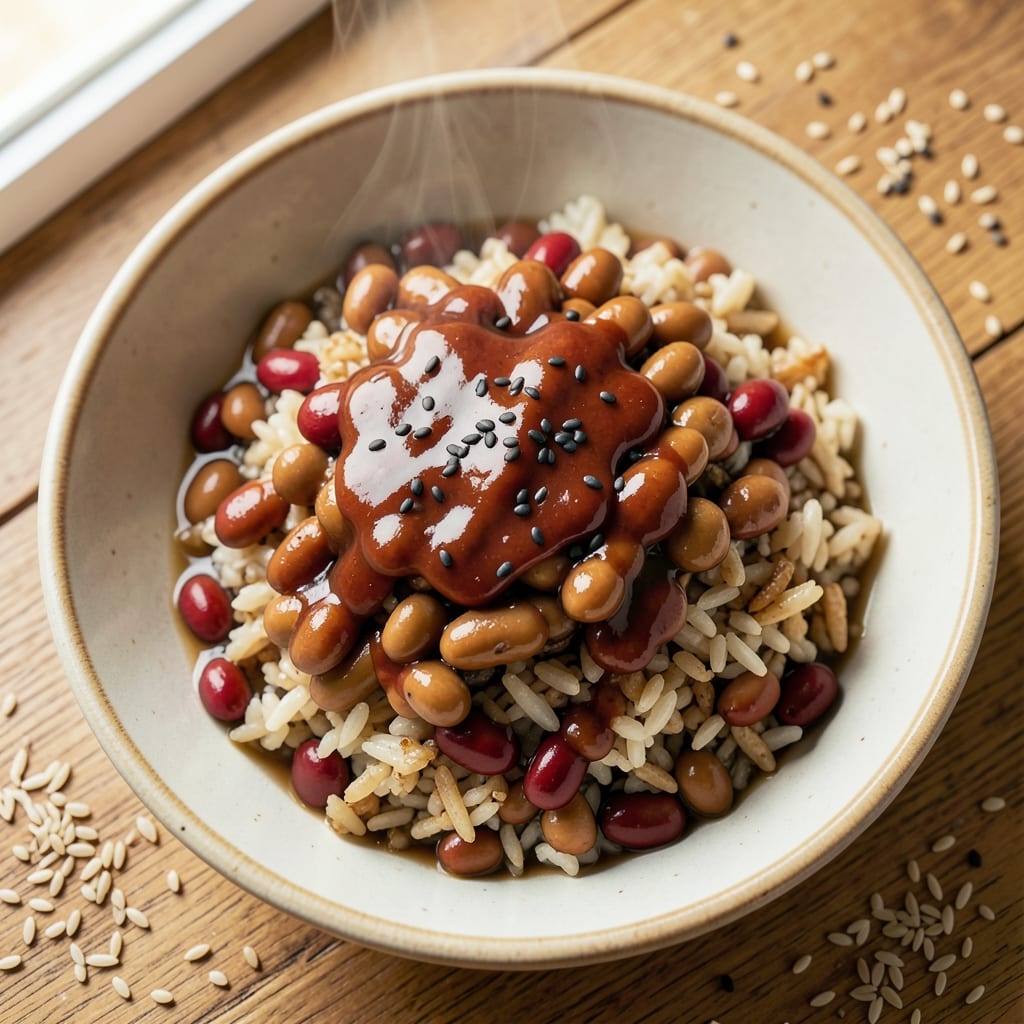
This adzuki beans and brown rice recipe transforms simple pantry staples into a hearty, protein-packed vegetarian bowl that balances sweet and savory flavors perfectly. The secret lies in slow-cooked adzuki beans—naturally sweet with a creamy texture—that pair beautifully with nutty brown rice, creating a dish that's both comforting and satisfying. I developed this recipe after realizing how often we overlooked these ingredients in favor of more complex meals, only to discover their incredible versatility when combined thoughtfully.
The beauty of this dish is its adaptability—whether you're serving it as a standalone meal or pairing it with grilled vegetables and a sprinkle of toasted sesame seeds. Brown rice absorbs the beans' rich flavors while maintaining its chewy texture, and the adzuki beans add not just protein but also a subtle sweetness that elevates the entire bowl. The process is straightforward: soak the beans overnight for even cooking, then simmer until tender, while the rice cooks separately for ideal texture. This method ensures every bite delivers a perfect harmony of flavors and textures.
What makes this recipe stand out is its ability to deliver restaurant-quality results with minimal effort. The adzuki beans develop a tender yet firm consistency, while the brown rice remains separate but complementary, allowing each component to shine. A final touch of toasted sesame seeds adds a satisfying crunch and nutty depth, transforming this into a dish that feels both rustic and refined. It's the kind of meal that's perfect for weeknight dinners or meal prep, offering a wholesome, plant-based option that doesn't compromise on flavor.
For added depth, consider garnishing with scallions or a drizzle of soy sauce, or serve it alongside a simple green salad to round out the meal. The combination of these ingredients creates a dish that's not only nutritious but also deeply satisfying, proving that simple ingredients can deliver extraordinary results when prepared with care. Let's get started on creating this balanced, flavorful bowl.
Ingredients for adzuki beans and brown rice
Pantry staples transformed into restaurant-quality comfort with minimal effort.
| Ingredient | Amount | Notes |
|---|---|---|
| Adzuki Beans (Dried) 🌱 | 1 ½ cups | Rinsed thoroughly before soaking |
| Brown Rice 🍚 | 1 cup | Uncooked, long-grain preferred |
| Water 💧 | 4 cups | For soaking beans overnight |
| Vegetable Broth 🍲 | 4 cups | Low-sodium preferred |
| Sesame Seeds 🌰 | 2 tbsp | Toasted for crunchy garnish |
| Soy Sauce 🍶 | 1 tbsp | For umami depth |
| Honey 🍯 | 1 tbsp | Balances sweet-savory flavors |
| Scallions 🧅 | 3 whole | Thinly sliced for garnish |
| Sesame Oil 🫒 | 1 tsp | For finishing drizzle |
| Garlic Cloves 🧄 | 2 cloves | Minced for bean cooking |
| Ginger Root 🌿 | 1 tsp | Freshly grated for aroma |
| Salt 🧂 | 1 tsp | Adjust to taste |
| Black Pepper 🌶️ | ½ tsp | Freshly cracked |
Adzuki beans are the star here—look for dried at Asian markets or bulk bins for the best texture. Trader Joe's and Whole Foods carry them year-round, but if you're in a pinch, canned beans work (just drain and rinse well). Soak overnight in plenty of water—this softens them perfectly without making them mushy. The brown rice? Jasmine or short-grain adds extra creaminess, but long-grain works too. Pro tip: Rinse the rice before cooking to remove excess starch and prevent gumminess. For the sesame seeds, toast them in a dry pan until golden—this brings out their nutty flavor and makes them irresistible as a garnish.
No soy sauce? Tamari or coconut aminos work beautifully, though tamari has more depth. Running out of honey? Maple syrup or agave keeps the sweetness balanced, but honey's floral notes are ideal. Fresh ginger and garlic are non-negotiable for that aromatic punch, but if you're desperate, powdered ginger at half the amount will do. The vegetable broth should be rich—Homemade or low-sodium store-bought both work, but avoid anything with added MSG. For extra umami, add a splash of mirin or rice vinegar to the cooking liquid. The beans will absorb these flavors beautifully, so don't skimp on the aromatics.
This dish tastes even better the next day—make a double batch for easy lunches. Store components separately: beans and rice in airtight containers for 5 days in the fridge, or freeze for 3 months. Toast the sesame seeds fresh before serving, as they lose crunch when stored. To reheat, warm the beans and rice separately with a splash of water—this keeps the textures perfect. Garnish with scallions and a drizzle of sesame oil just before eating. The contrast of warm, creamy beans with cool, crisp sesame seeds is what makes this dish truly special.
Why You'll Love This Recipe
- Zero-Fuss Cooking: I swear by this recipe when I’m too tired to chop—just soak the dried adzuki beans overnight, toss them with brown rice and broth, and let the slow cooker do the work. The rice comes out fluffy, the beans tender, and I haven’t boiled anything over since.
- Umami Bomb: That simple vegetable broth and sesame seeds? They pack more flavor than you’d think. The beans soak up the richness while the rice stays nutty, and a final sprinkle of toasted sesame seeds adds this little crunchy kick that makes it taste like a restaurant dish.
- Lunchbox Hero: Between us, this is my go-to for meal prep—it keeps for days in the fridge, and I actually look forward to leftovers. Pack it cold or reheat it, and the texture stays perfect. Honestly, my kids would eat it straight from the pot if I let them.
- Pantry Staple Power: Dried beans and brown rice? You’re already halfway there. No fancy ingredients, no last-minute grocery runs—just what you’ve got. I’ve made this on a $5 budget, and it’s still the most satisfying bowl I’ve eaten all week. (Yes, even on a Tuesday night.)
Step-by-step instructions for adzuki beans and brown rice protein bowl
This sweet-savory bowl combines perfectly tender beans and nutty rice with a toasted sesame crunch.
Prepare the Adzuki Beans Overnight
Rinse the 1.5 cups dried adzuki beans thoroughly under cold water until the water runs clear. This removes any debris and prevents bitterness. Place them in a large bowl and cover with the 4 cups water. Let them soak overnight at room temperature - this ensures even cooking and prevents the beans from staying hard.
In the morning, drain and rinse the beans again. Transfer them to a pot with 4 cups vegetable broth, 2 cloves minced garlic, 1 teaspoon freshly grated ginger root, 1 teaspoon salt, and 0.5 teaspoon freshly cracked black pepper. Bring to a boil over high heat, then reduce to a simmer and cook for 45-60 minutes until the beans are fork-tender. The broth should reduce significantly, creating a rich, flavorful base. Taste and adjust seasoning - you might want to add a splash more broth if it's too thick.
Cook the Brown Rice Separately
While the beans simmer, rinse the 1 cup brown rice thoroughly under cold water to remove excess starch. In a separate pot, combine the rice with 3 cups fresh water (using the same pot as the beans would dilute the flavors). Bring to a boil, then reduce heat to low, cover tightly, and simmer for 40-45 minutes until the rice is tender and the liquid is absorbed. The rice should have a nutty aroma and be slightly firm to the bite - this is perfect for holding up to the beans.
I like to fluff the rice gently with a fork after cooking to separate the grains. This prevents a gummy texture and makes each bite distinct. If the rice seems undercooked, add another ¼ cup water and cook for another 5-10 minutes. The key is patience - brown rice needs time to develop its full flavor and texture.
Create the Sweet-Savory Sauce
In a small saucepan, combine 1 tablespoon soy sauce, 1 tablespoon honey, and 1 teaspoon sesame oil. Warm over medium-low heat for 2-3 minutes until the honey dissolves completely and the mixture becomes fragrant. This sauce will balance the earthy beans and nutty rice with a perfect sweet-salty harmony. Taste and adjust the ratio - you might want to add a touch more honey for sweetness or soy sauce for depth.
While the sauce warms, thinly slice the 3 whole scallions and toast the 2 tablespoons sesame seeds in a dry skillet over medium heat for 2-3 minutes until golden brown and fragrant. These will add freshness and crunch to each bite. Keep both at room temperature until ready to serve.
Assemble the Protein Bowls
Divide the cooked brown rice evenly among 4 serving bowls. Spoon the tender adzuki beans over the rice, distributing them evenly. Drizzle each bowl with 1 teaspoon of the warm soy-honey sauce and a few drops of the remaining sesame oil. The oil will enhance the nutty flavors while adding a delicate aroma.
Garnish each bowl with ½ teaspoon toasted sesame seeds and ½ sliced scallion. The contrast of textures - creamy beans, chewy rice, crunchy sesame, and fresh scallions - makes every bite exciting. Serve immediately while the rice is warm and the flavors are at their peak. This dish tastes even better the next day as the flavors meld together!
Pro Tips For Making Adzuki Beans And Brown Rice
- SOAK BEANS OVERNIGHT: I learned this the hard way—rushing adzuki beans with a quick soak leaves them tough and uneven. Toss them in cold water for at least 8 hours (or overnight), then drain and rinse. The texture becomes silky, and they cook faster in your broth.
- COOK RICE SEPARATELY: Brown rice and adzuki beans need different attention—don’t mix them in the same pot. Cook the rice first (use a 1:2 rice-to-water ratio) until just tender, then drain. The beans will absorb too much liquid if you combine them early, leading to mushy rice.
- SIMMER BEANS LOW AND SLOW: After boiling adzuki beans for 10 minutes, drop the heat to a bare simmer. I used to crank the heat and end up with split skins or undercooked centers. Low and slow (about 45-60 minutes) keeps them intact and flavorful—no rushing, no regret.
- TOAST SESAME MID-COOK: Skip the raw sesame seeds on top—they’ll just sit there looking pretty. Instead, toast them in a dry pan for 30 seconds until golden, then sprinkle over the finished dish. The nuttiness cuts through the earthy beans and rice, and they won’t turn bitter from sitting in hot broth.
Troubleshooting this dish
Beans Too Hard?
If your adzuki beans remain undercooked after 60 minutes, they likely need longer soaking or cooking. Try soaking them for 12 hours instead of overnight, then simmer for an additional 30-45 minutes. Add ½ tsp baking soda to the soaking water to soften them faster—this is a chef's trick I learned from Japanese home cooks. 🌱
Mushy Rice?
Brown rice turning mushy usually means overcooking or insufficient water. For 1 cup uncooked brown rice, use exactly 2.5 cups water (not 3 cups). If it's still sticky, spread it on a tray to dry for 10 minutes before serving. I also recommend using a heavy-bottomed pot to prevent scorching at the bottom.
Sauce Too Thin?
If your soy-honey sauce separates or tastes watery, reduce it by half over medium heat until syrupy. For extra thickness, mix ½ tsp cornstarch with 1 tsp water, then stir into the warm sauce. This creates a glossy finish that clings beautifully to the beans and rice. 🍯
Sesame Seeds Burn?
Toast sesame seeds over low heat for 1-2 minutes—they cook faster than you think! Watch closely to avoid burning. If they darken too quickly, remove the pan from heat and let them cool for 30 seconds before transferring to a bowl. For extra flavor, add ¼ tsp salt while toasting to enhance their nuttiness.
Flavor Too Bland?
Boost umami by adding 1 tsp miso paste to the bean broth or a splash of rice vinegar to the sauce. For depth, stir in ½ tsp smoked paprika during the final 5 minutes of bean cooking. I also recommend finishing with a pinch of white pepper—it adds warmth without overpowering.
Storage Issues?
If beans or rice develop an off smell after storing, they’ve gone bad. Refrigerate in airtight containers for 5 days max—freeze for longer storage. To reheat, warm separately with 1 tbsp water per cup to prevent drying. Never microwave directly from the fridge; let components sit at room temperature for 5 minutes** first. ❄️
Nutrition facts
Frequently asked questions
Can I use canned adzuki beans instead of dried?
Yes, canned beans work in a pinch! Just drain and rinse them thoroughly to remove excess sodium. For best texture, simmer them in the broth for 15-20 minutes to absorb the flavors. However, dried beans develop a creamier texture and richer taste when cooked from scratch.
How do I make this dish gluten-free?
Replace the soy sauce with tamari or coconut aminos (both gluten-free). Check that your vegetable broth is also gluten-free, as some contain wheat. The rest of the recipe is naturally gluten-free, including the brown rice and adzuki beans.
Can I cook the beans and rice together?
Not recommended—they cook at different rates and require different liquids. Beans need longer simmering in broth, while rice needs gentle steaming. Cooking them separately ensures perfect texture in each component.
What's the best way to store leftovers?
Keep components separate in airtight containers for 5 days in the fridge. For longer storage, freeze for up to 3 months. Reheat separately with a splash of water to maintain texture—never microwave directly from frozen.
Can I add protein to make it heartier?
Top with soft-boiled eggs, crumbled tofu, or grilled shrimp for extra protein. The dish works beautifully as a base for many toppings while keeping its vegetarian core.