
Main Courses
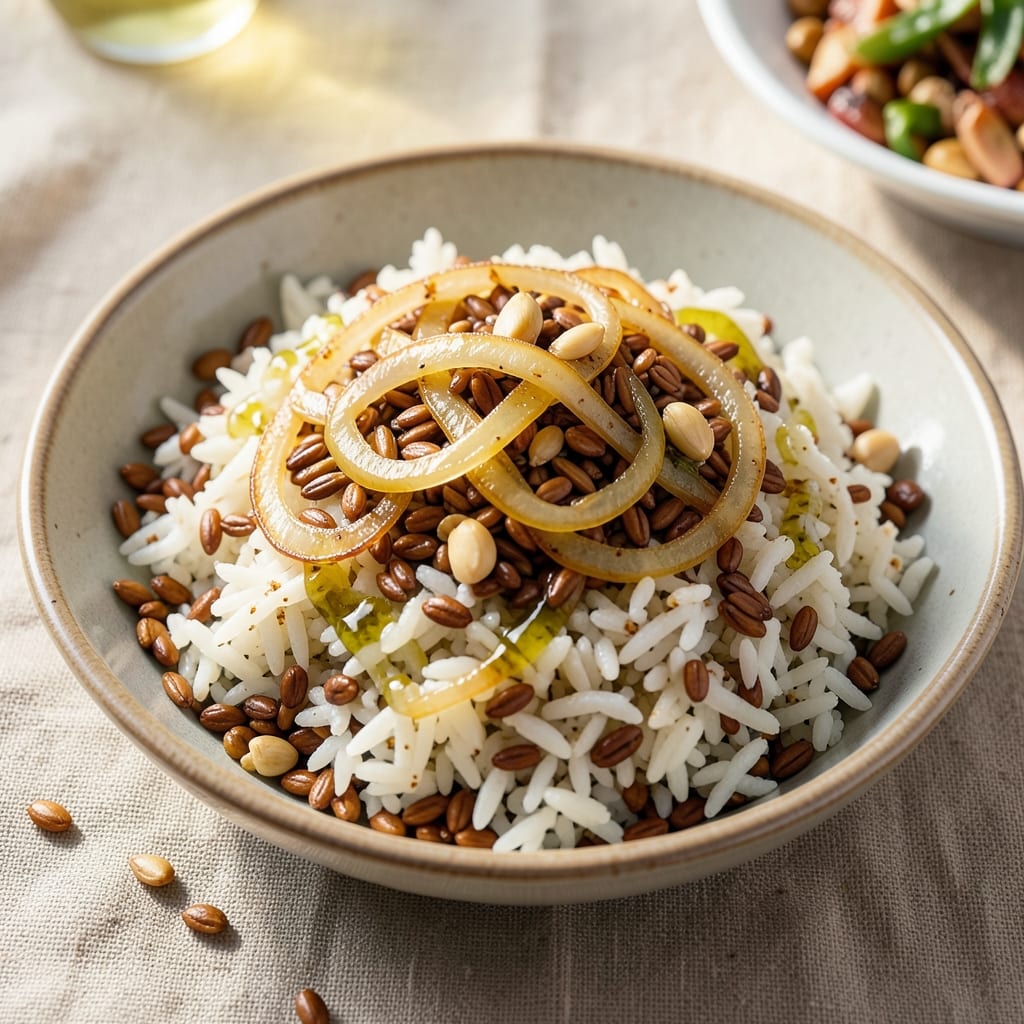
This amaranth and rice recipe transforms two powerhouse ingredients into a complete, protein-rich dish that’s nutty, earthy, and satisfying. The secret lies in toasting the amaranth first—this step unlocks its deep, toasty flavor and prevents mushiness, while the rice absorbs the aromatic blend beautifully. What makes this recipe stand out is its versatility: serve it as a hearty side, a base for grain bowls, or even a standalone main with toppings like avocado or roasted vegetables.
The cooking process is straightforward but intentional: toast the amaranth until fragrant, then simmer it with rice in a flavorful broth until tender and fluffy. The result is a dish that’s not only visually appealing with its golden-brown specks of amaranth but also packed with plant-based protein and fiber. It’s the kind of recipe that feels both comforting and nutrient-dense, perfect for meal preppers or anyone looking to elevate simple grains.
By the end, you’ll have a dish that’s naturally gluten-free, vegan-friendly, and packed with texture—crispy amaranth bits contrast with the soft, fluffy rice. The nutty flavor profile pairs well with everything from bold spices to fresh herbs, making it adaptable to any cuisine. Whether you’re cooking for one or feeding a crowd, this recipe delivers a restaurant-quality result with minimal effort.
Pair it with roasted vegetables, a drizzle of tahini, or a sprinkle of sesame seeds for extra depth. The possibilities are endless, but the foundation—this simple, flavorful amaranth and rice blend—is foolproof. Ready to transform your next meal?
Ingredients for amaranth rice
Toasted amaranth meets fluffy rice in this protein-rich, gluten-free dish perfect for meal prep or elegant sides.
| Ingredient | Amount | Notes |
|---|---|---|
| Amaranth Grains 🌾 | ½ cup | Uncooked, rinsed thoroughly |
| Long-Grain White Rice 🍚 | 1 cup | Jasmine or basmati preferred |
| Vegetable Broth 💧 | 2 cups | Low-sodium preferred |
| Extra-Virgin Olive Oil 🫒 | 2 tbsp | For toasting amaranth |
| Yellow Onion 🧅 | 1 whole | Diced finely for even cooking |
| Garlic Cloves 🧄 | 3 cloves | Minced for aromatic depth |
| Ground Cumin 🌿 | ½ tsp | Toasted for enhanced flavor |
| Smoked Paprika 🌶️ | ½ tsp | Adds subtle smokiness |
| Turmeric Powder 🌿 | ¼ tsp | For vibrant color |
| Salt 🧂 | ¾ tsp | Diamond Crystal preferred |
| Fresh Cilantro 🌿 | ¼ cup | Chopped, for garnish |
| Lemon Juice 🍋 | 1 tbsp | Freshly squeezed |
| Sesame Seeds 🌰 | 1 tsp | Toasted for crunch |
Amaranth is the star here—buy it from bulk bins at Whole Foods or natural grocery stores for the freshest grains. The golden variety has a slightly sweeter, nuttier flavor than black or red amaranth. Toasting it in olive oil until fragrant is non-negotiable; this step develops its signature toasty notes and prevents mushiness. For the rice, jasmine or basmati absorbs flavors beautifully, but any long-grain variety works. The vegetable broth should be low-sodium—you'll be adding extra salt later, and you don't want to overdo it. Onions and garlic? Fresh is always better, but frozen diced sets work in a pinch if you're short on time.
No amaranth? Quinoa at a 1:2 ratio works as a substitute, though the texture will differ slightly. Short on vegetable broth? Water plus 1 tsp bouillon powder gets you close—just remember to reduce the salt. Fresh cilantro missing? Dried cilantro or parsley at half the amount will add a similar brightness. The spices are where you can get creative: swap smoked paprika for regular paprika plus a pinch of liquid smoke if you're feeling adventurous. For the sesame seeds, toast them in a dry pan for 30 seconds to bring out their nutty flavor—don't skip this step if you want that satisfying crunch.
This dish reheats beautifully—store in an airtight container for up to 5 days in the fridge, or freeze portions for 3 months. The amaranth holds its texture better than most grains when reheated, making this perfect for meal prep. For serving, I like to keep the sesame seeds and lemon juice separate until ready to eat so they stay fresh and crisp. Double the batch and freeze half—you'll thank yourself later when you're pulling together a quick weeknight dinner. The flavors actually deepen overnight, so leftovers often taste even better than the first serving.
Why You'll Love This Recipe
- I swear by the 1: 2 amaranth-to-rice mix—it’s the magic number for texture. No measuring cups, no guesswork: just dump, stir, and let the broth do the work while you chop veggies for the rest of dinner.
- No-Fuss Ratio: I swear by the 1:2 amaranth-to-rice mix—it’s the magic number for texture. No measuring cups, no guesswork: just dump, stir, and let the broth do the work while you chop veggies for the rest of dinner.
- Earthy Umami Bomb: That toasted amaranth? It’s like a nutty, popcorn-like crunch mixed with the soft rice—plus the onion caramelizes in the olive oil until it’s sweet and jammy. Honestly, the first bite makes you wonder why you’ve never done this before.
- Lunchbox Hero: Between us, this keeps perfectly for 4 days in the fridge. Pack it cold for work or reheat it with a splash of broth—it’s the only grain bowl that doesn’t turn sad and mushy by Wednesday.
Step-by-step instructions for cooking amaranth and rice
Transform simple grains into a complex, flavorful dish with this precise method.
Toast the Amaranth for Depth of Flavor
Heat the 2 tablespoons extra-virgin olive oil in a medium saucepan over medium heat. Add the ½ cup amaranth grains, stirring constantly for 3-4 minutes until they become fragrant and begin to pop like tiny kernels of corn. This toasting step enhances their nutty flavor and prevents them from becoming mushy during cooking.
Watch the amaranth closely—it should turn a deeper golden color and develop an earthy aroma. Once toasted, remove the pan from heat and set aside. The amaranth will continue cooking later, so don't overcook it now. This step is crucial; under-toasted amaranth will lack flavor, while over-toasted grains can become bitter.
Sauté Onion and Garlic for Aromatic Foundation
In the same saucepan (no need to clean it), add the finely diced yellow onion and cook over medium heat for 5-6 minutes until softened and translucent. Add the minced garlic cloves and cook for an additional 30 seconds until fragrant but not browned.
This step builds the flavor base for your dish. The onions should release their moisture and caramelize slightly at the edges, creating a sweet contrast to the earthy amaranth. If the onions begin to brown too quickly, reduce the heat slightly. The garlic should infuse its aroma without burning—burnt garlic will make the entire dish taste bitter.
Add Spices and Rice for Even Cooking
Stir in the ½ teaspoon ground cumin, ½ teaspoon smoked paprika, and ¼ teaspoon turmeric powder, cooking for 30 seconds until the spices are fragrant. Add the 1 cup long-grain white rice and stir to coat the grains evenly with the spices and onion mixture.
The spices should bloom and fill your kitchen with their warm, earthy aromas. This is where the magic happens—properly toasting the spices before adding liquid ensures they release their full flavor. Stir frequently during the first minute to prevent the rice from sticking to the bottom of the pan, which can lead to uneven cooking.
Simmer with Broth for Perfect Texture
Pour in the 2 cups vegetable broth and bring the mixture to a gentle boil. Once boiling, reduce heat to low and cover the saucepan with a tight-fitting lid. Simmer for 20 minutes without disturbing the pan. The amaranth and rice will absorb the liquid gradually, creating a fluffy yet cohesive texture.
During this time, the grains should cook evenly and develop a tender yet slightly chewy bite. The amaranth will soften but retain its distinct texture, while the rice will become light and fluffy. Avoid lifting the lid to check on the progress—steam is essential for even cooking, and each peek can add 5 minutes to your cooking time.
Finish with Acid and Garnish for Brightness
Once the cooking time is complete, remove the pan from heat and let it sit covered for 5 minutes. Stir in the 1 tablespoon lemon juice and ½ teaspoon salt, then fluff the grains gently with a fork. Transfer to a serving dish and garnish with the ¼ cup chopped fresh cilantro and 1 teaspoon toasted sesame seeds.
The lemon juice brightens the earthy flavors, cutting through the richness of the amaranth and rice. The sesame seeds add a delightful crunch, while the cilantro provides a fresh contrast. Serve immediately while the grains are still warm, allowing the aromas to fully develop. This dish pairs beautifully with grilled proteins or as a standalone vegetarian bowl.
Pro Tips For Making Amaranth Rice
- Toast the Amaranth First: Amaranth needs a quick sear—2-3 minutes in olive oil on medium-high—before adding rice. Skipping this makes the grains gummy; toasting brings out their nutty flavor and keeps them distinct in the dish.
- Soak the Amaranth Overnight: If you’re short on time, at least rinse it well, but soaking 4-6 hours (or overnight) cuts cooking time by half and prevents a mushy texture. I learned this the hard way after a 45-minute simmer left me with gluey amaranth.
- Use a 1:2 Ratio for Rice: Stick to 1 part amaranth to 2 parts rice—any more amaranth and the dish turns into a porridge. This balance keeps the texture light and the flavors harmonized without one ingredient overpowering the other.
- Sauté the Onion Low and Slow: Cook the onion in olive oil on low heat until deeply caramelized—about 10 minutes—before adding broth. High heat burns it; patience here builds flavor that carries through the whole dish. (Yes, even if you’re impatient like me.)
Common mistakes when making great amaranth rice
Skipping the Toast
I can’t stress this enough—toasting the amaranth is non-negotiable if you want that signature nutty flavor and perfect texture. Skipping this step results in bland, mushy grains that lack depth. The amaranth needs that 3-4 minute toast in olive oil to develop its full potential. If you rush or skip it, your dish will taste underwhelming and lack the satisfying crunch from the toasted bits. 🌾
Using Too Much Liquid
Adding the full 2 cups of broth at once might seem safe, but it can lead to a soggy mess. The amaranth absorbs liquid differently than rice, so if you overdo it, you’ll end up with a gluey, unappetizing texture. Instead, start with 1½ cups of broth and add the remaining ½ cup only if the grains aren’t tender after 15 minutes of simmering. This ensures the amaranth holds its shape while the rice stays fluffy.
Uneven Cooking from Peeking
Every time you lift the lid to check on your amaranth-rice mix, you’re adding 2-5 extra minutes to your cooking time. The steam escaping causes the grains to dry out unevenly, leading to some parts being undercooked and others overdone. Trust the 20-minute simmer time and resist the urge to peek. If you’re worried, use a fork test—gently poke the grains; they should be tender but still slightly firm.
Ignoring the Resting Time
After cooking, letting the grains rest for 5 minutes covered is just as important as the cooking process itself. This allows the residual heat to finish cooking the grains evenly and redistribute the moisture. Skipping this step can leave you with uneven textures—some grains may be firm while others are mushy. It’s also the perfect time to stir in that lemon juice and salt for maximum flavor integration. 💫
Overcrowding the Pan
Using a pan that’s too small forces the grains to steam instead of toast and cook properly. The amaranth and rice need room to expand and develop their textures. If your pan is crowded, the grains will clump together, leading to uneven cooking and a pasty consistency. Use a medium saucepan—one that gives the grains at least 1 inch of space—to ensure even toasting and simmering. If needed, cook in batches.
Underseasoning the Broth
Many home cooks rely solely on the vegetable broth for flavor, but broth alone won’t carry the depth of this dish. The spices—cumin, smoked paprika, and turmeric—need to bloom properly in the dry pan before adding liquid. If you skip toasting the spices or use a low-quality broth, your dish will taste flat. For extra flavor, consider adding a ½ teaspoon of soy sauce or miso paste—**it adds umami that balances the earthiness beautifully.
Nutrition facts
Frequently Asked Questions
Why does my amaranth rice turn mushy?
The most common cause is skipping the toasting step—this is what gives amaranth its nutty flavor and prevents mushiness. Also, using too much liquid (stick to 2 cups max) or peeking too often during cooking can create steam that makes the grains soften unevenly. Try toasting the amaranth for 3-4 minutes in olive oil first, then simmer with just enough broth to cover the grains.
Can I make this recipe without a stove? Use an instant pot or rice cooker for hands-off cooking. Sauté the onions, garlic, and spices first, then add the amaranth, rice, and broth. Cook on high pressure for 10 minutes (instant pot) or use the rice cooker's grain setting. The texture will be slightly different but still delicious. Just
How do I store and reheat leftovers?
Store in an airtight container in the fridge for up to 5 days or freeze for 3 months. To reheat, sprinkle with 1 tsp water per cup, cover, and microwave for 2 minutes. The amaranth holds its texture better than most grains when reheated, making this perfect for meal prep. For best results, add fresh lemon juice and cilantro after reheating to brighten the flavors.
What are the best toppings for this dish?
This recipe is incredibly versatile! Try avocado slices, pickled red onions, or crispy fried shallots for texture. For protein, add grilled chicken, black beans, or tofu. A drizzle of tahini sauce or spicy mayo adds richness, while fresh herbs like mint or cilantro keep it light. The earthy amaranth pairs beautifully with both bold and delicate flavors.