
Main Courses
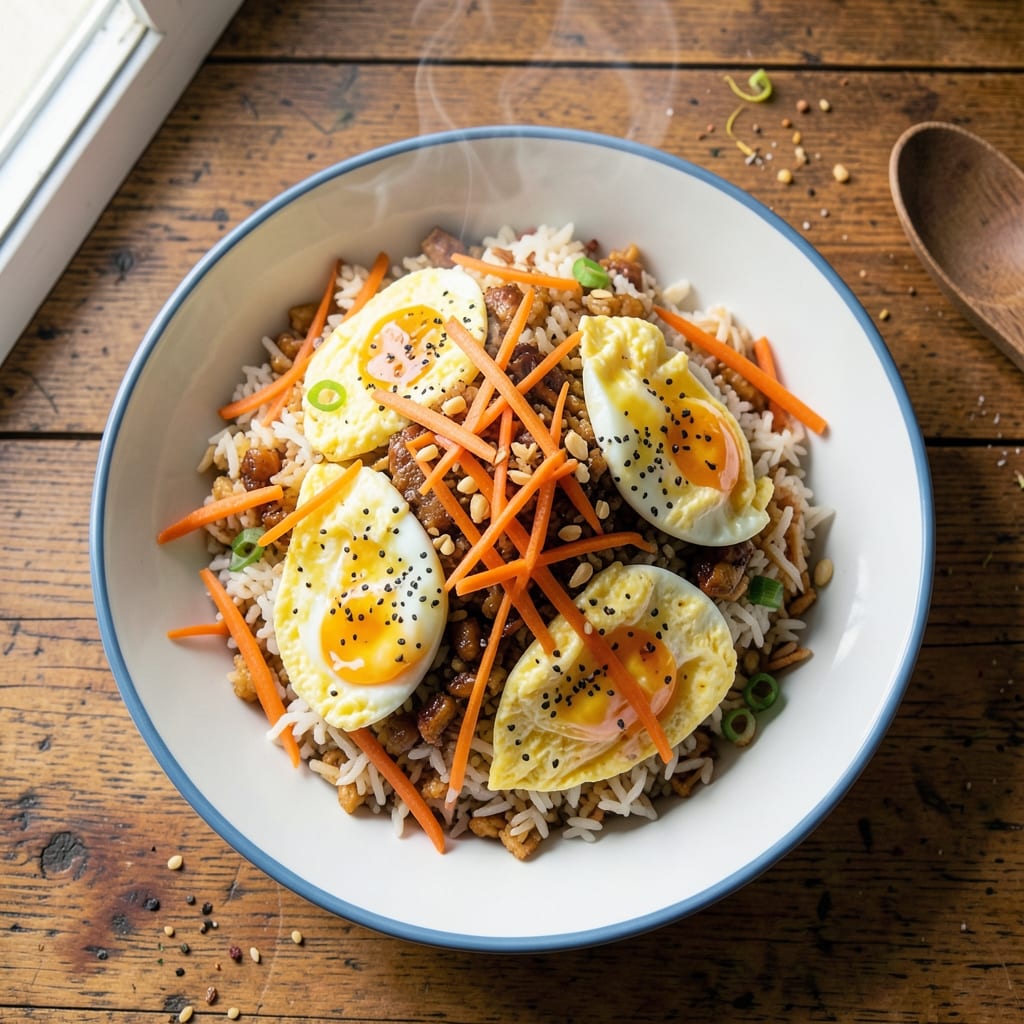
This American-style fried rice recipe delivers the perfect balance of crispy edges, tender veggies, and fluffy rice—all in one pan. The secret lies in using day-old rice that absorbs flavors beautifully while maintaining its texture, paired with a quick scramble of eggs for that signature crispy finish. I developed this version after years of restaurant-style attempts, finally nailing the crispy-yet-tender egg technique that makes every bite satisfying.
The foundation of great fried rice starts with proper rice—cooked and cooled to achieve that ideal texture. We'll build flavor with garlic, ginger, and soy sauce, then incorporate fresh vegetables like peas, carrots, and scallions for color and crunch. The eggs are scrambled separately to ensure they stay crispy around the edges while remaining tender inside, a technique that elevates this dish from basic to restaurant-quality.
By the end, you'll have a vibrant, one-pan meal packed with protein, vegetables, and aromatic seasonings that come together in just 20 minutes. The crispy egg pieces add a satisfying texture contrast to the tender rice and vegetables, making each bite a perfect balance of flavors and textures. This recipe is designed to be both foolproof and customizable—swap in your favorite proteins or veggies to make it your own.
Serve it as a main dish with a side of egg rolls or coleslaw for a full meal, or let it stand in for lunch the next day—it tastes even better reheated. Here's how to make it perfectly every time.
Ingredients for american style fried rice
Day-old rice, crispy eggs, and fresh veggies—this one-pan meal comes together faster than takeout.
| Ingredient | Amount | Notes |
|---|---|---|
| Day-Old Cooked White Rice 🍚 | 4 cups | Cold, unseasoned rice preferred |
| Large Eggs 🥚 | 4 whole | Room temperature for even cooking |
| Vegetable Oil 🫒 | ¼ cup | High smoke point preferred |
| Garlic Cloves 🧄 | 4 cloves | Minced for aromatic base |
| Fresh Ginger 🌿 | 1 ½ tbsp | Grated, for zesty kick |
| Carrots 🥕 | 1 cup | Diced small for even cooking |
| Frozen Peas 🌱 | ½ cup | Thawed, for pop of color |
| Green Onions 🧅 | ¼ cup | Sliced, for fresh finish |
| Soy Sauce 🥢 | ⅓ cup | Light or regular preferred |
| Sesame Oil 🫒 | 1 tbsp | Toasted, for nutty aroma |
| Salt 🧂 | ½ tsp | Adjust to taste |
| Black Pepper 🌶️ | ¼ tsp | Freshly ground for heat |
| Cooking Wine (optional) 🍷 | 1 tbsp | Dry sherry or mirin |
The rice is non-negotiable—day-old works best (the good stuff, not the mushy kind). Jasmine or basmati hold up better than long-grain white, but use what you've got. For the eggs, room temperature is key—crack them into a bowl first. The carrots? Baby carrots work great—just chop 'em up fine. Fresh ginger loses potency fast, so buy small amounts or freeze what you won't use in a month. The green onions? Trader Joe's sells them pre-sliced for lazy days.
No soy sauce? Coconut aminos at 1:1 ratio works in a pinch. Short on peas? Corn or diced bell peppers add sweetness. The sesame oil is what makes this taste restaurant-worthy—don't skip it (or use toasted sesame seeds if you're feeling fancy). For the wine, dry sherry or mirin adds depth, but skip it if you're avoiding alcohol. The eggs? Scramble them separately for that signature crispy texture—low and slow on medium heat is the trick.
This reheats beautifully—honestly tastes better the next day once everything melds. Keeps 4 days in the fridge, freezes for 3 months if you portion it right. I always make extra for lunch the next day—microwave 2 minutes with a splash of water to revive the crispiness. Store the sesame oil in a dark bottle to preserve its flavor.
Why You'll Love This Recipe
- One-Pan Magic: I swear by this—no chopping mountains of veggies, no fancy gadgets. Just a hot pan, some oil, and the rice and eggs you already have. Honestly, the only prep is cracking eggs and mincing garlic, and that’s it.
- Garlic-Ginger Crunch: That first sizzle of garlic and ginger in the oil? It’s the secret weapon. The ginger adds a bright snap, while the garlic deep-fries into little golden nuggets—crispy on the outside, soft in the middle. (Yes, even on a Tuesday night.)
- Lunchbox Hero: Between us, this is my go-to for packed lunches. Toss in some leftover chicken or peas, and it turns into a full meal. Not the prettiest, but the taste makes up for it—especially when you’re starving at your desk.
- Zero-Waste Feast: Day-old rice? Perfect. Extra eggs? No problem. This recipe turns scraps into something crave-worthy. I’ll be real: I’ve made it with whatever was in my fridge, and it’s still spot-on. Budget-friendly and foolproof.
Step-by-step instructions for American style fried rice
Here's how to make crispy, flavorful fried rice that's ready in one pan.
Scramble the Eggs Perfectly
Crack all 4 whole Large Eggs into a bowl and whisk vigorously until the yolks and whites are completely combined. Heat ¼ cup Vegetable Oil in a large skillet or wok over medium-high heat until shimmering. Pour in the eggs and let them sit undisturbed for 5-7 seconds—this helps create those beautiful, soft curds.
Gently push the eggs around the pan with a spatula, folding them into soft, slightly crispy pieces. Once the eggs are just set but still slightly runny in the center (about 30-45 seconds), remove them from the pan and set aside. You'll use them later, but they need to cool slightly first. The eggs should be tender with a delicate, slightly crispy texture—not dry or rubbery.
Stir-Fry the Aromatics and Vegetables
In the same skillet (no need to wipe it clean—the browned bits add flavor), add another ¼ cup Vegetable Oil and heat over medium-high heat. Add the 4 cloves Garlic Cloves (minced) and 1.5 tbsp Fresh Ginger (grated). Cook for 30-45 seconds until fragrant—you should smell that bright, zesty aroma. Don't let them burn; they cook quickly.
Toss in the 1 cup Carrots (diced small) and stir-fry for 2-3 minutes until they start to soften but still hold their shape. Add the 0.5 cup Frozen Peas (thawed) and cook for another 1-2 minutes until the peas are heated through. The vegetables should be tender-crisp, not mushy. This step builds the flavor base for your fried rice.
Combine Everything for the Perfect Texture
Push the vegetables to one side of the pan and add the 4 cups Day-Old Cooked White Rice to the empty space. Stir gently to coat the rice with the oil and aromatics, breaking up any large clumps. After 1-2 minutes, mix everything together thoroughly. The rice should start to sizzle and turn slightly translucent at the edges.
Pour in the 0.33 cup Soy Sauce, 1 tbsp Sesame Oil, 0.5 tsp Salt, and 0.25 tsp Black Pepper. If using, add the 1 tbsp Cooking Wine (optional). Stir everything together, making sure the rice is evenly coated. The sauce should cling to the rice, not pool at the bottom. Cook for 3-4 minutes, stirring frequently, until the rice is heated through and the edges are beginning to crisp.
Finish with Crispy Eggs and Green Onions
Add the scrambled eggs back to the pan and stir everything together for 1-2 minutes until the eggs are heated through and the rice is evenly distributed. The eggs should melt into the rice, creating pockets of creamy texture. Taste and adjust seasoning if needed—you might need a little more soy sauce or salt to balance the flavors.
Turn off the heat and stir in the 0.25 cup Green Onions (sliced). Let the fried rice sit for 1 minute to allow the flavors to meld together. Serve immediately while still hot and crispy. The rice should be tender with crispy edges, the eggs creamy, and the vegetables bright and flavorful. Enjoy your one-pan, veggie-packed meal!
Pro Tips For Making American Style Fried Rice
- STIR FAST, STOP TOASTING: American-style fried rice needs a fast stir—if you let the rice sit too long in the wok, it turns gummy. Work in batches if needed, but keep the heat high and the rice moving constantly. I used to burn the garlic and ginger while trying to crisp the rice; now I add them after the rice is mostly cooked and stir just until fragrant.
- USE COLD RICE, NO EXCUSES: Day-old rice isn’t just a suggestion—it’s non-negotiable. Spread freshly cooked rice on a tray and refrigerate for 12+ hours (or freeze it overnight, then thaw). Cold rice breaks apart better, soaks up sauce, and doesn’t turn mushy. Trust me, the extra wait makes the texture actually good.
- SCRAMBLE EGGS SEPARATELY: Don’t toss raw eggs into the wok with the rice—you’ll end up with sad, greasy egg bits. Scramble them first in a small pan with a splash of water for fluffiness, then chop into small pieces. Add them to the rice after it’s cooked, so they warm through without stealing all the heat.
- SALT THE RICE FIRST: Season the cold rice with a generous pinch of salt before frying—it crisps up better and balances the flavors. Skip this, and your fried rice will taste bland, no matter how much soy sauce you dump in. (Yes, even if you’re using pre-salted soy sauce.)
Common mistakes when making great american style fried rice
Overcooking the Rice
I’ve ruined fried rice more times than I’d like to admit by overcooking the rice—it turns mushy and loses that perfect crispy edge. The key is to work quickly once the rice hits the pan. Stir constantly for just 3-4 minutes after adding the sauce, and remove it as soon as it’s heated through. If the rice starts to look dry or sticky, it’s too late—add a splash of water or broth and cover for 1 minute to revive it. 💫
Using Fresh Rice
Freshly cooked rice is a rookie mistake—it’s too moist and will turn into glue in your pan. Day-old rice is non-negotiable because it’s dry enough to crisp up while absorbing flavors. If you must use fresh rice, spread it on a tray and refrigerate for 1 hour to dry it out. I’ve even microwaved leftover rice for 1 minute to speed up the process. Trust me, the texture difference is night and day.
Skipping the Egg Scramble Step
Adding eggs straight to the pan with everything else is a flavor and texture disaster—they’ll turn rubbery instead of creamy. Scramble them separately over low heat until just set (about 30-45 seconds), then set them aside to cool slightly. When you fold them back in at the end, they’ll melt into the rice beautifully. Pro tip: Use room-temperature eggs—they scramble more evenly and stay tender. 🥚
Burning the Garlic and Ginger
Garlic and ginger are the aromatic soul of fried rice, but they burn faster than you think. Keep your heat at medium-high and cook them for only 30-45 seconds until fragrant. If they start to brown too quickly, reduce the heat slightly. I’ve learned the hard way—overcooked garlic tastes bitter and ruins the whole dish. Always smell them before adding the veggies!
Not Enough Oil
Fried rice needs oil to create that signature crispy texture, but many recipes skimp. Use at least ½ cup total (split between steps) for a 12-inch skillet. If your pan is smaller, reduce the oil slightly but don’t skimp—it’s what gives the rice its wok-like crunch. I’ve even used a nonstick pan with 1 extra tablespoon of oil to ensure even browning. The extra effort makes all the difference!
Underseasoning
Taste as you go! Many home cooks hold back on soy sauce or salt, thinking they can add more later—but once the rice is done, it’s hard to fix. Start with the full ⅓ cup soy sauce and ½ teaspoon salt, then adjust to taste. The sesame oil adds depth, but don’t overdo it—1 tablespoon is plenty. I always keep a small bowl of soy sauce nearby to tweak the seasoning at the end. 🧂
Nutrition facts
Frequently asked questions
Why does my American-style fried rice turn out mushy?
The #1 culprit is using fresh rice—it's too moist and steams instead of crisping. Always use day-old rice (or refrigerated for 1 hour if fresh). Also, stir constantly for only 3-4 minutes after adding sauce—overcooking turns rice gluey. If it gets sticky, add 1 tablespoon water and cover for 1 minute to revive it.
Can I make this with chicken or shrimp instead of eggs?
For chicken, use 1 cup diced cooked and chilled pieces (season with salt/pepper first). For shrimp, peel and devein 12 large, then sauté separately until pink (2-3 minutes) before mixing in. Just reduce soy sauce slightly—protein adds natural saltiness. The cooking time stays the same, but check doneness first.
What's the secret to crispy eggs in fried rice?
Scramble eggs separately over low heat until just set (30-45 seconds), then set aside to cool slightly. The key is room temperature eggs—they scramble more evenly. When folding back in, keep heat medium so eggs melt into rice without turning rubbery. Never add eggs straight to the pan with everything else!
How do I make this gluten-free?
Swap soy sauce for 3 tbsp gluten-free tamari or coconut aminos (use 1:1 ratio). Check sesame oil label—most are gluten-free, but some brands process with wheat. For extra umami, add 1 tsp gluten-free fish sauce or ½ tsp nutritional yeast. All other ingredients are naturally gluten-free.
Can I prep this ahead of time?
Yes! Store cooked fried rice in an airtight container for up to 4 days in the fridge. Reheat in the microwave with 2 tbsp water for 2 minutes (stir halfway) to restore crispiness. For freezing, portion into 1-cup servings and freeze for up to 3 months. Thaw overnight in the fridge before reheating.