
Main Courses
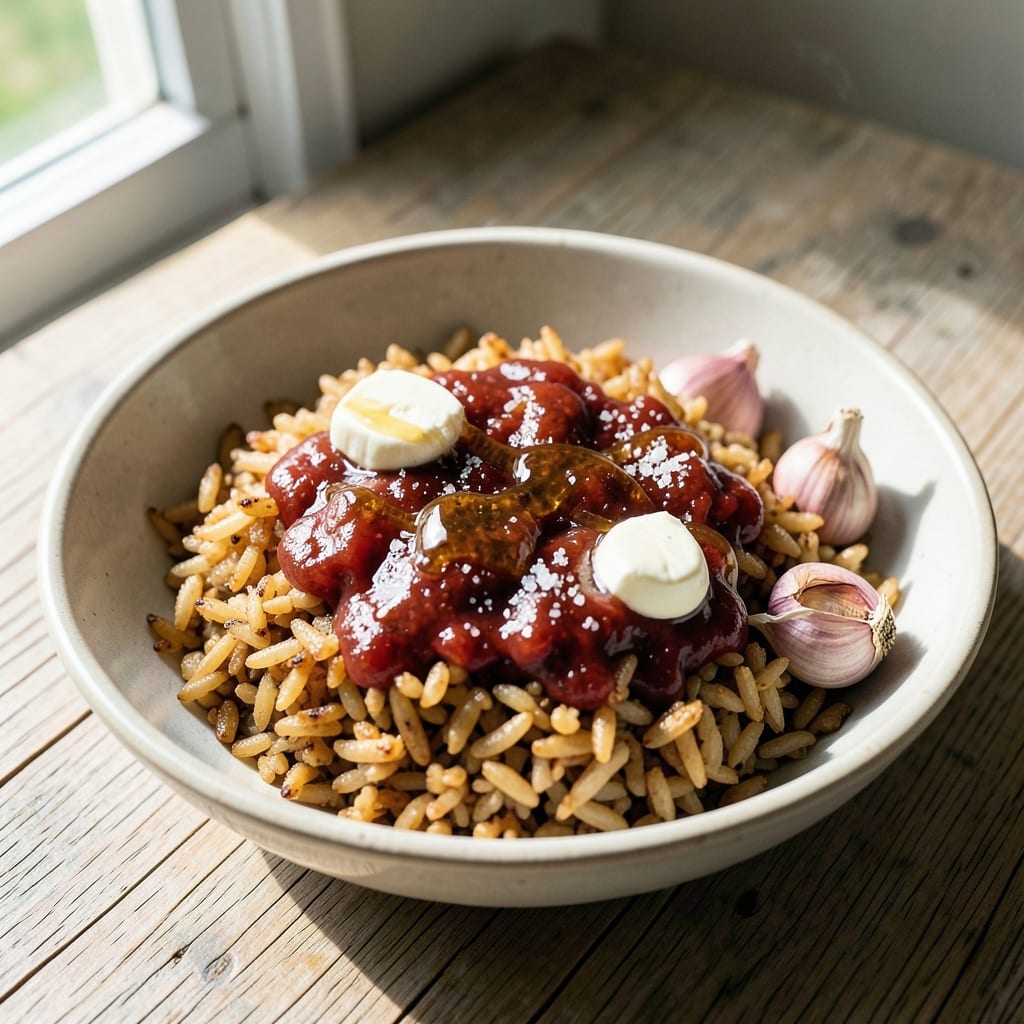
This apple cider vinegar rice recipe transforms ordinary grains into a bright, tangy, crispy-edged side dish that steals the show. The secret lies in cooking rice with apple cider vinegar, garlic, and honey—a technique I discovered while searching for a way to elevate simple white rice. What makes it special is how the vinegar's acidity tenderizes the rice while creating those coveted crispy edges, all while balancing sweetness and savory notes perfectly.
The process is straightforward but requires attention to detail—starting with slightly undercooked rice, then finishing it in a skillet with apple cider vinegar, butter, and a pinch of salt. This method ensures each grain develops a crispy exterior while staying tender inside, with a subtle tang that cuts through rich proteins like grilled chicken or roasted pork. The result is a restaurant-quality side that takes just 30 minutes to prepare.
What you'll end up with is a dish that's as visually appealing as it is flavorful—golden, crispy edges glistening with a glossy sheen, and a fragrant aroma that fills your kitchen. The apple cider vinegar adds a bright, tangy note that pairs beautifully with savory main courses, while the crispy texture adds a satisfying crunch. This is the kind of rice that turns a simple meal into something extraordinary.
Pair it with grilled meats, roasted vegetables, or even as a topping for tacos. The versatility of this recipe makes it perfect for weeknight dinners or special occasions. Let's get started!
Ingredients for apple cider vinegar rice
Nine simple ingredients transform basic rice into a restaurant-worthy side with crispy edges and tangy brightness.
| Ingredient | Amount | Notes |
|---|---|---|
| Long-Grain White Rice 🍚 | 1 ½ cups | Uncooked, jasmine or basmati preferred |
| Apple Cider Vinegar 🍏 | ¼ cup | Raw, unfiltered for best flavor |
| Unsalted Butter 🧈 | 3 tbsp | Cold, cubed for crispy edges |
| Garlic Cloves 🧄 | 3 cloves | Minced, fresh for aromatic punch |
| Honey 🍯 | 1 tbsp | Wildflower preferred for depth |
| Kosher Salt 🧂 | ¾ tsp | Diamond Crystal preferred |
| Vegetable Oil 🫒 | 1 tbsp | For skillet searing |
| Fresh Parsley 🌿 | ⅛ cup | Chopped, for garnish |
| Water 💧 | 2 ¼ cups | Filtered preferred |
The rice is the foundation, so jasmine or basmati gives you that coveted long-grain texture. Trader Joe's and Whole Foods carry high-quality options, but any long-grain white will work. Apple cider vinegar should be raw and unfiltered—the kind you'd drink straight. I grab mine from Brunswick Farms or make my own. For the butter, cold cubes create those crispy edges better than melted butter. The honey? Wildflower or clover adds subtle floral notes that balance the vinegar's tang.
No apple cider vinegar? White wine vinegar or rice vinegar work in a pinch, but you'll lose that signature apple flavor. Short on honey? Maple syrup at half the amount works, though it's slightly heavier. Fresh parsley is ideal, but dried parsley at one-third the amount gets you close. The garlic can be pre-minced from a jar (though fresh is better), and if you're really in a bind, garlic powder at one-quarter teaspoon will do. For the rice, if you can't find jasmine or basmati, arborio rice works too—just expect slightly stickier grains.
This rice reheats beautifully—just add a splash of water and cover until warmed. Keeps for 3-4 days in the fridge, though the crispy edges soften after day two. For best results, make it fresh and serve immediately. The skillet method is key: don't overcrowd or the rice won't crisp. Store any leftovers in an airtight container with a paper towel pressed on top to absorb moisture. Freezes for up to 3 months, though texture changes slightly after thawing.
Why You'll Love This Recipe
- One-Pot Magic: I swear by this—just rice, vinegar, butter, and garlic in one pot. No measuring cups, no extra bowls, no stress. The vinegar does all the work while you stir once.
- Tangy Sweet Crunch: That first bite? The honey and vinegar balance is chef’s kiss—bright, buttery, with a subtle crunch from the garlic. It’s like rice got a gourmet upgrade without trying.
- Lunchbox Hero: Pack this cold or reheated—it’s perfect for work lunches, kids’ school meals, or a quick picnic. Honestly, I’ve sent it in thermoses more times than I can count.
- Budget Bulk: A single batch feeds four, costs pennies, and tastes fresher than takeout. Leftovers? They get better the next day, especially if you toast them in butter. My wallet and taste buds win.
Step-by-step instructions for apple cider vinegar rice
Here's how to achieve that perfect balance of crispy edges and bright tangy flavor.
Toast the Rice for Crispy Perfection
Heat a large skillet over medium heat and add the 1 tablespoon vegetable oil. Once shimmering, add the 1.5 cups long-grain white rice and stir constantly for 3-4 minutes until the grains become translucent at the edges and smell nutty. This toasting step develops the rice's natural flavors and creates those coveted crispy edges you're after.
Don't walk away - watch the rice closely. You're looking for a light golden color rather than browned bits. If you see the rice starting to brown too quickly, reduce the heat slightly. The goal is to toast without burning, which would make the rice bitter. This step sets the foundation for your crispy texture, so take your time here.
Build Flavor with Butter and Aromatics
Reduce the heat to medium-low and add the 3 tablespoons cold unsalted butter along with the 3 minced garlic cloves. Stir for 1-2 minutes until the butter melts completely and the garlic becomes fragrant but doesn't brown. The butter will add richness while the garlic infuses its aromatic punch into the rice.
Here's where the magic happens: add the 0.25 cup apple cider vinegar and 1 tablespoon honey all at once. Stir vigorously for 30 seconds as the vinegar sizzles and the honey begins to caramelize slightly. This combination creates the signature tangy brightness that makes this rice so special. The vinegar will cook off quickly, leaving behind its characteristic flavor without making the rice sour.
Cook the Rice with Perfect Texture
Pour in the 2.25 cups water and add the 0.75 teaspoon kosher salt. Stir once to distribute everything evenly, then bring to a gentle boil. Once boiling, reduce heat to low, cover the skillet tightly with a lid, and simmer for 15 minutes without lifting the lid. This low-and-slow cooking allows the rice to absorb the liquid evenly while developing that perfect texture.
After 15 minutes, remove the lid and check the rice. You want to see the bottom layer beginning to crisp slightly at the edges - this is your signal that the rice is almost done. If the bottom looks dry before the rice is fully cooked, add 1-2 tablespoons water and cover again for another 2-3 minutes. The goal is crispy bottoms with tender, fluffy rice throughout.
Finish with Fresh Herbs and Rest
Once the rice is tender and the bottom is crispy, remove from heat and stir in the 0.125 cup chopped fresh parsley. The parsley adds a fresh finish that brightens all the other flavors. Let the rice sit covered for 5 minutes to allow any remaining steam to distribute evenly through the grains. This resting period is crucial for developing the final texture.
Before serving, give the rice a gentle fluff with a fork, being careful not to mash the crispy bottom layer. The contrast between the tender rice and crispy edges is what makes this dish so satisfying. Serve immediately while the edges are still crisp and the flavors are at their peak. This rice pairs beautifully with grilled meats, roasted vegetables, or even as a standalone side dish.
Pro Tips For Making Apple Cider Vinegar Rice
- Rinse Rice First: I learned this the hard way—skipping the rinse leaves your rice gummy. Give long-grain white rice a quick 30-second cold-water rinse before cooking, then drain well. The starch wash cuts down on that clingy texture, especially when you’re adding vinegar later. ---
- Bloom Butter Properly: Don’t just toss in butter at the end. Melt it with minced garlic over medium-low heat for 2–3 minutes until it’s foamy but not browned. This step makes the flavor sing—no one wants bland butter hiding in their rice. ---
- Add Vinegar Last: Stir in apple cider vinegar off the heat, or you’ll cook it off and end up with a sharp, almost pickled taste. A splash (about 1–2 tablespoons) brightens the dish, but timing is everything—wait until the rice is just done. ---
- Sweeten in Stages: Honey’s heat-sensitive, so don’t dump it all in at once. Start with half the amount while the rice cooks, then finish with the rest off the heat. This keeps the texture light instead of sticky, and the flavor stays balanced.
Dietary considerations for this apple cider vinegar rice
Gluten-Free Adaptation
This recipe is naturally gluten-free as long as you use certified gluten-free rice varieties like jasmine or basmati from trusted brands such as Lundberg Family Farms or Tilda. Double-check your apple cider vinegar label—some brands process in facilities that handle gluten, but Brunswick Farms and Bragg are typically safe. The honey, butter, and other ingredients are inherently gluten-free, making this a simple and delicious option for those avoiding gluten. ✨
Low-Carb/Keto Options
For a low-carb version, replace the white rice with cauliflower rice (about 2 cups fresh or 1 cup riced) and reduce the water to 1.5 cups. Cook the cauliflower rice in the same skillet with the butter, garlic, and vinegar mixture for 8-10 minutes until tender, then finish with parsley. The crispy edges will be less pronounced, but the tangy flavor remains. Add a pinch of psyllium husk powder (½ tsp) to help bind the cauliflower rice for better texture.
Dairy-Free Substitutes
Skip the butter and use 3 tbsp dairy-free butter (like Miyoko’s or Earth Balance) or coconut oil (melted) for crispy edges. The flavor remains rich, though coconut oil adds a subtle tropical note that pairs beautifully with the apple cider vinegar. Ensure your honey is also dairy-free (most are, but check labels if concerned). The crispy texture will still develop, though coconut oil may require slightly higher heat to achieve the same crispness.
Allergen-Friendly Adjustments
For nut allergies, avoid honey and use maple syrup (½ tbsp) instead—it’s naturally nut-free and adds a similar sweetness. If you’re sensitive to sulfites, opt for organic apple cider vinegar (like White House Foods), as conventional brands may contain added sulfites. For soy allergies, ensure your vegetable oil is refined (most are soy-free, but check labels). Always verify all ingredients for hidden allergens, especially when substituting.
Protein-Packed Boost
Turn this into a complete meal by stirring in ½ cup cooked chicken breast (shredded) or ½ cup black beans (rinsed) after removing from heat. The protein adds heartiness without altering the rice’s texture. For extra flavor, season the chicken with ½ tsp smoked paprika or the beans with ½ tsp cumin before mixing. This keeps the dish balanced and satisfying while adding nutritional depth.
Nutrition facts
Frequently asked questions
Why does this recipe use apple cider vinegar in rice?
The apple cider vinegar adds a bright, tangy brightness that balances the rice's natural starchiness while creating those coveted crispy edges. The acidity tenderizes the grains slightly, and when combined with honey, it creates a perfect sweet-tart contrast. This technique also helps prevent the rice from becoming gummy, keeping each grain distinct.
Can I make this recipe without a skillet?
Yes, but the crispy edges will be less pronounced. Use a heavy-bottomed pot instead, toasting the rice with oil over medium heat for 3-4 minutes before adding the vinegar and butter. After cooking, transfer to a baking dish and broil for 2-3 minutes to create some crispiness. The flavor will still be delicious, though!
What if my rice turns out mushy?
Mushy rice usually means too much liquid or not enough resting time. For future batches, use 2.25 cups water for 1.5 cups rice and let it sit covered for 5 minutes after cooking. If it's already mushy, spread it on a baking sheet and bake at 350°F for 10-15 minutes to dry it out slightly. The crispy edges will still shine through!
How can I store leftovers to keep them crispy?
Spread any leftover rice on a baking sheet and let it cool completely. Once cool, store in an airtight container with a paper towel pressed on top to absorb moisture. Reheat in a skillet over medium heat with a splash of water for 3-5 minutes, stirring occasionally, to restore crispiness. Leftovers keep well for 3-4 days in the fridge.
What proteins pair best with this tangy rice?
This rice's bright acidity complements rich, savory proteins perfectly. Try grilled chicken, pork chops, or beef tenderloin for a hearty meal. For vegetarian options, pair with roasted tofu or tempeh. The crispy edges also work beautifully with fried fish or shrimp. The contrast of textures makes every bite satisfying!