
Main Courses
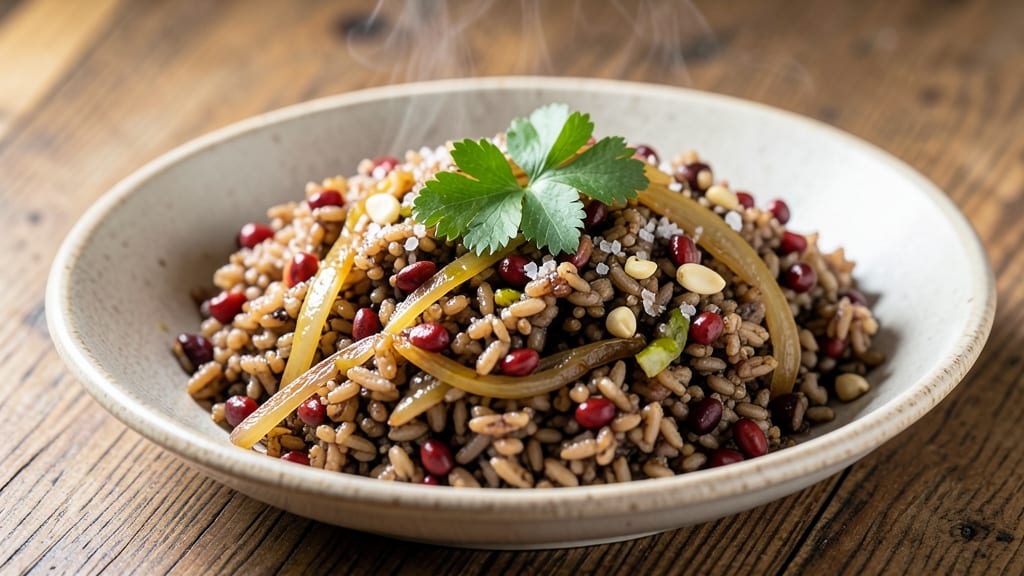
This brown rice and quinoa pilaf recipe delivers a perfect nutty-earthy blend that transforms simple grains into a restaurant-worthy side dish. The secret lies in toasting the grains first—this unlocks deeper flavors while preventing mushiness, and the crispy herb topping adds a satisfying crunch that keeps every bite interesting.
The combination of brown rice and quinoa creates a textural contrast that's both hearty and light, with chewy grains and fluffy centers. Cooked in aromatic broth with fresh herbs, this pilaf absorbs rich flavors while maintaining its natural nuttiness.
The crispy herb topping, made with toasted breadcrumbs and fresh parsley, seals in moisture and adds a bright, fresh finish that elevates the dish.
Ingredients for brown rice and quinoa pilaf
Toasted grains and aromatic broth create this restaurant-worthy pilaf with satisfying crunch.
| Ingredient | Amount | Notes |
|---|---|---|
| Long-Grain Brown Rice 🌾 | 1 cup | Uncooked, rinsed thoroughly |
| Quinoa 🌾 | ½ cup | Uncooked, rinsed well |
| Vegetable Broth 💧 | 2 ½ cups | Low-sodium preferred |
| Extra-Virgin Olive Oil 🫒 | 2 tbsp | For toasting grains |
| Yellow Onion 🧅 | 1 whole | Diced fine |
| Garlic Cloves 🧄 | 3 cloves | Minced finely |
| Fresh Parsley 🌿 | ¼ cup | Stems removed, chopped |
| Fresh Thyme Leaves 🌿 | 1 tbsp | Chopped finely |
| Panko Breadcrumbs 🍞 | ½ cup | For crispy topping |
| Salt 🧂 | 1 ½ tsp | Kosher or sea salt |
| Black Pepper 🌶️ | ½ tsp | Freshly ground |
| Lemon Zest 🍋 | 1 tsp | Freshly grated |
| Unsalted Butter 🧈 | 2 tbsp | Cold, cubed |
The grains are the foundation—brown rice and quinoa together give you that perfect chewy texture. Bob's Red Mill or Trader Joe's organic brands work best for consistent quality. Rinse them thoroughly before toasting to remove excess starch, which prevents gumminess. The vegetable broth should be rich but not salty—Imagine or Pacific Foods are solid choices, or make your own with vegetable scraps. Fresh herbs are non-negotiable here; dried just won't cut it for that bright finish. If you're short on parsley, cilantro works in a pinch, but thyme is essential for that earthy depth.
No panko? Toasted breadcrumbs from a baguette work just as well—just pulse them in a food processor for that perfect texture. Short on fresh herbs? Dried thyme at one-third the amount is better than nothing, but fresh is ideal. The lemon zest might seem like an afterthought, but it brightens everything—use a microplane for maximum flavor. For the butter, don't skip the cold cubes; they'll create steam when they hit the hot pan, keeping your pilaf deliciously moist. If you're making this ahead, toast the breadcrumbs separately and store them in an airtight container until ready to use.
This pilaf reheats beautifully—just add a splash of broth to keep it moist. Keeps for 4-5 days in the fridge, though the crispy topping loses its crunch after day two. For longer storage, freeze portions without the topping—just add fresh breadcrumbs and a quick toast in the oven when reheating. The topping should be made fresh if possible, but if you're prepping ahead, store it separately and toast it for 3-4 minutes at 375°F before serving to restore that satisfying crunch.
Why You'll Love This Recipe
- One-Pan Magic: I swear by this recipe—just toss everything in one pot, let it simmer, and walk away. No fancy tools, no stressing over separate pans for rice and quinoa. The onion softens into sweet caramelized bits while the broth infuses that deep, savory base, and the olive oil keeps every grain glistening.
- Nutty, Earthy Crunch: Between us, the combo of brown rice and quinoa is chef’s kiss—chewy brown rice holds its shape, while fluffy quinoa adds that satisfying bite. Toast the grains in olive oil first? Absolute game. The onion adds a slow-sweet depth, and the broth keeps it rich without being heavy.
- Meal Prep MVP: This pilaf lasts forever in the fridge—perfect for lunches or to bulk up dinners later. I make a big batch on Sundays, and it’s still delicious by Thursday. Add roasted veggies one day, shredded chicken another, or just eat it straight with a drizzle of tahini. Honestly, it’s my lazy genius.
- Budget-Friendly Power: Brown rice and quinoa are cheap staples, and vegetable broth stretches further than you’d think. A single onion and a splash of olive oil make this taste like a fancy dish without the price tag. Plus, it’s filling—great for stretching meals when groceries are tight. (Yes, even on a Tuesday night.)
Step-by-step instructions for brown rice and quinoa pilaf
Here's how to create a perfectly balanced pilaf with nutty grains and a crispy herb topping.
🍳 Step 1: Toast the Grains for Enhanced Flavor
Heat a large skillet over medium heat and add the 2 tablespoons extra-virgin olive oil. Once shimmering, add the 1 cup long-grain brown rice and ½ cup quinoa, stirring constantly for 3-4 minutes until the grains become fragrant and lightly golden. This toasting step develops deeper nutty flavors and prevents the grains from becoming mushy.
Watch the grains closely—they should be evenly toasted but not burned. You'll see them release their natural oils and smell distinctly nutty. Remove the grains from the skillet and set aside in a bowl. This step is crucial for building flavor in the finished pilaf.
🍳 Step 2: Sauté Aromatics and Build the Base
In the same skillet, add 2 tablespoons unsalted butter and allow it to melt completely. Add the 1 whole yellow onion and 3 cloves garlic cloves, cooking over medium heat for 5-6 minutes until the onions are translucent and the garlic is fragrant but not browned. This gentle cooking prevents the garlic from becoming bitter.
Stir in 1 tablespoon fresh thyme leaves and 1 teaspoon lemon zest, cooking for an additional 30 seconds to infuse the flavors. The lemon zest will brighten the earthy tones of the grains. Keep this mixture warm while you prepare the grains.
🥘 Step 3: Cook the Grains to Perfect Texture
Return the toasted grains to the skillet and pour in the 2½ cups vegetable broth. Add 1½ teaspoons salt and ½ teaspoon black pepper, then bring to a gentle simmer. Cover the skillet tightly with a lid and reduce heat to low. Cook for 35-40 minutes, stirring once halfway through, until the grains are tender and the liquid has been absorbed.
Brown rice and quinoa cook at different rates, so check at the 35-minute mark. The grains are done when they're tender but still have a slight bite, and the liquid has been completely absorbed. If there's excess liquid, uncover and cook for an additional 2-3 minutes to evaporate it.
👨🍳 Step 4: Prepare the Crispy Herb Topping
While the grains cook, prepare the crispy topping by combining ½ cup panko breadcrumbs, ¼ cup fresh parsley, and ½ teaspoon additional black pepper in a small bowl. Mix well to distribute the herbs evenly. This topping adds texture contrast and freshness to the finished pilaf.
Heat 1 tablespoon extra-virgin olive oil in a small skillet over medium heat. Add the breadcrumb mixture and cook for 2-3 minutes, stirring constantly, until golden brown and crispy. The topping should be evenly browned with no raw spots. Remove from heat and set aside.
🥘 Step 5: Combine and Garnish for Final Presentation
Once the grains are perfectly cooked, transfer them to a serving dish. Gently fold in the crispy herb topping, distributing it evenly over the surface. The contrast between the tender grains and crispy topping creates the perfect textural experience.
Let the pilaf rest for 2-3 minutes before serving to allow the flavors to meld. Garnish with additional fresh parsley if desired. This pilaf delivers a harmonious blend of nutty grains, aromatic vegetables, and a crispy herb topping that elevates every bite.
Pro Tips For Making Brown Rice And Quinoa Pilaf
- Rinse the Quinoa: I learned this the hard way—skipping the rinse leaves a bitter, chalky texture. Swirl quinoa in a fine-mesh strainer under cold water for 30 seconds, then shake dry. That quick step removes saponins (the plant’s natural soap) and guarantees fluffy grains.
- Toast the Grains: After chopping the onion, add both rice and quinoa to the pot and dry-toast over medium heat for 3-4 minutes. The nutty aroma deepens, and the grains won’t clump later—just watch for smoke, which means you’re too aggressive.
- Use Two Broth Batches: Brown rice absorbs liquid like a sponge. Start with half the broth, simmer until mostly gone, then add the rest. If you dump it all in at once, you’ll end up with mushy rice and sad, undercooked quinoa.
- Finish with Oil: Stir in a tablespoon of extra-virgin olive oil at the end—yes, even if the recipe doesn’t say so. It coats the grains, making each bite richer and preventing them from sticking together. (Your future self will notice the difference.)
Storing and reheating this dish
Fridge Storage Tips
Let your pilaf cool completely before storing—transferring it to an airtight container within 2 hours preserves freshness. I use glass Pyrex containers with tight-sealing lids to maintain moisture and prevent sogginess.
Store in the fridge at 40°F or below for up to 4-5 days, though the crispy topping may lose its crunch after day 2. 🥫
Freezer Prep Guide
For longer storage, freeze portions without the crispy topping—it doesn’t reheat well. Divide pilaf into single-serving portions in freezer-safe bags or containers, leaving ½-inch headspace for expansion.
Label with the date and freeze for up to 3 months. The grains stay tender, but the texture may be slightly drier after thawing. 🧊
Reheating for Best Texture
Add 2-3 tablespoons of vegetable broth to thawed or refrigerated pilaf before reheating—this prevents dryness. Use a heavy-bottomed pot on medium-low heat for 8-10 minutes, stirring occasionally, until warmed through (165°F).
For microwave reheating, cover with a damp paper towel and heat in 1-minute intervals on 70% power. 🔥
Reviving the Crispy Topping
If storing the pilaf with its topping, reheat the grains first, then toast the topping separately. Spread the crispy mixture on a parchment-lined baking sheet and bake at 375°F for 3-4 minutes until golden and crisp again. This quick step restores the satisfying crunch that makes this pilaf special. ✨
Meal Prep Strategy
Double the crispy topping recipe and store it separately in an airtight container for up to 3 days. Toast fresh portions before serving to keep the texture perfect. For batch cooking, prepare 4 servings at once—this pilaf reheats beautifully and keeps well for 5 days in the fridge.
Plan ahead to save time during busy weeks! 📅
Nutrition facts
Frequently asked questions
Can I substitute quinoa for another grain in this pilaf?
You can replace quinoa with farro or barley for a similar texture, but cooking times will vary. Farro takes about 25-30 minutes while barley needs 45-50 minutes. For a lighter option, try couscous (cooks in 5 minutes), but it won't have the same nutty depth. Always adjust liquid ratios according to the grain's package instructions.
Why does my pilaf turn out mushy instead of fluffy?
Mushiness usually happens when grains aren't toasted properly or the liquid ratio is off. Always toast grains in oil until fragrant (3-4 minutes) and use 2.5 cups broth for 1.5 cups total grains. Stirring too frequently during cooking can also break the grains. For extra insurance, uncover for the last 2-3 minutes to evaporate excess moisture.
Can I make this pilaf ahead of time for meal prep?
Prepare the pilaf 1-2 days ahead and store in an airtight container in the fridge. The crispy topping should be made fresh before serving, but you can toast breadcrumbs separately and store them for up to 3 days. For best texture, reheat gently with a splash of broth and toast the topping fresh in the oven for 3-4 minutes at 375°F.
What herbs can I use if I don't have fresh parsley and thyme?
For thyme, dried works in a pinch (1/3 the amount), but fresh is ideal. For parsley, try cilantro or dill for brightness. If you're missing both, 1 teaspoon dried oregano adds earthy depth. For a citrusy twist, add ½ teaspoon dried lemon zest instead of fresh. The key is balancing earthy and bright flavors.
Can I make this pilaf vegetarian or vegan?
This recipe is already vegetarian! For vegan, simply replace the 2 tablespoons butter with vegan butter or olive oil, and ensure your broth is vegetable-based. The crispy topping remains vegan as long as you use plant-based breadcrumbs. All other ingredients are naturally vegan-friendly.