
Main Courses
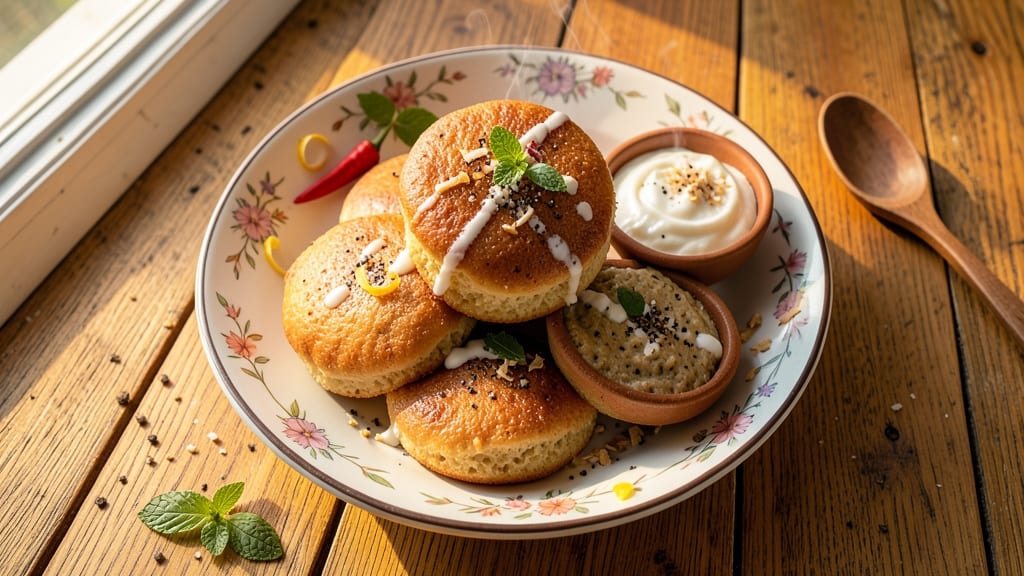
This brown rice idli recipe transforms traditional idli into a nutritious, vegan powerhouse while keeping that signature fluffiness. The key lies in fermenting brown rice batter—where natural enzymes break down nutrients for better digestion—while preserving the delicate texture idlis are known for.
Unlike white rice versions, these idlis develop a subtle earthy depth that pairs beautifully with coconut chutney or sambar.
What makes this recipe special is the balance: brown rice adds fiber and minerals, while urad dal provides protein and binding properties. The fermentation process (overnight in a warm spot) creates those signature air pockets, ensuring idlis that are light yet sturdy enough to hold up to dipping.
Perfect for health-conscious eaters who refuse to compromise on taste, this version proves wholesome ingredients can deliver restaurant-quality results at home.
Ingredients for brown rice idli
Nutrient-dense brown rice and protein-rich urad dal create fluffy, fermented idlis with earthy depth.
| Ingredient | Amount | Notes |
|---|---|---|
| Short-Grain Brown Rice 🌾 | 1 cup | Uncooked, rinsed thoroughly |
| Urad Dal (Black Gram) 🌱 | ½ cup | Split, rinsed well |
| Water 💧 | 2 ½ cups | Filtered preferred for clarity |
| Yogurt (Vegan Coconut Yogurt) 🥛 | ¼ cup | Unsweetened, for fermentation |
| Asafoetida (Hing) 🌿 | ⅛ tsp | Pinch for aroma |
| Salt 🧂 | 1 tsp | Diamond Crystal preferred |
| Fresh Fenugreek Leaves 🌱 | ¼ cup | Methi leaves, chopped |
| Coconut Oil 🫒 | 1 tbsp | For greasing steamer |
| Coconut Milk (Light) 🥥 | ¼ cup | Optional for richness |
The brown rice is the foundation here—short-grain varieties like Sonora or Calrose work best for that signature fluffiness. Bob’s Red Mill or Lundberg organic brown rice are excellent choices, but any short-grain will do. Soak the rice for 4-5 hours before grinding, which helps break down the phytic acid and improves digestibility. For the urad dal, split and rinsed is crucial—whole urad dal takes too long to ferment. Fresh fenugreek leaves add a subtle bitterness that balances the rice’s nuttiness, so Indian grocery stores or specialty markets are your best bet for vibrant, fresh leaves.
No vegan yogurt? Coconut yogurt from So Delicious works perfectly, but cashew yogurt is another great option. The asafoetida (hing) is non-negotiable—it’s what gives idlis that unmistakable aroma. If you can’t find it, garlic powder at half the amount is a decent substitute, though the flavor won’t be identical. For the coconut milk, light canned versions like Thai Kitchen are ideal—they add creaminess without overpowering. Short on fenugreek? Spinach or kale at double the amount can mimic the earthy notes, though the texture will differ slightly. Always use filtered water for clarity in the batter.
The batter ferments best in a warm spot (78-82°F) overnight, so place it near your oven with the light on or in a sealed container in a slightly warm kitchen corner. Once fermented, use within 24 hours for optimal texture. Store any leftover batter in an airtight container in the fridge for up to 3 days, though the flavor will mellow. For serving, pair with homemade coconut chutney or sambar—the contrast of temperatures (warm idlis with cool chutney) is a must. Freeze shaped idlis on a tray before transferring to a bag for up to 3 months—reheat in a steamer for 5 minutes.
Why You'll Love This Recipe
- Three-Ingredient Base: The brown rice and urad dal combo does all the heavy lifting—no fancy mixers, just soak, grind, and steam. Honestly, my blender’s never worked harder for something this simple.
- Nutty Earthy Crunch: That short-grain brown rice adds a subtle toasty bite, while the urad dal keeps it fluffy. The coconut yogurt? It’s the secret—creamy, tangy, and way more interesting than regular idlis.
- Meal Prep MVP: Steam a batch on Sunday, store them in the fridge, and reheat with a quick microwave zap. I pack these for work lunches—no sad, soggy leftovers here.
- Budget Breakfast Win: Urad dal and brown rice are cheaper than white rice idli mixers, but the flavor? Night and day. Plus, the hing (yes, that tiny pinch) makes them taste like you spent hours, not minutes.
Step-by-step instructions for brown rice idli recipe
Here's how to transform nutty brown rice into light, fluffy idlis with perfect fermentation and texture.
Soak the Rice and Dal for Optimal Fermentation
Combine the 1 cup short-grain brown rice and 0.5 cup urad dal in a large bowl. Add 2.5 cups water and soak for at least 6 hours (overnight is ideal). The rice should absorb water and swell noticeably - you'll see the grains become translucent and plump. This extended soak is crucial for breaking down the brown rice's phytic acid, which prevents proper fermentation and results in dense idlis.
After soaking, drain the water completely using a fine-mesh strainer. Give the grains a gentle squeeze to remove excess moisture - wet batter will ferment unevenly and produce gummy idlis. Transfer the drained mixture to a clean bowl for the next step. The texture should be moist but not soupy, resembling thick porridge.
Grind to a Smooth Batter with Perfect Consistency
Add the 0.25 cup vegan coconut yogurt, 0.125 tsp asafoetida, 1 tsp salt, and 0.25 cup chopped fresh fenugreek leaves to the soaked grains. Mix gently with a spatula to distribute the ingredients evenly. The fenugreek leaves will add a distinctive aroma and subtle bitterness that balances the nutty rice flavor.
Transfer the mixture to a blender and grind in batches until completely smooth. The batter should have a thick, pancake-like consistency - if it's too thin, add 1-2 tablespoons of the soaked rice mixture; if too thick, add 1 tablespoon water. For the optional richness, stir in 0.25 cup light coconut milk at this stage. The ideal batter should coat the back of a spoon but still hold its shape when drizzled.
Ferment for 8-12 Hours at Controlled Temperature
Cover the batter with a clean kitchen towel and let it ferment at 75-80°F for 8-12 hours. I place my batter in a warm spot - either near the oven with the light on, or in a slightly warmed oven with the pilot light on. The fermentation process is complete when the batter doubles in volume and develops a slightly tangy, yeasty aroma. You'll notice small bubbles forming on the surface and the batter will become noticeably lighter in texture.
For best results, check the batter after 8 hours - if it hasn't doubled, give it another 2-4 hours. Over-fermenting (beyond 14 hours) can make the idlis too sour. The ideal fermented batter should be airy with visible bubble formation throughout, and should jiggle slightly when the bowl is shaken gently. This indicates proper fermentation and predicts light, fluffy idlis.
Steam to Perfection with Proper Greasing
Grease an idli steamer with 1 tablespoon coconut oil, making sure to coat the sides and bottom thoroughly. This prevents sticking and creates that signature crispy bottom. Pour the fermented batter into idli molds, filling them 3/4 full - overfilling leads to messy, overflowing idlis. Gently tap the molds on the counter to remove any large air bubbles.
Place the steamer over medium-high heat and bring water to a rolling boil. Cover with the lid and steam for 10-12 minutes. You'll know they're done when the idlis release easily from the molds and have a slightly crisp bottom. The top should be smooth with no raw batter showing. For even cooking, I rotate the steamer halfway through the cooking time to ensure all idlis receive equal heat.
Serve Warm with Traditional Accompaniments
Remove the idlis from the steamer and let them sit for 2-3 minutes before serving. This brief resting period helps them set properly. Serve immediately with coconut chutney or mint chutney for maximum freshness. The idlis should be light, airy, and slightly springy to the touch, with a delicate nutty flavor from the brown rice. The interior should be completely cooked through with no raw batter, while maintaining that signature idli texture that's neither too soft nor too firm.
For best results, consume within 2 hours of steaming. The idlis develop their best texture when served warm, and the fermentation flavors are most pronounced when fresh. Store any leftovers in an airtight container in the refrigerator for up to 2 days, but reheat gently in a steamer to restore their original texture.
Pro Tips For Making Brown Rice Idli
- SOAK RICE LONGER: Brown rice needs at least 8-10 hours (overnight’s ideal) to soften properly—don’t cut corners. I learned this after my first batch had a weird gritty texture; the rice just wasn’t broken down enough. If you’re short on time, use a pressure cooker (20 mins on high) after soaking 4 hours, but the flavor won’t be as rich.
- GRIND DAL WITH HING: Add the asafoetida (hing) directly to the soaked urad dal before grinding—it blends right in and prevents that pungent aftertaste. I used to sprinkle it later, and the idlis always had a faint, lingering sharpness. A pinch (¼ tsp) is enough; more won’t make it stronger, just overpowering.
- STEAM AT LOW HEAT: Your steamer isn’t doing its job if water boils aggressively underneath—it’ll cook the idlis unevenly. Fill the pot to just below the steamer’s base, then reduce heat to a gentle simmer. I burned the bottom of my idlis twice before realizing the steam needs to be light and consistent, not a sauna.
- FERMENT COOLER, NOT WARMER: After mixing batter, let it sit in a cool, draft-free spot (not the oven or near the stove) for the first 2 hours. I rushed fermentation by placing it in a warm kitchen, and the idlis turned out dense and sour. Room temperature (around 24°C/75°F) is perfect—think of it like letting yogurt set naturally, not speeding it up.
Make-ahead tips for this recipe
Pre-Ferment Prep
Start your make-ahead prep the night before by soaking the 1 cup short-grain brown rice and 0.5 cup urad dal in 2.5 cups water for at least 6 hours. Drain completely and store in an airtight container in the fridge overnight.
This cold soak jumpstarts fermentation and improves digestibility. I use a glass container with a tight seal to prevent moisture loss. 🌾
Batter Prep Ahead
Combine the soaked rice-dal mix with 0.25 cup coconut yogurt, 1 tsp salt, and 0.125 tsp asafoetida in a bowl. Cover and refrigerate for 4-6 hours before grinding.
This chilled prep ensures even fermentation and prevents over-fermentation while you're away. Grind only when ready to ferment—batter ferments faster when cold. The consistency should be thick like pancake batter.
Fermentation Timing
Place the ground batter in a warm spot (78-82°F) for 8-12 hours to ferment. I use my oven with the light on or a proofing box for consistent warmth. For overnight prep, set a timer for 10 hours—this gives you perfectly fermented batter ready for morning idlis.
The batter should puff up and develop small bubbles. If it's still thick after 12 hours, give it another 2 hours in a slightly warmer spot.
Batch Freezing
Shape the fermented batter into idlis and freeze them on a parchment-lined tray for 1 hour until firm. Transfer to a ziplock freezer bag with parchment between layers. This prevents sticking and preserves texture for up to 3 months.
To cook, steam frozen idlis directly from the freezer for 12-15 minutes—no thawing needed! The texture remains fluffy, though slightly denser than fresh.
Morning Steaming
Grease your steamer with 1 tbsp coconut oil and arrange frozen idlis in the molds. Steam over medium-high heat for 12-15 minutes—the frozen state extends cooking time slightly.
For fresh batter, reduce to 10-12 minutes. Serve immediately with chutney for that restaurant-quality breakfast. The crispy bottom and airy interior are worth the early morning effort! ✨
Nutrition facts
Frequently asked questions
Why does brown rice idli need longer soaking than white rice?
Brown rice has a tougher outer bran layer that requires 6+ hours of soaking to soften properly. This breaks down phytic acid, improving digestibility and fermentation. White rice soaks in 4 hours because it's stripped of this layer. Skipping proper soaking makes brown rice idlis dense and chewy instead of fluffy.
Can I substitute urad dal with moong dal for this recipe?
Yes, but expect different results! Moong dal ferments faster (6-8 hours) and creates a lighter texture, but lacks urad dal's protein binding. For best results, use half urad dal and half moong dal—this balances fermentation time and texture. The flavor will be slightly milder too.
How do I fix idlis that came out too dense?
Dense idlis usually mean under-fermentation or thick batter. Next time, ferment 12+ hours in a warm spot (like your oven with light on) and check batter consistency—it should be like pancake batter. For immediate fixes, steam again with 1 tbsp water in the steamer for 5 minutes to soften.
What's the best way to reheat leftover brown rice idlis?
Steam is always best! Arrange idlis in a greased steamer with 1 tbsp coconut oil and steam over medium heat for 5-7 minutes. Microwaving (30 seconds with damp paper towel) works too, but texture suffers. Avoid toaster ovens—they dry out the idlis.
Can I make this recipe without a steamer?
Use a bamboo basket lined with cheesecloth or a microwave-safe bowl with a plate on top. For the bowl method, pour 1 inch hot water, place idli molds on top, and cover with a damp towel. Microwave on high for 3-4 minutes. The texture won't be identical, but still delicious!