
Desserts
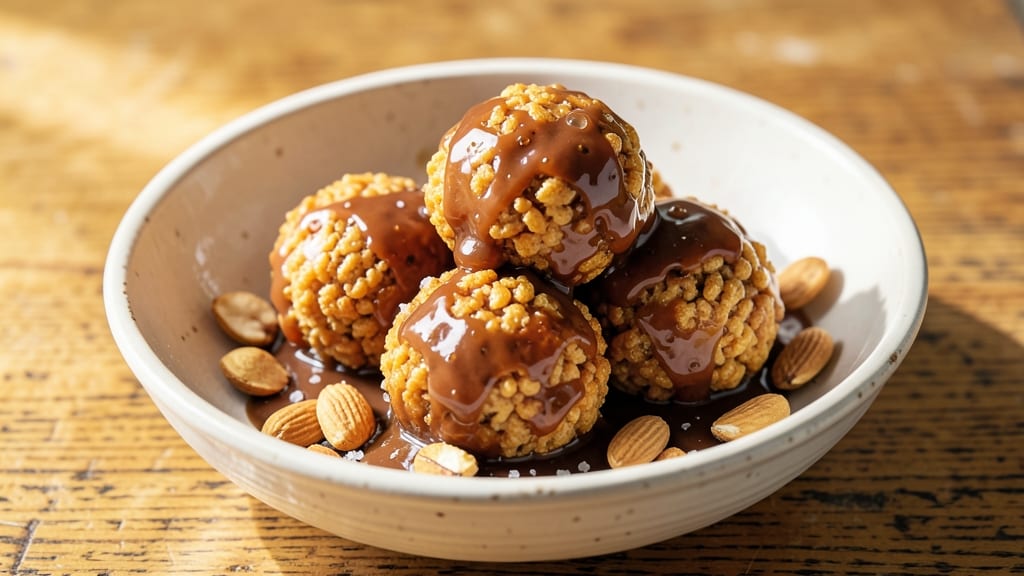
This caramel Rice Krispie balls recipe delivers the perfect balance of buttery crunch and sweet, gooey magic in every bite. 💛 The secret lies in melting caramel just until it's smooth and tacky—not too runny, not too thick—so it perfectly coats each crispy Rice Krispie flake.
I've tested countless variations, and this method guarantees balls that hold their shape while staying irresistibly sticky inside.
What makes these stand out is the combination of rich caramel, creamy butter, and the signature snap of Rice Krispies. The recipe includes optional coatings like melted chocolate or chopped nuts for extra indulgence, and they store beautifully in the fridge for up to a week.
Whether you're serving them as a nostalgic dessert or a satisfying snack, these will disappear faster than you can say "sweet crunch."
Ingredients for caramel rice krispie balls
Six crispy cups and a touch of buttery magic make these caramel Rice Krispie balls irresistible.
| Ingredient | Amount | Notes |
|---|---|---|
| Rice Krispies Cereal 🍪 | 6 cups | Original or lightly buttered flavor |
| Unsalted Butter 🧈 | ½ cup | Cold, cut into small cubes |
| Store-Bought Caramel Sauce 🍯 | 1 ½ cups | Like Smucker's or homemade equivalent |
| Vanilla Extract 🌸 | 1 tsp | Pure, high-quality vanilla |
| Salted Peanuts 🥜 | ½ cup | Chopped, optional for crunch |
| Melted Semi-Sweet Chocolate 🍫 | ½ cup | For coating, optional |
| Granulated Sugar 🍚 | 1 tbsp | For extra sweetness if needed |
| Heavy Cream 🥛 | 2 tbsp | For extra creaminess, optional |
| Ground Cinnamon 🌿 | ¼ tsp | For subtle warmth |
| Vanilla Ice Cream 🍦 | ½ cup | For dipping, optional |
The Rice Krispies are the star, so grab the original flavor—the lightly buttered kind works too, but stick with what you love. For the caramel, store-bought is fine (Smucker's is my go-to), but homemade works even better. The butter needs to be cold when you add it to the caramel—this prevents the mixture from getting too runny too fast. If you're feeling fancy, Trader Joe's has a great vanilla bean paste that adds depth. For the nuts, salted peanuts give the best crunch, but chopped walnuts or almonds work too if you prefer.
No caramel sauce? Homemade is easy—just melt sugar with butter and corn syrup, then add cream. Short on vanilla? Almond extract at half the amount works in a pinch. The chocolate coating? Use chips for convenience—just melt them in the microwave. Want extra creaminess? Stir in 2 tablespoons of heavy cream at the end. The cinnamon is optional but adds a cozy touch—Penzeys has a great organic blend if you want to splurge. And if you're serving these as a dessert, vanilla ice cream for dipping is always a crowd-pleaser.
These taste even better the next day as the flavors meld. Store in an airtight container in the fridge for up to 7 days—they won’t lose their crunch. For longer storage, freeze for up to 3 months—just thaw at room temperature before serving. I like to portion them into small jars or containers so I can grab a handful whenever cravings hit. They’re perfect for parties, potlucks, or just sneaking a few when no one’s looking.
Why You'll Love This Recipe
- Five-Ingredient Magic: I swear by this combo—Rice Krispies, melted butter, and that rich caramel sauce do all the heavy lifting. No fancy techniques, just melt, mix, and roll.
- Party in a Bowl: These disappear at gatherings—no one ever guesses how simple they are. Pack them for potlucks, stash them in lunchboxes, or just eat the whole batch yourself.
- Zero-Guilt Indulgence: Makes 20 balls for under $5 and lasts a week in the fridge. I’ll be real: my kids think they’re dessert, but the peanut crunch keeps it feeling like a treat, not a cheat.
Step-by-step instructions for caramel Rice Krispie balls
Here's how to make these perfect caramel rice krispie treats with rich texture and gooey centers.
🍳 Step 1: Melt Butter and Caramel Sauce Together
In a large microwave-safe bowl, combine the 0.5 cup unsalted butter (cut into small cubes) and 1.5 cups store-bought caramel sauce. Microwave in 30-second intervals, stirring after each interval, until the butter is completely melted and the mixture is smooth. This should take about 1-1.5 minutes total. The mixture should be warm but not hot—you want it to be thick enough to coat the back of a spoon.
Here's the thing—this warm mixture is what creates that signature gooey texture. If it gets too hot, the rice krispies will lose their crunch. Test the temperature by dipping a spoon in—it should be warm to the touch but not scalding. Stir in the 1 tsp vanilla extract and 0.25 tsp ground cinnamon until evenly distributed. The cinnamon adds subtle warmth that pairs perfectly with the caramel.
👨🍳 Step 2: Mix in Optional Add-Ins and Rice Krispies
If using, fold in the 0.5 cup chopped salted peanuts and 2 tbsp heavy cream with a silicone spatula. The peanuts add a satisfying crunch while the cream makes the treats extra creamy. For even more richness, you can also stir in the 1 tbsp granulated sugar at this stage—it helps balance the saltiness of the peanuts.
Now, gently fold in the 6 cups rice krispies cereal using the spatula. Work quickly but carefully—you want to distribute the cereal evenly without crushing it. The cereal should be completely coated in the caramel mixture, with no dry spots remaining. If the mixture looks too thick, add 1-2 teaspoons of hot water to loosen it slightly. You'll know it's ready when the cereal clings together when pressed between your fingers.
🥘 Step 3: Shape and Chill the Treats
Using a lightly greased spoon or your hands (lightly greased with butter), scoop the mixture into 1-inch balls and place them on a parchment-lined baking sheet. I like to work quickly here—wet your hands slightly if the mixture sticks to prevent it from getting messy. Arrange the balls about 1 inch apart so they don't touch while they set.
Refrigerate the treats for 30-45 minutes until they're firm to the touch. This chilling step is crucial—it allows the caramel to set properly and prevents the treats from falling apart when you handle them. If you're in a hurry, you can speed this up by placing the baking sheet in the freezer for 15-20 minutes. Just be careful not to over-chill, or the caramel might become too hard.
🍫 Step 4: Optional Chocolate Coating (If Using)
If you're using the 0.5 cup melted semi-sweet chocolate, melt it in a microwave-safe bowl in 20-second intervals, stirring until smooth. Dip the bottom half of each rice krispie ball into the chocolate, letting any excess drip off. Place the chocolate-coated balls back on the parchment-lined baking sheet.
For a cleaner look, you can also drizzle the melted chocolate over the tops of the balls using a fork. Let the chocolate set for 10-15 minutes at room temperature. If you're short on time, place the sheet in the refrigerator for 5 minutes to speed up the process. The chocolate should be firm but still glossy—this ensures a perfect finish without being overly thick.
🍽️ Step 5: Serve with Ice Cream (Optional)
Once the treats are fully set, serve them immediately or store them in an airtight container in the refrigerator for up to 5 days. For the ultimate indulgence, serve with a scoop of 0.5 cup vanilla ice cream on the side. The contrast of the warm, gooey treats with the cold ice cream is pure magic.
Here's a pro tip: If you want to make these treats ahead of time, assemble them as directed but stop after Step 3. Store the uncoated balls in the refrigerator for up to 3 days or freeze them for up to 3 months. When ready to serve, let them come to room temperature before adding the chocolate coating. This way, you can enjoy fresh, gooey rice krispie balls whenever you're in the mood for a sweet treat!
Pro Tips For Making Caramel Rice Krispie Balls
- Melt Butter Slowly: I learned this the hard way—dumping cold butter into the pan and ending up with greasy, clumpy balls. Warm the butter first until it’s just starting to foam, then remove from heat before adding the caramel sauce. This keeps everything smooth and prevents separation.
- Toast Cereal First: Skip the dry cereal straight from the box—it’ll soak up all the caramel and leave you with sad, crumbly balls. Lightly toast the Rice Krispies in a dry pan for 2-3 minutes until they’re just golden. They’ll stay crisp and hold their shape better.
- Mix Peanuts Last: Adding peanuts too early means they’ll get drowned in caramel and turn into a mushy mess. Fold them in after shaping the balls, pressing them lightly into the surface so they stay put. (Yes, even if you’re impatient like me.)
- Chill Before Rolling: This isn’t the prettiest method, but it’s the tastiest—let the mixture sit for 5 minutes after mixing. The butter will firm up just enough to roll into neat balls without sticking to your hands. (Your future self will thank you.)
Troubleshooting great caramel rice krispie balls
Sticky Mixture Fixes
If your caramel mixture becomes too thick and sticky before mixing with Rice Krispies, add 1-2 teaspoons of hot water to loosen it. The goal is a smooth, spoonable consistency—think warm honey.
Overheating causes this issue, so always microwave in 30-second bursts and stir between intervals. If it's still too sticky after adding water, let it cool slightly before proceeding. 🌡️
Crunchy vs. Mushy Texture
Mushy Rice Krispie balls usually mean the caramel was too hot when combined with the cereal. Always test the caramel mixture's temperature by dipping a spoon—it should feel warm but not scalding.
If your balls turn out mushy, try chilling the mixture for an extra 10 minutes before shaping. For extra crunch, fold in ½ cup extra Rice Krispies after the initial mix and reshape.
Dry or Crumbly Balls
Dry balls happen when the caramel cools too much before mixing with the cereal, or if you overmixed. Keep your butter cold when adding it to the caramel, and work quickly when folding in the Rice Krispies.
If your mixture looks dry, stir in 1 tablespoon of heavy cream or 1 teaspoon of melted butter to restore moisture. For prevention, use store-bought caramel sauce (like Smucker's) which stays tacky longer than homemade versions.
Chocolate Coating Issues
If your chocolate coating looks streaky or doesn't set properly, melt the chocolate in 20-second intervals and stir until completely smooth. For a glossy finish, ensure the chocolate is 80% melted before dipping.
If it sets too quickly, place the coated balls in the refrigerator for 5 minutes to firm up. For extra stability, chill the Rice Krispie balls for 45 minutes before coating—this prevents them from falling apart when dipped. 🍫
Storage Problems
If your Rice Krispie balls lose their crunch after storing, they likely absorbed moisture. Always store them in an airtight container with a paper towel to absorb excess moisture. For longer fridge storage (up to 7 days), portion them into small jars to maintain freshness.
Freezing is your best option for long-term storage—wrap individual balls in parchment paper before placing in a freezer bag for up to 3 months. Thaw at room temperature before serving.
Peanut Separation
If your chopped peanuts sink to the bottom or separate from the mixture, fold them in just before shaping the balls. For even distribution, use a silicone spatula to gently mix them through.
If you're concerned about separation, lightly toast the peanuts in a dry pan for 2 minutes before adding—they'll hold their crunch better and stick to the caramel mixture more effectively. 🥜
Nutrition facts
Frequently asked questions
Can I make these without store-bought caramel sauce?
For homemade caramel, melt 1 cup granulated sugar in a saucepan over medium heat until it turns amber. Remove from heat and whisk in ½ cup heavy cream and ½ cup butter. Let cool slightly before mixing with Rice Krispies. The texture will be slightly thicker than store-bought, so adjust with 1 tsp hot water if needed.
Why do my Rice Krispie balls turn out mushy?
Mushy texture usually means the caramel was too hot when mixed with cereal. Always test the mixture by dipping a spoon—it should feel warm but not scalding. If your balls turn out mushy, try chilling the mixture for an extra 10 minutes before shaping. For extra crunch, fold in ½ cup additional Rice Krispies after the initial mix.
How can I make these gluten-free?
Use gluten-free Rice Krispies cereal (like Rice Chex) and check your caramel sauce ingredients for gluten. Most store-bought brands are gluten-free, but always verify labels. For homemade caramel, ensure your sugar and cream are certified gluten-free. The texture will be slightly different but still delicious!
Can I bake these instead of refrigerating?
No baking is needed—they set through chilling. However, you can lightly bake them at 300°F for 5-7 minutes after shaping to create a firmer exterior. Watch closely to prevent over-browning. For best results, stick with the chilling method for that classic gooey center.
What's the best way to reheat these?
These treats aren't meant to be reheated—they're best enjoyed at room temperature. If they've been refrigerated, let them sit at room temperature for 10-15 minutes before serving. For a warm treat, try pairing them with warm vanilla ice cream or a hot cup of coffee. The contrast makes them even more irresistible!