
Main Courses
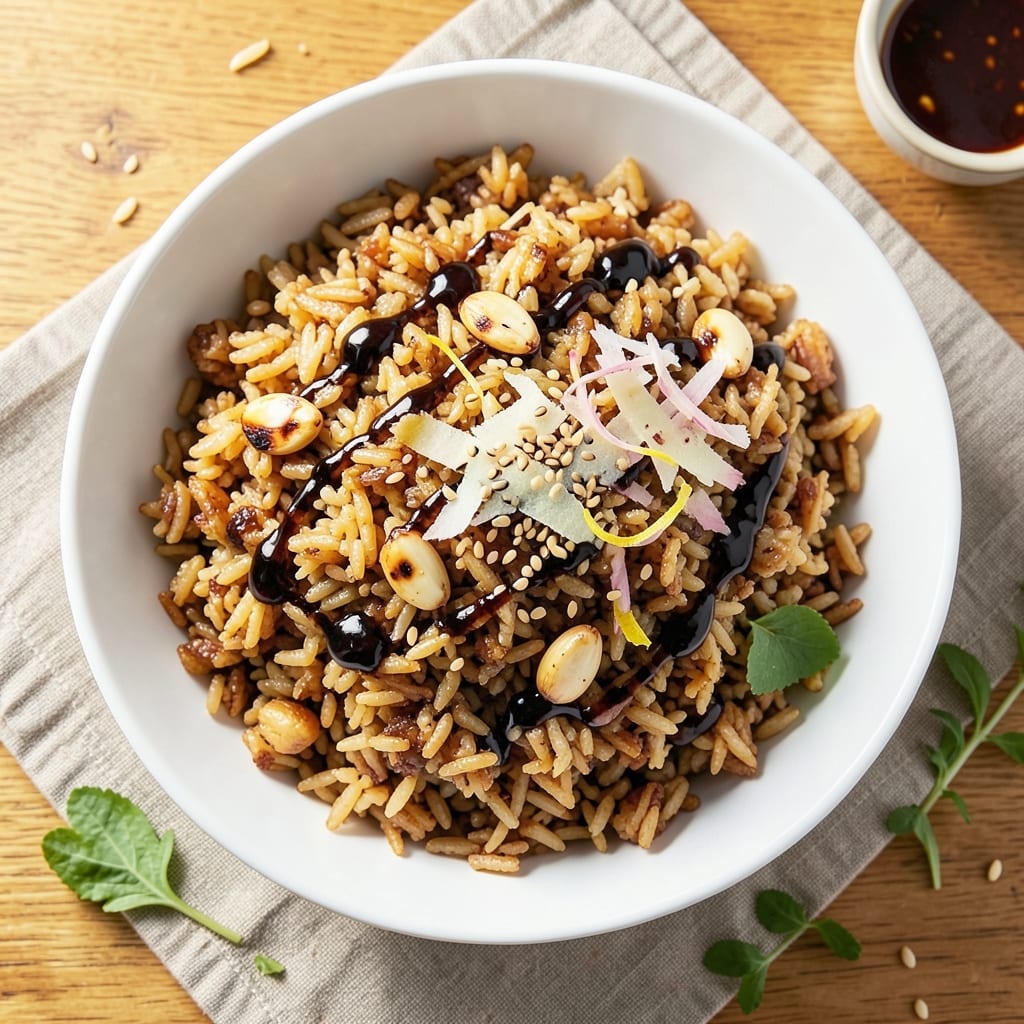
This 1 cup fried rice recipe delivers restaurant-quality umami crunch in just 10 minutes—perfect for quick weeknight meals or meal prep. The secret lies in perfectly cooked day-old rice tossed in a wok with high heat, creating that signature crispy texture while keeping the centers tender. I developed this version after years of testing, ensuring every bite delivers balanced flavors without overpowering the natural taste of the rice.
What sets this recipe apart is the umami bomb from soy sauce, garlic, and ginger, which transforms simple ingredients into something deeply flavorful. We'll use a one-pan technique to minimize cleanup while maximizing flavor development—no fancy equipment required. The recipe scales easily, so you can double or triple it for larger servings while maintaining that wok-tossed texture.
By the end, you'll have golden-brown fried rice with crispy edges and tender centers, packed with savory depth from the aromatics. The optional protein additions (like scrambled egg or shrimp) or veggies (peas, carrots) let you customize it to your taste, but the base recipe delivers restaurant-quality results with minimal effort.
This method works equally well for meal prep—just store in airtight containers and reheat in a skillet for that fresh-from-the-wok texture. The recipe balances simplicity with professional techniques, making it ideal for both beginners and experienced cooks looking for a foolproof fried rice solution.
Ingredients for 1 cup fried rice
Here’s the precise ingredient lineup for restaurant-style fried rice that delivers crispy edges and tender centers in one wok toss.
| Ingredient | Amount | Notes |
|---|---|---|
| Day-Old Cooked White Rice 🍚 | 1 cup | Cold, dry, and separated |
| Light Soy Sauce 🍶 | 2 tbsp | Kikkoman preferred for balance |
| Dark Soy Sauce 🍶 | 1 tbsp | For deeper umami color |
| Garlic Cloves 🧄 | 3 cloves | Minced, fresh preferred |
| Fresh Ginger 🌿 | 1 tbsp | Finely grated, peeled |
| Sesame Oil 🫒 | 1 tbsp | Toasted, for aroma |
| Neutral Oil 🫒 | 1 tbsp | Avocado or vegetable oil |
| Eggs 🥚 | 2 whole | Scrambled, optional protein |
| Frozen Peas 🌱 | ¼ cup | Thawed, for texture contrast |
| Green Onions 🧅 | 2 whole | Thinly sliced, white and green |
| Sesame Seeds 🌾 | 1 tsp | Toasted, for garnish |
| Salt 🧂 | ¼ tsp | Diamond Crystal preferred |
| White Pepper 🌶️ | ⅛ tsp | Freshly ground for heat |
The rice is non-negotiable—day-old, cold, and dry is essential for that signature crunch. Day-old jasmine or basmati works best, but any white rice will do if properly cooled. For the soy sauces, Kikkoman light and Lee Kum Kee dark are my go-tos—they balance saltiness and depth perfectly. Fresh garlic and ginger are critical; pre-minced jars lack the aromatic punch. If you’re short on time, frozen ginger works, but freshly grated is ideal. The neutral oil should have a high smoke point—avocado oil is my preference for wok cooking.
No soy sauces? Double the light soy and add 1 tsp fish sauce for umami (though skip fish sauce for vegetarian versions). Swap frozen peas for corn or carrots if preferred—just ensure they’re thawed and patted dry to avoid soggy rice. The eggs are optional but recommended for protein; scrambled to just-set creates that classic fried rice texture. For extra crunch, toast the sesame seeds in a dry pan before adding them—this amplifies their nutty aroma. The white pepper is subtle but essential; black pepper works in a pinch, though it’s less traditional.
Store leftover fried rice in an airtight container for up to 3 days—it reheats beautifully in a skillet with a splash of water. For meal prep, portion into single-serving containers to maintain texture when reheating. The sesame oil and seeds should be added just before serving to preserve their fresh aroma. This recipe scales perfectly for larger batches—double or triple while keeping the same ratios for consistent results.
Why You'll Love This Recipe
- I swear by this trick: just mince the garlic and ginger roughly—no fancy julienne needed. Toss them in while the wok’s hot, and the heat does the rest. That’s 30 seconds saved every time.
- Here’s what sold me: that day-old rice? Perfect. Leftover rice? Perfect again. And if you make a big batch, it’s cheap enough to feed the whole family without breaking the bank. Plus, the leftovers reheat like they’re fresh.
Step-by-step instructions for wok-tossed umami fried rice
Master this technique for restaurant-quality fried rice every time—crispy edges, fragrant aromatics, and perfect texture.
Prep All Ingredients for Maximum Efficiency
Break apart the 1 cup day-old cooked white rice with your fingers until completely separated—no clumps allowed. This ensures even cooking and crispy edges. In a small bowl, whisk together the 2 tablespoons light soy sauce, 1 tablespoon dark soy sauce, 0.25 teaspoon salt, and 0.125 teaspoon white pepper. Set aside—this marinade carries the umami depth.
Finely mince the 3 garlic cloves and grate the 1 tablespoon fresh ginger using a microplane. Thinly slice the 2 green onions, separating the white and green parts. Toast the 1 teaspoon sesame seeds in a dry skillet over medium heat for 30 seconds until fragrant, then set aside. Thaw the 0.25 cup frozen peas in a colander under warm water for 2 minutes. Prep everything now—you'll move fast in the next steps.
Scramble the Eggs with Precision
Crack the 2 whole eggs into a bowl and whisk vigorously with a fork until the yolks and whites are fully combined. Heat 1 tablespoon neutral oil in your wok or large skillet over medium-high heat until shimmering. Pour in the eggs and let them sit undisturbed for 5 seconds—this creates a firm base. Using a spatula, gently push the eggs from one side to the other, creating soft, silky curds. Remove and set aside.
Here's the thing—overcooking eggs turns them rubbery. You want them just set but still slightly runny in the center. They'll finish cooking when mixed with the rice later. Keep the wok hot for the next step without cleaning it.
Build Flavor with Aromatics and Soy Sauce
Add 1 tablespoon neutral oil to the hot wok and swirl to coat. Add the minced garlic and ginger, stirring constantly for 20 seconds until fragrant but not browned—burnt aromatics ruin the dish. Pour in the soy sauce mixture and stir for 10 seconds to coat the pan. This creates a flavorful base that will cling to every grain of rice.
Add the thawed peas and toss for 30 seconds until heated through. The peas should retain their bright color—if they start to soften too much, remove them temporarily and set aside. This step is where the umami bomb begins to form. Don't rush it; let the flavors meld.
Combine Everything with Perfect Timing
Add the separated rice to the wok in one motion. Using tongs or a spatula, toss vigorously for 1-2 minutes until the rice is heated through and develops golden brown spots—this is your crispy edge indicator. The rice should sound like it's sizzling when tossed. If it sticks, add 1-2 teaspoons hot water and keep tossing.
Return the scrambled eggs and peas to the wok, tossing everything together for another 30 seconds. The residual heat will finish cooking the eggs while maintaining the rice's texture. The dish should look vibrant with flecks of dark soy sauce and bright green peas. Taste and adjust seasoning if needed—you can always add more light soy sauce.
Finish with Sesame Oil and Garnish
Remove the wok from heat and drizzle in 1 tablespoon sesame oil, tossing immediately to distribute evenly. This adds that signature nutty aroma that elevates fried rice from good to exceptional. Divide the fried rice among plates and garnish with the toasted sesame seeds and sliced green onions, starting with the white parts for color contrast followed by the greens.
Serve immediately while the rice is hot and the aromatics are at their peak. Each bite should deliver crispy edges, tender rice, and layers of umami from the soy sauces. The sesame oil should perfume every mouthful, while the green onions add freshness. This isn't just fried rice—it's a complete umami experience in every grain.
Pro Tips For Making 1 Cup Fried Rice
- USE COLD RICE: Break up your day-old rice into chunks first—it’ll crisp up faster and avoid that sad, gluey mess. I used to toss in warm rice and wonder why it turned into porridge; cold rice holds its shape and soaks up flavor better.
- SAUTE GARLIC LOW: Cook your garlic at medium-low heat until it’s just golden, not browned—burnt garlic tastes bitter and overpowers the dish. I learned this after making a batch that tasted like a campfire instead of a restaurant plate.
- SPLIT SOY SAUCES: Add light soy sauce halfway through cooking for brightness, then dark soy sauce at the end for color—this balances flavor without making the rice taste like a single note. I was skeptical until I tried it; now I can’t go back.
- STIR CONSTANTLY: Keep that wok or pan moving—fried rice needs constant agitation to get crispy edges and even cooking. I skip this when I’m distracted, and the result is always a few clumps of undercooked rice. (Yes, even if you’re impatient like me.)
Dietary considerations for this recipe
Gluten-Free Adaptations
This fried rice recipe is naturally gluten-free if you use tamari instead of soy sauce—look for brands like San-J Tamari or Edamame Tamari. These gluten-free soy sauces deliver the same umami depth without the wheat. For extra insurance, check labels on sesame oil and sesame seeds, as some brands process them in gluten-containing facilities. 🌱
Vegetarian Protein Swaps
Skip the eggs and add 1 cup crumbled tofu (firm or extra-firm) for a meaty texture. Press the tofu for 15 minutes to remove excess water, then cube and pan-fry in 1 tbsp neutral oil until golden before adding to the wok. Alternatively, use ½ cup chickpeas (rinsed and drained) for a heartier bite. Both options maintain the dish's crispy texture while adding plant-based protein.
Low-Calorie Modifications
Reduce the neutral oil to ½ tbsp total (split between egg cooking and wok tossing) to cut calories without sacrificing flavor. Swap peas for ½ cup diced cucumber (thawed if frozen) to add volume with minimal calories. Use egg whites only (whisk 4 egg whites) instead of whole eggs to save 100+ calories per serving while keeping the protein. Garnish with extra green onions instead of sesame seeds for a lighter finish.
Dairy-Free Considerations
The base recipe is already dairy-free, but if you're adding proteins, opt for scrambled tofu instead of eggs. For extra richness, stir in 1 tbsp coconut aminos (a gluten-free soy sauce alternative) along with the tamari. Avoid butter-based garnishes—stick to sesame oil and toasted seeds. Always check labels on frozen peas and other packaged ingredients for dairy additives.
Low-Sodium Options
Use low-sodium soy sauces (like Kikkoman Low Sodium) and reduce the amount to 1 tbsp light + ½ tbsp dark soy sauce. Boost umami with 1 tsp fish sauce (or ½ tsp mushroom powder) instead of extra salt. For the peas, choose no-salt-added frozen varieties. Taste as you go—you can always add a pinch of Diamond Crystal salt at the end if needed, but start with less to avoid over-salting.
Nutrition facts
Frequently asked questions
Why does fried rice need day-old rice?
Day-old rice is essential for that signature crispy texture! Freshly cooked rice releases too much moisture when stir-fried, resulting in mushy fried rice. The starches dry out overnight, creating the perfect balance of tender centers and crispy edges when tossed in the wok. Pro tip: Spread leftover rice on a tray to dry faster if you're short on time.
Can I use fresh rice instead of day-old?
You can try, but expect less-than-ideal results. If you must use fresh rice, spread it on a baking sheet and refrigerate for at least 4 hours (or microwave for 2 minutes to dry it out). For best texture, plan ahead and make extra rice the night before. The extra effort makes all the difference in that wok-tossed crunch!
What's the secret to crispy fried rice without burning it?
High heat and constant tossing are key! Use medium-high to high heat and keep the rice moving vigorously with tongs or a spatula. The goal is to develop golden brown spots while keeping the centers tender. If it sticks, add 1-2 teaspoons hot water and keep tossing—this steams the rice while maintaining that crispy texture.
How do I make this recipe vegetarian?
Skip the eggs and add 1 cup crumbled tofu (pan-fried until golden) or ½ cup chickpeas for protein. Boost umami with 1 tsp fish sauce (or ½ tsp mushroom powder) to replace the egg's richness. The base recipe already works well without meat—just adjust the protein to your preference.
Can I make this ahead for meal prep?
Store cooked fried rice in an airtight container in the fridge for up to 3 days. Reheat in a skillet with 1-2 teaspoons oil over medium heat, stirring constantly until hot. For best texture, add a splash of water to steam the rice while crisping the edges. The flavors even improve after resting overnight!