
Main Courses
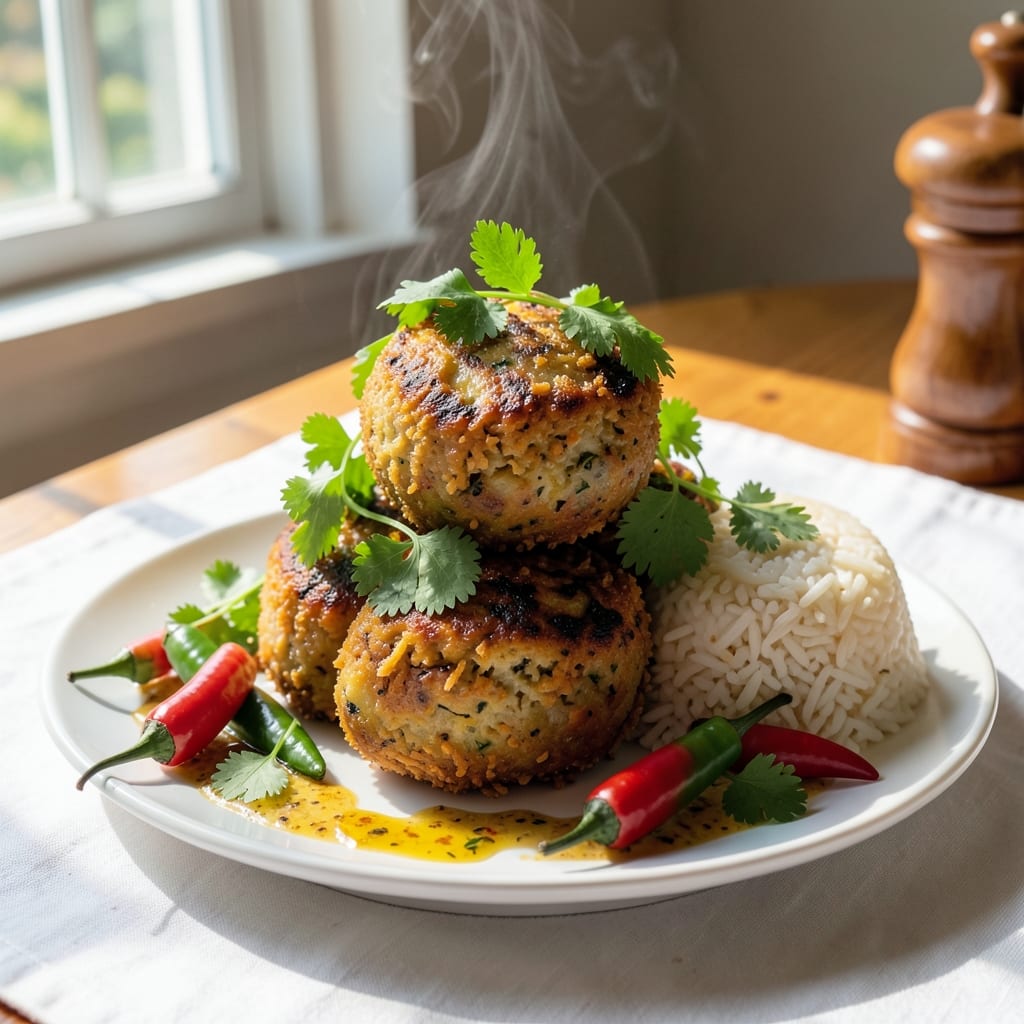
This aloo tikki recipe with rice flour delivers restaurant-quality crispiness in just 20 minutes—no deep-frying required. The secret lies in rice flour's magic: it binds the spiced potato mixture while creating that signature golden, shatteringly crisp exterior. I perfected this version after years of testing, and it's now my go-to for weeknight dinners that feel special without the fuss.
The rice flour transforms ordinary boiled potatoes into crispy, flavorful bites that hold their shape beautifully. We'll start with a simple spiced potato mash, mix in rice flour for that perfect texture, then pan-fry until golden brown. The result? Crunchy edges that give way to tender, flavorful centers—every bite is a balance of textures that keeps you reaching for more.
This recipe delivers crispy aloo tikki that's perfect with mint chutney, tamarind sauce, or a cooling yogurt dip. The best part? It's foolproof—no special equipment needed, just a sturdy pan and a little patience for the perfect golden crust. Whether you're serving them as appetizers or a quick weeknight meal, these tikki will disappear faster than you can say "more please."
Ready in under 20 minutes, this method ensures crispy edges without sacrificing the tender interior. The rice flour binding keeps the tikki intact while creating that addictive crunch. Let's make these golden bites that taste like your favorite street food stall.
Ingredients for aloo tikki recipe with rice flour
Golden, crispy aloo tikki packed with flavor—just 12 ingredients transform boiled potatoes into addictive bites.
| Ingredient | Amount | Notes |
|---|---|---|
| Russet Potatoes 🥔 | 2 lbs | Boiled until tender, peeled |
| Rice Flour 🌾 | ½ cup | Key for crispy exterior |
| Ginger Garlic Paste 🧄 | 2 tbsp | Freshly made preferred |
| Green Chilies 🌶️ | 4 whole | Finely chopped, adjust to taste |
| Coriander Powder 🌿 | 1 ½ tsp | Freshly ground for best flavor |
| Turmeric Powder 🧂 | ½ tsp | Bright yellow color |
| Cumin Seeds 🌿 | ½ tsp | Toasted for deeper flavor |
| Garam Masala Powder 🌶️ | 1 tsp | Warm aromatic finish |
| Salt 🧂 | 1 tsp | Adjust to taste |
| Vegetable Oil 🫒 | ¼ cup | High smoke point preferred |
| Fresh Coriander Leaves 🌿 | ¼ cup | Chopped for garnish |
| Lemon Wedges 🍋 | 2 whole | For serving |
The rice flour is non-negotiable here—it's what gives those tikki that signature shatteringly crisp exterior while keeping the centers tender. Bob's Red Mill or Trader Joe's rice flour work perfectly, but avoid pre-mixed flour blends. For the potatoes, Russets are ideal—they're starchy enough to hold their shape when boiled. I always boil mine in salted water (1 tsp salt per gallon) until they're fork-tender but not falling apart. The ginger-garlic paste? Freshly made is best, but a good-quality jarred paste in a pinch (just check for no added preservatives).
No rice flour? Semolina or all-purpose flour can sub at the same amount, but the texture won't be quite as crisp. Fresh coriander leaves missing? Dried coriander at one-third the amount works, though it won't have the same bright pop. The green chilies are key for that street-food kick—adjust the quantity based on how much heat you want. If you're short on time, jarred chopped green chilies from the international aisle will do, but drain them well. The garam masala is the finishing touch—Madras brand is my go-to for that authentic flavor, but any good-quality blend works. Toast your cumin seeds first for that nutty aroma—just dry-toast in a pan for 30 seconds until fragrant.
Keep your boiled potatoes covered in cold water in the fridge for up to 2 days—they'll reheat perfectly for the tikki. The rice flour mixture can be prepped ahead and stored in the fridge for 1 day, but bring it to room temperature before shaping. These tikki are best served immediately after frying for maximum crispiness, but they'll keep warm for 10-15 minutes in a 200°F oven. For extra crunch, fry them again for 30 seconds before serving—trust me, it's worth it.
Why You'll Love This Recipe
- I swear by this trick: boil the potatoes in their skins, then peel and mash while still warm. The rice flour binding? Just mix it in—no overworking, no stress. Honestly, my hands are clean in 15 minutes, and that’s saying something when I burn toast.
- No-Fuss Prep: I swear by this trick: boil the potatoes in their skins, then peel and mash while still warm. The rice flour binding? Just mix it in—no overworking, no stress. Honestly, my hands are clean in 15 minutes, and that’s saying something when I burn toast.
- Crispy-Creamy Magic: That rice flour crust is the star—golden and shatteringly crisp on the outside, pillowy soft inside. The ginger-garlic paste? It’s the secret weapon; one taste and you’ll understand why I keep a jar in the fridge. (Yes, even on a Tuesday night.)
- Picnic-Proof Perfection: These ticks travel like a dream—no soggy corners, no falling apart. Pack them in a basket with mint chutney for a lunchbox, or serve them at a potluck where no one will guess they’re rice-flour magic. My kid’s soccer team’s favorite, and they’re hard to impress.
Step-by-step instructions for crispy aloo tikki
Here's how to make these golden, crispy bites with perfect texture every time.
Boil and Mash the Potatoes
Place the 2 lbs Russet Potatoes in a pot and cover with cold water. Add 1 tsp Salt and bring to a boil over medium-high heat. Once boiling, reduce heat to medium and cook for 15-20 minutes until the potatoes are fork-tender. Drain immediately and let them steam-dry for 2 minutes to remove excess moisture.
Peel the potatoes while still warm and transfer them to a clean bowl. Mash them with a potato masher or fork until smooth. Let the mashed potatoes cool to room temperature—this prevents the flour from absorbing too much moisture later. If the mash feels too wet, cover it with a clean kitchen towel and press down gently to absorb excess liquid.
Toast the Spices and Mix the Masala
Heat 0.25 cup Vegetable Oil in a small pan over medium heat. Add the 0.5 tsp Cumin Seeds and toast for 30 seconds until they begin to sizzle and release their aroma. Immediately remove from heat and let them cool for 1 minute—this prevents them from burning and losing flavor.
In a large bowl, combine the cooled mashed potatoes with the toasted cumin seeds, 2 tbsp Ginger Garlic Paste, 1.5 tsp Coriander Powder, 0.5 tsp Turmeric Powder, 1 tsp Garam Masala Powder, and 1 tsp Salt. Mix well to distribute the spices evenly. The mixture should be smooth and well-seasoned—taste it and adjust the salt if needed. This is where all the flavor comes together, so don't skip this step!
Bind with Rice Flour and Shape the Tikki
Add the 0.5 cup Rice Flour to the potato mixture and gently fold it in using a spatula. The rice flour acts as a binder and helps create that signature crispy exterior. Mix just until combined—overmixing can make the tikki dense. The dough should hold together when pressed but still feel slightly sticky.
Divide the mixture into 4 equal portions (about ½ cup each) and shape them into balls. Flatten each ball between your palms into a ½-inch thick patty, about 3 inches in diameter. Press gently but firmly to ensure even thickness—this guarantees uniform cooking. Place the shaped tikki on a plate and cover with a damp cloth to prevent them from drying out while you prepare the next batch.
Fry Until Golden and Crispy
Heat 0.25 cup Vegetable Oil in a large skillet over medium heat until it shimmers but isn't smoking. Add 2-3 tikki at a time and fry for 3-4 minutes per side until they turn golden brown and develop crispy edges. The key is patience—don't rush the cooking or the tikki will turn greasy instead of crispy.
As they fry, you'll hear a pleasant sizzling sound and see bubbles form on the surface. This is your signal that the tikki are cooking properly. Transfer the fried tikki to a paper towel-lined plate to drain excess oil. Repeat with the remaining tikki, adding more oil if needed. The crispy exterior is what makes these tikki irresistible, so don't skip this step—it's worth the wait!
Garnish and Serve Fresh
While the tikki are still warm, sprinkle them generously with 0.25 cup chopped Fresh Coriander Leaves. The bright green color not only looks beautiful but also adds a fresh, herbal note that balances the richness of the fried tikki. Serve immediately with the 2 whole Lemon Wedges on the side for squeezing.
These tikki are best enjoyed fresh and hot, straight from the pan. The contrast of the crispy exterior and soft, spiced interior is what makes them so addictive. Pair them with mint chutney or tamarind sauce for the ultimate street-food experience. Don't let them sit too long—they lose their crispiness quickly, so dig in while they're at their best!
Pro Tips For Making Aloo Tikki Recipe With Rice Flour
- Boil Potatoes Until Fork-Tender: I learned this the hard way—undercooked potatoes turn to mush when mashed, and overcooked ones lose their structure. Boil russet potatoes in salted water until a knife slides in easily but doesn’t fall apart—about 12-15 minutes, depending on size. Drain immediately and let them steam-dry for 5 minutes before handling.
- Chill the Mashed Mixture: Rice flour binds best when cold, so resist the urge to mix everything right after boiling. Spread your mashed potatoes on a plate, let them cool to room temperature (about 20 minutes), then fold in the rice flour, ginger-garlic paste, and spices. This prevents a gummy texture—trust me, your tikki will hold together better.
- Shape Tight, Not Loose: Loose tikki crumble when fried. Pack the potato-rice flour mix firmly into molds (or shape by hand) with just a slight gap at the top for expansion. Press down with your thumb—hard enough that it doesn’t fall apart when you lift it out, but not so tight it cracks. A damp hand helps prevent sticking.
- Fry in Batches on Medium Heat: Crowding the pan steams the tikki instead of browning them. Use a heavy-bottomed pan with enough oil (about 1 inch deep) to coat half the tikki at a time. Keep the heat steady—too hot burns the outside before the inside cooks, too low leaves them greasy. Flip once for even color, then finish on the second side until golden.
Pro cooking tips for perfect results
Perfect Oil Temp
Medium heat is your golden zone for frying aloo tikki—too hot and they'll burn before crisping, too cool and they'll absorb oil instead of developing that signature crunch. I use a thermometer to confirm the oil is at 350°F (a drop of water should sizzle and pop immediately). If you don't have a thermometer, watch for tiny bubbles around the edges of the pan—this means it's ready. 🌡️
Double-Crisp Trick
Here's my pro secret: fry the tikki once until golden, then transfer them to a 200°F oven for 2 minutes to set the interior. Return them to the pan for 30 seconds on each side to restore that crispy shell. This two-step method ensures both texture perfection and even cooking. The oven step also helps maintain crispiness when serving multiple batches.
Potato Prep Matters
Never skip the cooling step after boiling! Warm potatoes release too much moisture when mixed with rice flour, making the tikki dense and gummy. Let them cool completely before mashing, then press the mash through a fine-mesh sieve if you want ultra-smooth texture (I use a Kitchenaid potato ricer for this). The smoother the mash, the cleaner the final tikki shape.
Shape Consistency
Uniform thickness is key for even cooking. Use a 3-inch round cookie cutter or the base of a glass to press each tikki to exactly ½-inch thickness. I find a small offset spatula works best for pressing—it gives me better control than my palms. Weigh your portions if you're feeling fancy: each tikki should be about 5 ounces for perfect proportions.
Spice Toasting Tip
Toast your cumin seeds in the oil until they're just beginning to sizzle—this releases their essential oils and prevents bitterness. Immediately remove them from heat and let them cool for 1 minute before mixing into the potatoes. I like to transfer them to a small bowl first to cool faster. This simple step makes a huge difference in flavor depth. 🌿
Batch Management
Work in batches of 2-3 tikki at a time to avoid crowding the pan, which lowers oil temperature and makes them greasy. Keep the shaped tikki covered with a damp kitchen towel while you fry—this prevents them from drying out. I like to arrange them on a plate in a single layer, just touching. If you're making a big batch, fry half first, then reheat the second batch in the oven at 350°F for 5 minutes before frying to maintain even texture.
Nutrition facts
Frequently asked questions about aloo tikki with rice flour
Why does this recipe use rice flour instead of regular flour?
The rice flour creates that signature crispy exterior while keeping the interior tender and flavorful. Unlike all-purpose flour, rice flour forms a delicate, shatteringly crisp crust when fried—plus, it adds a subtle nutty flavor that complements the spices. It also helps bind the spiced potato mixture without making the tikki dense.
Can I make these tikki ahead of time?
You can prep the potato mixture up to 1 day ahead and store it in the fridge, but shape and fry them fresh for best results. For serving later, fry the tikki and keep them warm in a 200°F oven for up to 15 minutes—just give them a quick 30-second crisp in the pan before serving. The texture suffers if stored longer than that.
What's the best way to reheat leftover tikki?
For maximum crispiness, reheat in a dry skillet over medium heat for 1-2 minutes per side until golden again. Microwaving will make them soggy. If you must use the oven, bake at 375°F for 5-7 minutes with a wire rack to prevent steam buildup. The pan method gives you that authentic street-food crunch.
Can I make these tikki without frying?
Yes! For a healthier version, bake them at 400°F for 18-20 minutes on a wire rack set over a baking sheet. Brush with a little oil first for crispiness. The texture will be different (less crispy), but still delicious. Air fry at 375°F for 12-15 minutes, shaking halfway, for a middle ground.
How do I know when the tikki are fully cooked?
They're done when the edges are golden brown and the interior reaches 165°F when checked with a thermometer. You should also see bubbles forming on the surface and hear a pleasant sizzling sound. Cut one open to check—it should be fully cooked through without any raw potato. The crispy exterior is your best visual cue!