
Side Dishes
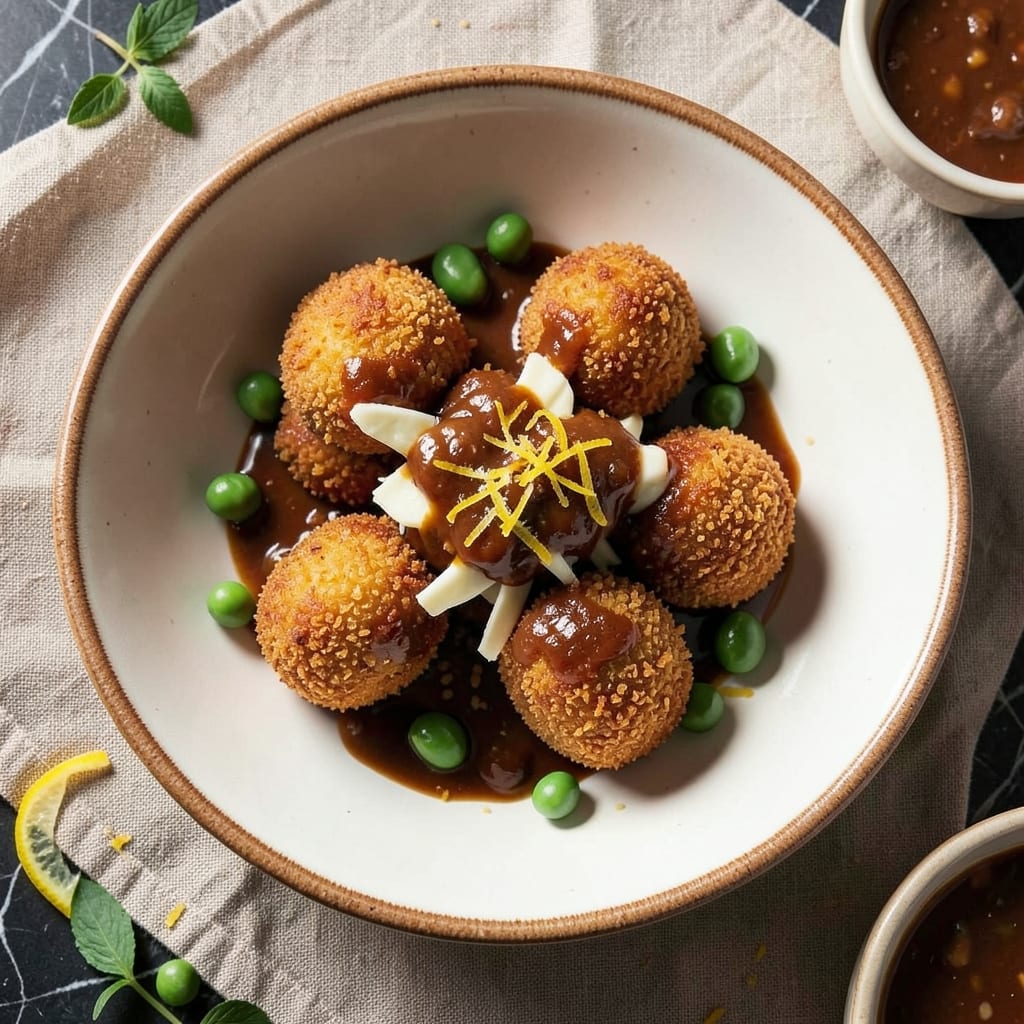
Transforming leftover rice into crispy-fried arancini is one of the most satisfying ways to repurpose dinner scraps—each golden bite hides a melty, flavorful surprise inside. The secret lies in cold, firm rice that holds its shape while achieving that perfect crispy exterior and creamy interior. I’ve perfected this technique after years of trial and error, ensuring every arancini is restaurant-worthy without requiring special equipment.
This recipe combines classic Sicilian flavors with practicality, using simple ingredients like mozzarella, ragù, and peas for authentic taste. The key steps—rolling the rice into tight balls, shaping them precisely, and frying at the right temperature—make all the difference. Once you master these techniques, you’ll never waste leftover rice again.
The result is a plate of crispy, golden arancini with tender, flavorful centers that melt in your mouth. Serve them warm as an appetizer or side dish, and watch them disappear faster than you can say "Sicily." The satisfaction of turning simple ingredients into something extraordinary is unmatched.
Whether you’re feeding a crowd or saving dinner leftovers, this recipe delivers foolproof, delicious results every time. Let’s get started on creating these crispy-fried gold bites!
Ingredients for arancini recipe leftover rice
Simple ingredients transform cold rice into crispy-fried Sicilian gold bites with melty centers.
| Ingredient | Amount | Notes |
|---|---|---|
| Cold Leftover Rice 🍚 | 3 cups | Day-old, firm, not sticky |
| Shredded Mozzarella Cheese 🧀 | 1 ½ cups | Fresh mozzarella, low-moisture |
| Classic Ragù Sauce 🍅 | 1 cup | Homemade or quality jarred |
| Frozen Peas 🌱 | ½ cup | Thawed, no need to drain |
| Large Egg 🥚 | 1 whole | Beaten for binding |
| All-Purpose Flour 🌾 | ½ cup | For breading, fine texture |
| Panko Breadcrumbs 🍞 | 1 cup | Light and crispy |
| Vegetable Oil 🫒 | 3 cups | For deep frying, high smoke point |
| Salt 🧂 | 1 tsp | Kosher or sea salt |
| Black Pepper 🌶️ | ½ tsp | Freshly ground |
| Garlic Powder 🧄 | ½ tsp | For extra flavor |
| Dried Parsley 🌿 | 1 tsp | For garnish, finely chopped |
| Lemon Zest 🍋 | 1 tsp | Brightens flavor |
The rice is non-negotiable—it must be cold and firm (day-old works best). Day-old basmati or arborio holds shape perfectly, but avoid sticky rice. For the mozzarella, fresh mozzarella from the deli counter shreds best—pre-shredded gets gummy. Ragù sauce? Homemade is ideal, but Rao’s or Barilla jarred works in a pinch. Frozen peas thaw in minutes under hot water—no need to drain, just squeeze out excess moisture with a paper towel. The egg acts as a glue for the filling, so make sure it's room temperature before mixing.
No mozzarella? Fontina or provolone shreds work in a bind, though the texture won’t be identical. Short on ragù? Mushroom duxelles or sun-dried tomato paste adds depth. For a veggie version, swap peas for roasted zucchini or caramelized onions. The panko is key for crispiness—Trader Joe’s or store-brand works fine, but avoid fine breadcrumbs. Need to fry without deep-frying? Air fryer at 375°F for 8-10 minutes gives a lighter result (though not as crispy). The lemon zest might seem small, but it cuts through the richness—zest only, no pith—and makes these taste restaurant-fresh.
Keep cold rice in the fridge for up to 3 days before using—it’ll dry out after that. Prep fillings ahead and store in an airtight container for 2 days. For frying, maintain oil at 350°F—a thermometer is worth the investment. These reheat beautifully: 375°F oven for 10 minutes revives crispiness. Make a double batch—they disappear fast! Store leftovers in the fridge for 3 days or freeze for 1 month (reheat from frozen).
Why You'll Love This Recipe
- No-Rice-Waste Magic: I swear by this trick—turning yesterday’s plain rice into something crispy and golden. No need to cook from scratch; just grab what’s left in the fridge and roll it up with that gooey mozzarella and ragù.
- Crispy-Creamy Obsession: That first bite? Crunchy shell, melty cheese, and rich ragù oozing out—it’s like a hug in food form. The peas add a little pop of color and texture, and honestly, I can’t resist going back for more.
- Game for Any Night: Whether it’s a lazy Sunday lunch or a quick dinner after work, these arancini hit the spot. They’re perfect for picnics too—just fry them up, wrap in foil, and you’ve got a handheld feast.
- Budget-Friendly Hero: Uses pantry staples and stretches leftovers into something special. Between us, this is how I feed my family without breaking the bank—minimal ingredients, maximum satisfaction.
Step-by-step instructions for arancini with leftover rice
Transform your cold rice into golden, crispy arancini with melty centers—here's how.
Prepare the Filling Mixture
In a large bowl, combine the 3 cups cold leftover rice with 1 cup classic ragù sauce, 0.5 cup thawed frozen peas, 1.5 cups shredded mozzarella cheese, 0.5 tsp garlic powder, and 1 tsp lemon zest. Using your hands, gently mix everything until fully incorporated but still slightly textured—you want pockets of filling that hold their shape when formed into balls.
Here's the thing—don't overmix or compress the filling too much. You're aiming for a tender, melty center, not a dense one. If the mixture feels too wet, add an extra tablespoon of panko breadcrumbs to help bind it. The filling should hold together when pressed between your fingers but still feel soft enough to compress into balls.
Create the Breading Station
Set up three shallow bowls in this order: one with the 1 whole large egg beaten with 1 tsp salt and 0.5 tsp black pepper, one with the 0.5 cup all-purpose flour, and one with the 1 cup panko breadcrumbs mixed with 1 tsp dried parsley. This sequential dredging creates the perfect crispy exterior.
I like to use separate bowls for each stage to avoid cross-contamination and ensure each arancini gets an even coating. The flour first creates a smooth base, the egg binds it together, and the panko gives that signature crispy texture. Don't skip the parsley in the breadcrumbs—it adds a fresh, bright contrast to the rich filling.
Form and Bread the Arancini
Using slightly wet hands (dampen them with water), scoop about 2 tablespoons of filling and roll it into a ball, gently pressing to form a smooth surface. Roll each ball in the flour first, then dip into the egg wash, and finally coat thoroughly in the panko mixture. Press the breadcrumbs gently to adhere completely.
Here's where precision matters: keep the balls uniform in size for even cooking. If the filling feels too wet to hold shape, chill the mixture for 15 minutes before forming. The breading should be about ¼-inch thick—thicker equals extra crispy, but don't go overboard or it'll burn before the center cooks through.
Fry to Golden Perfection
Heat 3 cups vegetable oil in a deep pot or Dutch oven to 350°F—use a thermometer to monitor this precisely. Fry 4-5 arancini at a time (don't overcrowd) for 3-4 minutes until they float to the surface and develop a deep golden brown crust. Drain on a wire rack or paper towels to remove excess oil.
This is the moment that matters: the arancini should be golden brown all over, not pale yellow. If they brown too quickly, lower the oil temperature to 325°F. The internal temperature should reach 165°F when checked with a meat thermometer. The outside should be crispy enough to hold its shape, while the inside remains soft and melty.
Serve Immediately
Serve the arancini while still hot, straight from the fryer, so the breading stays crispy. Garnish with an extra sprinkle of dried parsley and a pinch of lemon zest for brightness. The contrast between the crispy exterior and gooey, melty mozzarella center is what makes these arancini irresistible.
Real talk: these are best enjoyed fresh, but if you need to reheat, warm them in a 350°F oven for 5-7 minutes to restore crispiness. The secret to perfect arancini lies in the balance of technique—don't rush the frying, and always keep the oil at the right temperature. Trust the process, and you'll have restaurant-quality arancini every time.
Pro Tips For Making Arancini Recipe Leftover Rice
- CHILL THE RICE FIRST: I used to skip this and ended up with soggy arancini—no matter how much I squeezed the rice. Spread your leftovers on a tray and pop them in the freezer for 20 minutes. The extra cold makes the grains firmer and less likely to fall apart when you shape them, especially with all that ragù and peas weighing them down.
- USE FRESHLY GRATED CHEESE: Pre-shredded mozzarella has starch to prevent clumping, which means it won’t melt as smoothly. Buy a block, grate it yourself, and pat it dry with a paper towel to remove excess moisture—this keeps your arancini from getting gummy when fried. (Yes, it’s a pain, but your crispy crust will thank you.)
- DON’T OVERMIX THE FILLING: I learned this the hard way—overworking the rice, ragù, and peas turns the filling into a dense paste that cracks when fried. Mix just until everything’s combined, then stop. The texture should be loose enough to hold shape but still let the cheese stretch when fried. Think "sticky, not mushy."
- FREEZE SHAPED ARANCINI BEFORE FRYING: Sounds weird, but it works: roll your arancini, place them on a tray, and freeze for 30 minutes. The cold rice holds together better when you fry, and the exterior crisps up faster because it’s not releasing moisture into the oil. (Pro move: use a fork to secure the egg wash before freezing—no unraveling.)
Wine and beer pairings for this recipe
Crispy Exterior
For arancini’s signature crunch, pair them with a dry, crisp white wine that cuts through the richness. A Vermentino from Sardinia—bright, citrusy, and mineral-driven—is my go-to. Its acidity mirrors the lemon zest in the recipe, while its subtle almond notes complement the fried texture. 🍷
Rich Ragù Harmony
The meaty depth of ragù calls for a medium-bodied red with enough tannin to stand up to the dish. Try a Chianti Classico—its cherry and herbal notes echo the tomato sauce in the filling, while its acidity balances the fried crispiness. A 2018 vintage or younger offers perfect balance.
Light Beer Option
Skip the wine? A crisp Italian lager like Peroni or Birra del Borgo cleanses the palate between bites. Their subtle malt sweetness and effervescence refresh without overpowering. For a craft twist, a Belgian witbier (like Hoegaarden) adds floral notes that play beautifully with the parsley garnish.
Unexpected Pairing
For a bold contrast, try a dry sparkling rosé—think Prosecco DOCG or Spanish Cava. The bubbles and berry notes create a refreshing counterpoint to the fried richness. Serve chilled to enhance the contrast with the warm arancini. 🥂
Regional Italian Pairings
In Sicily, locals often pair arancini with Nero d’Avola—a bold, juicy red with dark fruit flavors. For a lighter option, a Grecanico (Sicilian white) offers citrus and saline notes that mirror the lemon zest. Both highlight the dish’s Sicilian roots while complementing its textures.
Nutrition facts
Frequently asked questions
Can I use any type of leftover rice for arancini?
For best results, use day-old basmati or arborio rice—these varieties stay firm and hold their shape when fried. Avoid sticky or freshly cooked rice, as it won’t crisp up properly. If you only have long-grain white rice, spread it on a tray to dry out slightly before using.
Why does my arancini filling ooze out when frying?
This usually happens when the filling is too wet or the rice isn’t cold enough. Chill the mixture for 15 minutes before forming balls, and ensure your hands are damp (not soaking) when shaping. For extra stability, add 1 extra tablespoon of panko to the filling if it feels loose.
How do I keep the arancini crispy when reheating?
To revive crispiness, place arancini on a baking sheet and warm in a 350°F oven for 5-7 minutes. For a quicker fix, use an air fryer at 375°F for 3-4 minutes. Avoid microwaving—they’ll turn soggy. The key is high heat and quick reheating to restore that golden crunch.
What’s the best way to store leftover arancini?
Store in an airtight container at room temperature for 1 day (they’ll lose crispiness but stay safe). For longer storage, refrigerate for up to 3 days or freeze for 1 month. To reheat from frozen, bake at 375°F for 10-12 minutes until crispy again.
Can I make arancini without deep-frying?
Yes! For a lighter version, bake at 400°F for 18-20 minutes on a wire rack (not a tray) until golden. Brush with oil first for crispiness. Alternatively, use an air fryer at 375°F for 8-10 minutes. The texture won’t be as crispy as fried, but it’s a great healthier alternative.