
Main Courses
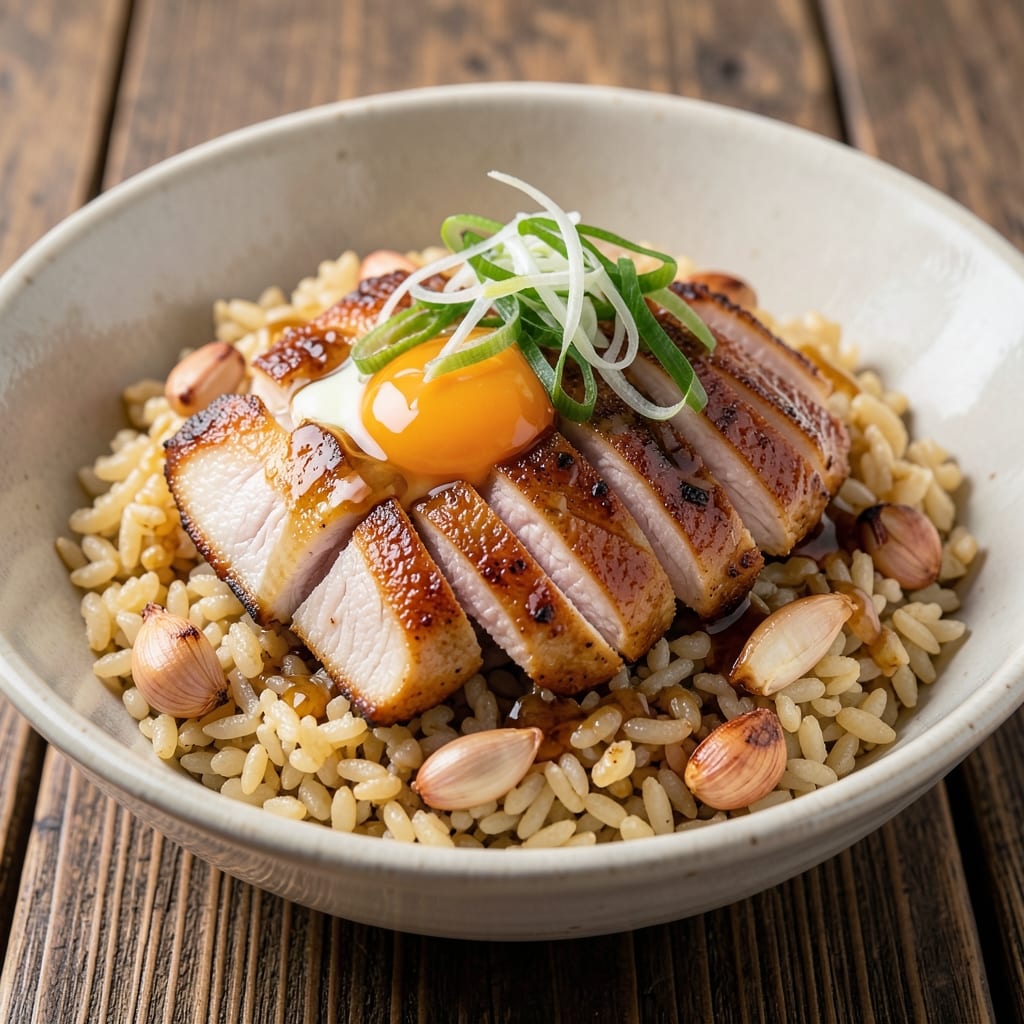
This Arashi fried rice recipe delivers the perfect balance of smoky garlic butter crunch and savory Japanese flavors in one pan. Inspired by the iconic character's bold personality, this dish starts with day-old rice heated just enough to create that signature crispy texture. The secret lies in the garlic butter—rich, aromatic, and slightly crispy at the edges—while soy sauce and sesame oil add depth without overpowering the dish.
What sets this recipe apart is the technique: high-heat stir-frying for that wok-like crunch, paired with optional protein like chicken, tofu, or shrimp for extra substance. Garnishes like soft-boiled eggs, scallions, and sesame seeds elevate every bite, making it a complete, restaurant-quality meal. The best part? It comes together in under 20 minutes with minimal prep.
By the time you're done, you'll have a fragrant, golden-brown fried rice that's crispy on the outside and tender inside. The smoky garlic butter adds a rich, umami note that ties everything together, while the sesame seeds provide a nutty finish. This dish is hearty enough for a main course but simple enough for a quick weeknight dinner.
Serve it as-is for a satisfying solo meal or double the batch for a crowd. The crispy edges and aromatic flavors make it a standout dish that's sure to impress. Let's get cooking!
Ingredients for arashi fried rice
Day-old rice, smoky garlic butter, and crispy edges—this is your one-pan Arashi fried rice essentials.
| Ingredient | Amount | Notes |
|---|---|---|
| Day-Old Cooked White Rice 🍚 | 4 cups | Cold, spread on tray to dry |
| Unsalted Butter 🧈 | ½ cup | Cold, cubed for garlic butter |
| Garlic Cloves 🧄 | 6 cloves | Minced, fresh preferred |
| Large Eggs 🥚 | 2 whole | Soft-boiled, peeled for garnish |
| Boneless Chicken Breast 🍗 | 1 lb | Diced, optional protein |
| Light Soy Sauce 🥢 | ¼ cup | Kikkoman preferred |
| Sesame Oil 🫒 | 1 tbsp | Toasted, for aroma |
| Scallions 🧅 | ¼ cup | Thinly sliced, green parts only |
| White Sesame Seeds 🌰 | 1 tbsp | Toasted lightly |
| Vegetable Oil 🫒 | 2 tbsp | High smoke point |
| Salt 🧂 | ½ tsp | Kosher or sea salt |
| Ground Black Pepper 🌶️ | ¼ tsp | Freshly ground |
The rice needs to be day-old and cold—fresh rice turns mushy. Spread it on a tray for 10 minutes before cooking to dry the surface slightly. For the garlic butter, cold butter and minced garlic create that signature smoky crunch. I always grab Kikkoman soy sauce for that authentic umami punch, but any light soy works. The chicken is optional but adds great protein—diced small so it cooks fast. If you're skipping protein, add extra veggies like peas or carrots instead.
No day-old rice? Cook fresh rice, spread it out, and chill for 30 minutes—it won't be perfect but works in a pinch. Fresh garlic is non-negotiable for that smoky flavor, but if you must use jarred, toast it first in oil to bring out the aroma. For the eggs, soft-boiled is ideal (6 minutes in boiling water), but hard-boiled works too if you're short on time. Swap the sesame oil for toasted sesame oil if you want even more depth—just a teaspoon goes a long way. The scallions can be subbed with regular onions if needed, but the green parts are what give that fresh finish.
Store any leftovers in an airtight container for 3-4 days—it reheats beautifully. For extra crispiness, spread reheated rice on a tray for 2 minutes in the microwave. The garlic butter freezes well for up to 3 months, so make a double batch. Garnishes like sesame seeds and scallions should be added right before serving to keep everything fresh. This dish is even better the next day—flavors meld perfectly overnight.
Why You'll Love This Recipe
- No Chopping Needed: I swear, this recipe only asks for garlic and chicken—both of which I can dice in under two minutes while chatting with my roommate. That butter and egg? Just crack, melt, stir. Done.
- Buttery Garlic Magic: The moment that garlic hits the hot butter, my kitchen smells like a Japanese izakaya. Then the eggs slide in all creamy, and suddenly you’ve got that rich, savory punch without a single jar of soy sauce in sight.
- Lunchbox Hero: Between us, this is my go-to for meal prep. Toss it in a container, and it’s still warm and tasty by noon—no sad, soggy rice here. My coworker even stole my leftovers twice last week.
- Budget Workhorse: Chicken breast and day-old rice? That’s my wallet’s best friend. Stretch it for two meals, freeze half for another week, and still feel like you’re eating something special. Not the prettiest, but the taste makes up for it.
Step-by-step instructions for smoky garlic butter fried rice
Transform cold rice into restaurant-quality fried rice with this one-pan technique.
Prepare the Garlic Butter Base
Heat a large skillet or wok over medium-high heat with 2 tablespoons vegetable oil. Add the 0.5 cup unsalted butter, cubed, and let it melt completely. Watch for the butter to foam and then settle into a golden liquid—this takes about 2-3 minutes.
Once the butter has melted, reduce heat to medium and add the 6 cloves minced garlic. Cook for 30-45 seconds until the garlic becomes fragrant and just begins to turn golden. Be careful not to burn it—garlic turns bitter quickly. This aromatic base will carry the entire dish, so don't rush this step. The butter should be bubbling gently but not browned.
Cook the Chicken and Scallions
Push the garlic butter to one side of the pan and add the 1 lb diced boneless chicken breast to the empty space. Cook for 4-5 minutes until the chicken is fully cooked through and no longer pink in the center. The chicken should be slightly crispy on the edges—this adds texture to the fried rice.
Once the chicken is done, add the 0.25 cup thinly sliced scallions to the pan. Stir them into the garlic butter and cook for 1 minute until they soften slightly but still retain their bright green color. Remove the chicken and scallions with a slotted spoon and set them aside on a plate. Keep the garlic butter in the pan—it's the flavor foundation.
Fry the Eggs and Incorporate the Rice
Return the pan to medium-high heat and add the 2 whole large eggs. Scramble them quickly, stirring constantly, until they're just set but still slightly runny in the center—about 30-45 seconds. Remove the eggs and set them aside with the chicken and scallions.
Now add the 4 cups day-old cooked white rice to the pan, breaking up any large clumps with your spatula. Stir to coat the rice evenly with the garlic butter. Cook for 2-3 minutes until the rice is heated through and begins to develop a light golden color in spots. If the rice seems dry, add 1-2 tablespoons water and stir to steam it slightly.
Season and Finish with Sesame
Return the chicken, scallions, and eggs to the pan. Drizzle in the 0.25 cup light soy sauce and the 1 tablespoon toasted sesame oil. Stir everything together thoroughly, making sure the soy sauce and sesame oil coat all the ingredients evenly. The rice should now be glossy and fragrant.
Season with the 0.5 teaspoon salt and 0.25 teaspoon ground black pepper, then taste and adjust if needed. Sprinkle the 1 tablespoon toasted white sesame seeds over the top just before serving. The sesame seeds add a nutty crunch that contrasts perfectly with the creamy garlic butter and tender rice.
Serve Immediately for Maximum Crunch
Transfer the fried rice to a serving platter and serve right away while it's hot. The texture is best when the rice is still slightly crispy around the edges, so don't let it sit too long. Garnish with additional sesame seeds if desired, and serve with steamed greens or a side of pickled vegetables for balance.
Each bite should deliver a perfect harmony of textures—crispy edges on the rice, creamy garlic butter, tender chicken, and the nutty crunch of sesame seeds. The smoky garlic flavor carries through every mouthful, making this a dish that's as impressive as it is delicious.
Pro Tips For Making Arashi Fried Rice
- CRISP THE CHICKEN FIRST: I learned this the hard way—skipping this step makes your fried rice taste like it’s swimming in chicken broth. Sear the chicken breast slices in a separate pan until golden and just cooked through (165°F internal temp) before dicing. That crust keeps the meat from turning rubbery when it hits the rice.
- SALT THE RICE BEFORE FRYING: Your day-old rice needs a salt boost before it goes in the pan. Toss it with a pinch of salt (about ½ tsp per cup) while breaking up clumps—this prevents blandness and helps the butter cling. (Yes, even if it’s already "day-old.")
- SCRAMBLE EGGS IN STAGES: The golden rule for fried rice eggs: don’t let them sit in the pan. Push the eggs to one side of the wok, let them set for 10 seconds, then scramble them before adding the rice. Overcooked eggs turn gummy, and nobody wants that in their arashi.
- USE COLD BUTTER: Sounds weird, but it works: take the unsalted butter straight from the fridge and let it sit in ice water for 5 minutes before adding it to the pan. It melts slowly, coating the rice evenly without burning—no more greasy, bitter batches. (Your future self will thank you.)
Creative variations of this arashi fried rice
Anime-Inspired Fusion
This recipe draws inspiration from Japanese comfort food but with a playful twist—just like the character Arashi/Uzumaki from Naruto! For a fusion twist, add 1 tbsp sriracha to the garlic butter for a spicy kick, or swap the chicken for teriyaki-glazed tofu cubes (marinate in 2 tbsp teriyaki sauce + 1 tsp mirin for 10 minutes). The sweet-spicy contrast mirrors anime-style flavor profiles while keeping the dish authentic. 🌶️
Vegetarian Crunch
Skip the chicken entirely and load up on veggies for a hearty vegetarian version. Sauté 1 cup shredded carrots and 1 cup peas with the garlic butter, then stir in ½ cup corn kernels at the end. Add 1 tbsp nutritional yeast for an umami boost that mimics the savory depth of meat. Garnish with extra sesame seeds and sliced jicama for crunch. ✨
Protein Swaps
Need a different protein? Try shrimp: Toss 1 lb peeled shrimp with 1 tsp soy sauce + ½ tsp black pepper before cooking. Shrimp cooks in just 2-3 minutes, so add it back to the pan with the rice in the final 2 minutes of cooking. For a meatier option, use diced pork belly (render the fat first) or crispy fried tofu for texture. 🍤
Spicy Sesame Twist
For a bold, restaurant-style flavor, mix 1 tsp gochujang (Korean chili paste) into the soy sauce before drizzling. Top with 1 tbsp chopped cilantro and an extra ½ tsp toasted sesame oil for depth. This adds a tangy, slightly sweet heat that balances the richness of the garlic butter. Serve with a side of kimchi for extra zing. 🔥
Breakfast Fried Rice
Transform this into a breakfast dish by adding 2 extra eggs (scrambled separately) and ¼ cup diced ham or crumbled bacon. Stir in 1 tbsp fish sauce for a briny kick, and garnish with sliced avocado and a fried egg on top. The extra protein makes it a filling morning meal—perfect for brunch lovers. 🍳
Meal Prep Adaptations
Make this ahead for easy lunches! Cook the rice and protein separately, then store in airtight containers. Reheat in a skillet with 1 tsp sesame oil over medium heat for 3-4 minutes, adding a splash of water to steam. For extra crispiness, spread reheated rice on a tray and broil for 2 minutes. Garnish fresh before serving to keep it vibrant. ⏰
Nutrition facts
Frequently asked questions
Why does the recipe call for day-old rice?
Day-old rice is essential because it's drier and less sticky, which creates that perfect crispy texture when stir-fried. Fresh rice contains too much moisture and will turn mushy. Spread your cooked rice on a tray for 10 minutes before cooking to dry it out slightly if you don't have leftovers. This simple step makes all the difference for that signature crunch!
Can I make this recipe without chicken?
The chicken is optional, so you can easily make this vegetarian or swap it for other proteins. Try shrimp (cook for just 2-3 minutes), tofu (press and cube first), or even crispy bacon. For a veggie-packed version, add 1 cup mixed veggies like peas, carrots, and corn when stir-frying the rice. The garlic butter base will still shine through!
How do I get the rice extra crispy?
The secret is high heat and proper timing. Use a wok or large skillet on medium-high heat and cook the rice in batches if needed. Break up clumps before adding to the pan, and stir constantly for 2-3 minutes until golden spots form. For extra crunch, spread the cooked rice on a tray and broil for 1-2 minutes before serving. The garlic butter helps create that delicious crispy edge!
Can I make this recipe in an air fryer?
While traditional stir-frying works best, you can adapt this for an air fryer! Cook the chicken and eggs separately, then toss the rice with the garlic butter mixture in the air fryer at 375°F for 5-6 minutes, shaking halfway. Add a splash of water if it seems dry. The texture won't be identical, but it's a great option for smaller batches. Garnish with sesame seeds right before serving for that restaurant-quality finish.
What's the best way to store leftovers?
Store leftovers in an airtight container in the fridge for up to 4 days. When reheating, use a skillet over medium heat with a splash of water to steam the rice. For extra crispiness, spread reheated rice on a tray and broil for 2 minutes before serving. The garlic butter flavor actually improves overnight, so this dish tastes even better the next day!