
Soups & Stews
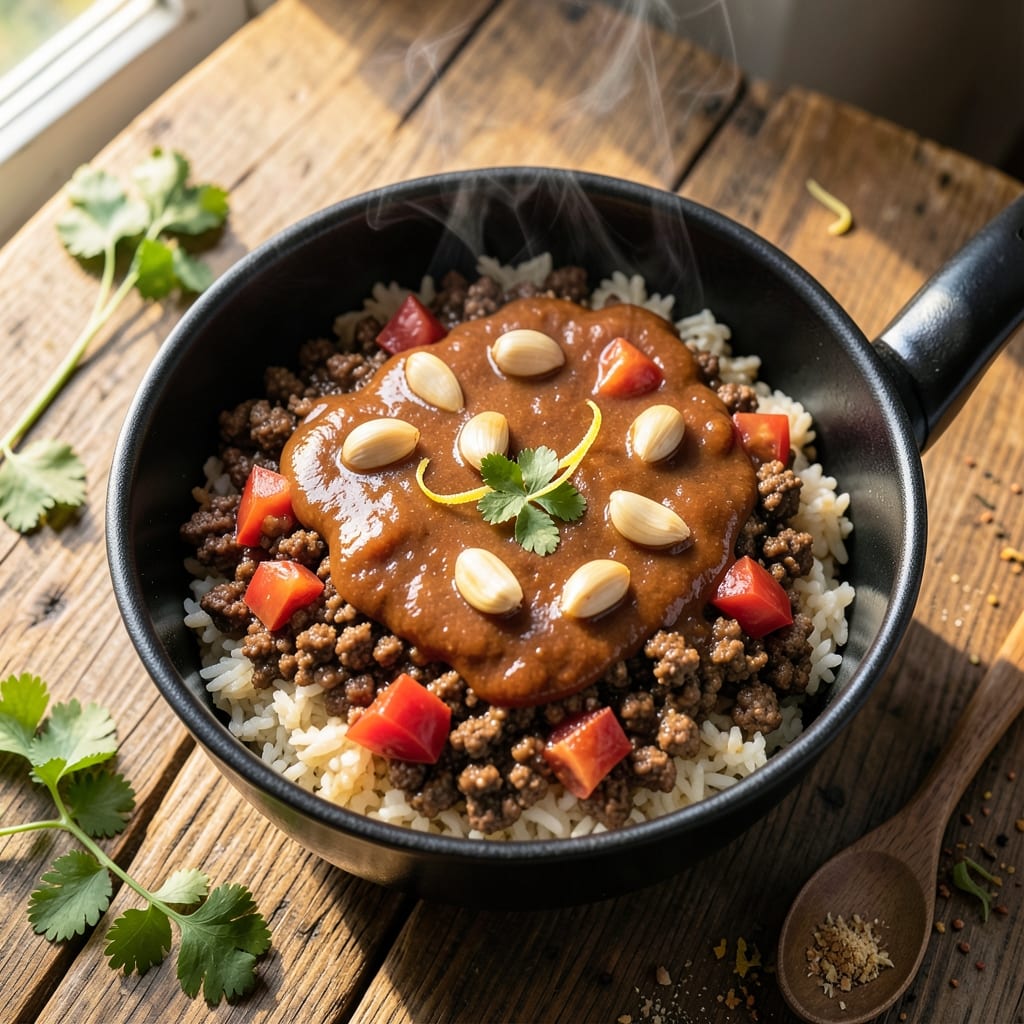
This Aroma rice cooker chili recipe transforms your rice cooker into a flavor factory, delivering restaurant-quality chili with minimal effort. The secret lies in slow-cooked spices and tender meat that meld together perfectly in one pot, creating a hearty meal that's impossible to resist. No stove required—just set it, forget it, and return to deep, rich flavors that develop effortlessly.
The beauty of this method is its simplicity: ground beef browns while spices bloom, then simmers until every bite is packed with smoky, savory depth. The rice cooker's even heat distribution ensures no burnt edges or uneven cooking—just perfectly tender meat, thickened beans, and a sauce that clings to every spoonful. Serve with crusty bread or over rice for the ultimate comforting bowl.
Ingredients for aroma rice cooker chili
Pantry staples plus a few key spices transform your rice cooker into a chili masterpiece.
| Ingredient | Amount | Notes |
|---|---|---|
| Ground Beef 🥩 | 1 lb | 80/20 fat ratio preferred |
| Yellow Onion 🧅 | 1 whole | Medium size, diced small |
| Garlic Cloves 🧄 | 4 cloves | Minced for even distribution |
| Diced Tomatoes 🍅 | 1 can | 28 oz, fire-roasted preferred |
| Tomato Paste 🍅 | 2 tbsp | Squeeze tube or canned |
| Chili Powder 🌶️ | 2 tbsp | Medium heat variety |
| Ground Cumin 🌿 | 1 tbsp | Toasted for deeper flavor |
| Smoked Paprika 🌶️ | 1 tbsp | For authentic smoky taste |
| Black Beans 🫘 | 1 can | 15 oz, drained and rinsed |
| Kidney Beans 🫘 | 1 can | 15 oz, drained and rinsed |
| Beef Broth 💧 | 1 cup | Low-sodium preferred |
| Water 💧 | 1 cup | For proper rice cooker function |
| Salt 🧂 | 1 tsp | Adjust to taste at end |
| Black Pepper 🌶️ | ½ tsp | Freshly ground preferred |
| Cayenne Pepper 🔥 | ¼ tsp | Optional for heat |
The ground beef is where the magic starts—80/20 fat ratio keeps it juicy. Grab the pre-packaged chili mix from the store if you're short on time, but for real depth, toast your spices in the rice cooker for 30 seconds before adding liquid. Penzeys or the bulk section at Whole Foods have the best quality spices. Fire-roasted diced tomatoes add natural sweetness without extra sugar. If you can't find them, regular diced tomatoes work, but they'll be a bit more acidic.
No black beans? Substitute pinto beans or lentils—they hold up well in the rice cooker. Short on kidney beans? Extra black beans or even chickpeas keep the texture similar. The tomato paste is non-negotiable for thickness, but if you're out, an extra 1/4 cup of diced tomatoes helps. For the broth, low-sodium is key—you'll adjust the final salt anyway. The cayenne is optional, but if you want heat, start with 1/4 tsp and add more later—you can't take it out once it's in.
This chili tastes even better the next day—3-4 days in the fridge is perfect. Freeze portions for up to 3 months by spreading in a single layer before bagging. For reheating, add a splash of water or broth to restore thickness. The rice cooker's even heat means no lumps, but give it a quick stir if you're serving immediately. Serve with cornbread or crusty bread for the full experience.
Why You'll Love This Recipe
- Set-and-Forget Magic: I swear by this recipe—dump everything in the rice cooker, press start, and walk away. The beef browns while the onions caramelize, and by the time the timer dings, you’ve got a rich, smoky chili without a single pot to scrub. (Yes, even on a Tuesday night.)
- Garlic Bomb Flavor: That minced garlic? It’s the secret weapon—sautéed until it’s fragrant but not burnt, then simmered into the tomato paste until the whole kitchen smells like a cozy diner. The diced tomatoes add just enough brightness to cut through the richness.
- Lunchbox Hero: Between us, this chili reheats like a dream. Pack it in jars for work lunches, and it’ll still taste fresh hours later. My kids actually ask for it in their school thermoses—no complaints about mushy leftovers here.
- Budget-Friendly Powerhouse: Ground beef stretches farther than you’d think when cooked low and slow with onions and tomatoes. I make this twice a month, and it feeds four for under $10. The tomato paste? That’s the flavor multiplier that makes it feel special without breaking the bank.
Step-by-step instructions for Aroma rice cooker chili
This one-pot method transforms your rice cooker into a flavor powerhouse—no stovetop required.
Brown the Ground Beef
Set your Aroma rice cooker to "Sauté" mode and heat the inner pot over medium-high heat. Add the 1 lb ground beef and break it apart with a wooden spoon, cooking until it loses its raw color and begins to brown—about 5-7 minutes. This step develops deep, meaty flavor that forms the chili's foundation.
Real talk: Don't rush this. You want the beef to brown evenly, not just cook through. If it releases easily from the pot and has a slightly crispy texture, you're golden. Drain any excess fat that accumulates, leaving about 1 tablespoon in the pot for flavor—this prevents the chili from becoming greasy later.
Sauté Onions and Garlic
Add the diced yellow onion to the pot with the cooked beef. Stir and cook for 4-5 minutes until the onions soften and become translucent. This reduces their sharpness and sweetens their flavor—key for a balanced chili.
Next, add the 4 minced garlic cloves and cook for 30 seconds until fragrant. Here's the thing—garlic burns fast, so keep an eye on it. You'll know it's ready when the aroma fills your kitchen and the raw garlic smell disappears. If it starts to darken, reduce the heat slightly.
Build the Chili Base
Stir in the 1 can diced tomatoes, 2 tbsp tomato paste, 2 tbsp chili powder, 1 tbsp ground cumin, 1 tbsp smoked paprika, 1 tsp salt, 0.5 tsp black pepper, and 0.25 tsp cayenne pepper. Mix well to distribute the spices evenly throughout the beef mixture.
This is where the magic happens. The tomato paste thickens the chili and deepens its color, while the spices create layers of flavor. Let the mixture cook for 2-3 minutes on sauté mode, stirring occasionally, until it begins to bubble and the raw tomato smell fades.
Add Liquids and Beans
Pour in the 1 cup beef broth and 1 cup water, then scrape up any browned bits from the bottom of the pot with a wooden spoon. These bits pack concentrated flavor—don't skip this step. Add the 1 can black beans and 1 can kidney beans, giving everything a gentle stir.
Transfer the pot to the rice cooker's inner pot and close the lid. Set the cooker to the "Cook" function and let it work its magic. The chili will simmer and thicken naturally as it cooks, developing rich, complex flavors without needing constant attention.
Cook to Perfect Texture
Let the chili cook for 25-30 minutes on the rice cooker's standard setting. The cooker will automatically switch to "Keep Warm" mode when done, maintaining the perfect temperature. Taste the chili and adjust seasoning if needed—add more salt, chili powder, or cayenne pepper to suit your preference.
For the best texture, let the chili rest for 5-10 minutes before serving. This allows the flavors to meld and the chili to thicken slightly. Serve warm with toppings like shredded cheese, sour cream, or fresh cilantro. Each bite should deliver a perfect balance of smoky, spicy, and savory flavors—all achieved with minimal effort in one pot.
Pro Tips For Making Aroma Rice Cooker Chili
- CRUSH THE ONIONS: Dice them small—think rice-sized or smaller—so they melt into the tomato base instead of sitting as chunks. I used to cut them in half and wondered why my chili had texture where it shouldn’t.
- BROWN THE BEEF FIRST: Don’t just dump raw meat into the rice cooker—sear it in a pan until it’s no longer pink, then add the rest. That crusty bit makes all the difference, and it won’t turn your chili into a gray mushy mess.
- STIR THE TOMATO PASTE: Mix the tomato paste into the onions before adding liquid—this prevents clumping and ensures it blends smoothly. I learned this the hard way after scraping globs off my rice cooker’s inner wall.
- USE FROZEN GARLIC: Skip mincing fresh garlic—just toss in a teaspoon of frozen garlic cubes straight from the bag. It softens perfectly in the rice cooker’s steam, and you avoid burning it (yes, even I’ve done that).
Regional styles of this dish
Texas-Style Chili
For a bold, meat-forward chili, crank up the heat and add 1 lb of ground beef with ½ lb of ground chuck for extra richness. Use 3 tbsp chili powder and 1 tsp cocoa powder for that iconic Texas depth. Skip the beans if you prefer a "chili without beans" style, but add 1 diced bell pepper and 1 chopped onion for texture. Serve with cornbread and pickled jalapeños for the full Lone Star experience. 🌶️
New Mexico Red Chili
Transform this into a New Mexico-style red chili by using 3 tbsp ground ancho chiles (soaked and blended) instead of chili powder. Add 1 tsp oregano and ½ tsp cinnamon for warmth. This version relies on pork shoulder (or beef) and includes posole-style hominy for texture. Top with avocado slices and lime wedges for brightness. 🌵
Southwest Black Bean
Swap the kidney beans for 3 cups cooked black beans and add 1 cup corn kernels (fresh or frozen). Boost the spices with 1 tsp Mexican oregano and ½ tsp ground cloves for complexity. Finish with diced avocado and cotija cheese for a vibrant, bean-centric chili. This version pairs perfectly with warm tortillas for scooping. 🌽
Slow-Cooked White Chili
For a creamy twist, replace the tomatoes with 2 cups chicken broth and add 1 cup shredded rotisserie chicken. Use 1 tsp ground cumin and ½ tsp turmeric for a milder profile. Stir in 1 cup cooked white beans and finish with ½ cup shredded Monterey Jack cheese. Top with chopped cilantro and lime zest for freshness. 🥄
Spicy Carolina-Style
Add 1 tbsp hot sauce (like Crystal or Tabasco) and ½ tsp cayenne pepper for heat. Include ½ cup diced smoked sausage (like andouille) for smokiness. This version benefits from 1 cup collard greens chopped and simmered in for texture. Serve over steamed white rice with extra hot sauce on the side. 🔥
Nutrition facts
Frequently asked questions
Can I use ground turkey or chicken instead of beef?
Yes! For a lighter version, swap the beef for 1 lb ground turkey or chicken, but reduce cooking time to 20 minutes since poultry cooks faster. The flavor will be milder, so add ½ tsp more cumin and 1 tsp poultry seasoning to compensate. For extra richness, stir in 2 tbsp chicken broth at the end.
Why does my chili turn out too thin or watery?
This usually happens when using too much broth or not letting it reduce properly. For thickness, add 1 tbsp tomato paste or 1 tsp cornstarch mixed with water while cooking. The rice cooker's "Keep Warm" setting helps thicken naturally—let it sit 10 minutes after cooking before serving. If still thin, simmer uncovered for 5 extra minutes.
What's the best way to make this chili vegetarian?
Replace the beef with 1 lb plant-based crumbles (like Beyond Meat) or 1 can lentils for protein. Use vegetable broth instead of beef broth and add 1 tbsp soy sauce for umami depth. For texture, include 1 cup diced mushrooms sautéed with the onions. Top with avocado or vegan cheese for creaminess.
Can I make this in a regular rice cooker without "Sauté" mode?
Brown the beef in a separate pan first, then transfer everything to the rice cooker. For extra flavor, sauté the onions and garlic in the rice cooker's inner pot using medium heat (if possible) or pre-cook them in a microwave for 2 minutes before adding. The rice cooker will still create delicious chili—just monitor the cooking time closely.
How do I adjust the spice level for kids?
Reduce the cayenne to ¼ tsp and skip the smoked paprika—it adds subtle heat. For extra mildness, use 1 tbsp mild chili powder (like McCormick's) instead of medium heat. Serve with toppings like shredded cheese or sour cream on the side so kids can adjust their own bowls.