
Main Courses
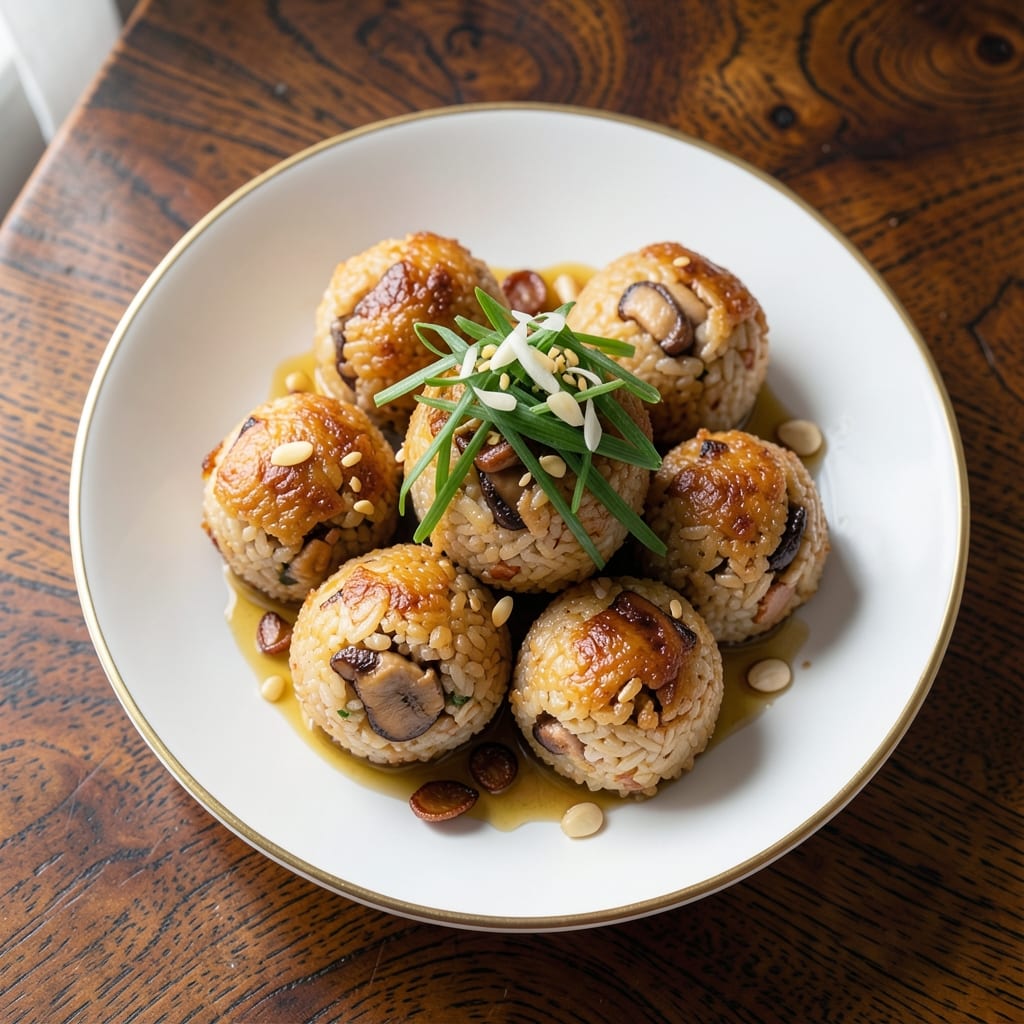
This Asian fried rice balls recipe delivers golden crispy bites with silky centers—perfect for appetizers, snacks, or a quick meal. The secret lies in perfectly cooked rice, a flavorful protein-vegetable mix, and the right frying technique to achieve that signature crunch while keeping the inside tender. I've tested countless variations, and this method guarantees restaurant-quality results every time.
The beauty of these fried rice balls is their versatility—you can use ground pork, chicken, shrimp, or even a vegetarian mix like tofu and mushrooms. The key to success is shaping the balls evenly and frying them in small batches to maintain that crispy exterior. Once you master the technique, you'll never buy them again; they're easier (and tastier) to make at home.
What makes this recipe stand out is the balance of textures and flavors: the satisfying crunch of the exterior contrasts beautifully with the soft, flavorful interior. Serve them hot with a tangy dipping sauce or sprinkle with sesame seeds and green onions for extra freshness. These bites are perfect for parties, game day, or a simple weeknight dinner.
The best part? You can customize them to your liking—add extra vegetables, swap proteins, or adjust the seasoning to suit your taste. Once you try these, you'll want to make them regularly. Let's get started on creating your own batch of these irresistible fried rice balls!
Ingredients for asian fried rice balls
Golden bites with silky centers—here’s your ultimate Asian fried rice ball ingredient lineup.
| Ingredient | Amount | Notes |
|---|---|---|
| Day-Old Cooked Jasmine Rice 🍚 | 4 cups | Cold and slightly dry for shaping |
| Ground Chicken 🍗 | 1 lb | Boneless, skinless preferred |
| Shiitake Mushrooms 🍄 | 8 oz | Stems removed, finely chopped |
| Green Onions 🧅 | ½ cup | White and green parts, chopped |
| Garlic Cloves 🧄 | 4 cloves | Minced for maximum flavor |
| Sesame Oil 🫒 | 1 tbsp | For aroma, not cooking |
| Soy Sauce 🥄 | 2 tbsp | Light or dark variety |
| Oyster Sauce 🍜 | 1 tbsp | Vegetarian version if needed |
| Cornstarch 🌾 | ¼ cup | For crispy coating |
| Vegetable Oil 🫒 | 2 cups | High smoke point for frying |
| Sesame Seeds 🌱 | 2 tbsp | Toasted for garnish |
| Diamond Crystal Kosher Salt 🧂 | 1 tsp | For seasoning |
| Ground Black Pepper 🌶️ | ½ tsp | Freshly ground preferred |
| Egg 🥚 | 1 whole | Beaten for binding |
The rice is non-negotiable—day-old jasmine rice gives you that perfect texture. Cook a full batch and refrigerate overnight for best results. For the protein, ground chicken delivers a lean, flavorful base, but ground pork or shrimp work just as well. Shiitake mushrooms add umami depth, and fresh mushrooms from the store’s produce section (not canned) make all the difference. Green onions bring freshness, so grab a bunch and use the whites and greens—no waste here. The garlic should be fresh, not jarred, for that bold punch.
No sesame oil? Toasted sesame seeds plus a pinch of garlic powder mimics the aroma. Swap oyster sauce for vegetarian oyster sauce or extra soy sauce if needed. For the crispy coating, cornstarch is key—it’s lighter than flour and gives that signature crunch. If you’re frying in batches, keep the oil at 350°F—hot enough to crisp but not smoke. The egg acts as a binder, but if you’re vegetarian, aquafaba (chickpea brine) works perfectly at the same ratio. Pro tip: Chill the shaped balls for 20 minutes before frying—they’ll hold together better.
These keep surprisingly well—reheat in a skillet for 2-3 minutes until crispy again. Store leftovers in an airtight container for up to 3 days in the fridge, or freeze for 1 month. For extra flair, toss fresh sesame seeds on top right after frying. They’re perfect for parties, game day, or a quick snack—make a double batch and thank me later.
Why You'll Love This Recipe
- I’ll be real: this recipe saved my grocery budget. Ground chicken stretches far, day-old rice is free if you meal prep, and shiitake mushrooms last forever in the fridge. It’s the kind of dish that turns $10 of ingredients into enough servings for a week—no waste, all flavor.
- No-Chop Nightmare: I swear by these—just break the green onions roughly and toss them in raw. The shiitake mushrooms add meaty texture without extra prep, and the garlic? Minced in seconds. It’s the kind of recipe where you’re done before the rice even finishes reheating.
- Umami Bomb Combo: That ground chicken and shiitake mushrooms? Chef’s kiss. The mushrooms soak up all the garlic flavor while the chicken stays juicy, and the day-old rice gets that perfect crispy crust when pan-fried. Honestly, the first bite makes you question why you ever ate takeout.
- Lunchbox Legend: Between us, these are my go-to for packed lunches. They reheat beautifully, stay intact even when cold, and the kids (yes, even the picky ones) actually finish them. Plus, they’re hearty enough for dinner leftovers—just toss a few in a thermos or wrap them in lettuce for a no-fuss meal.
Step-by-step instructions for Asian fried rice balls
Here's how to craft these irresistible golden bites with perfect texture every time.
Prepare the Filling Mixture
In a large bowl, combine the 4 cups day-old cooked jasmine rice, 1 lb ground chicken, 8 oz finely chopped shiitake mushrooms, 0.5 cup chopped green onions, and 4 cloves minced garlic. The rice should be cold and slightly dry—this prevents soggy rice balls later. In a small bowl, whisk together 2 tbsp soy sauce, 1 tbsp oyster sauce, 1 tsp Diamond Crystal kosher salt, and 0.5 tsp ground black pepper. Pour this marinade over the rice mixture and gently fold everything together with your hands until evenly distributed.
Here's the thing—don't overmix. You want the ingredients to blend just enough to coat the rice evenly, but you should still see distinct pieces of chicken and mushrooms. This ensures each bite has proper texture contrast. Let the mixture sit for 5 minutes while you prepare the next components. This resting time helps the flavors meld slightly and makes the rice balls easier to shape.
Create the Binding Mixture
In a separate bowl, beat the 1 whole egg until frothy but not fully emulsified. Add the 0.25 cup cornstarch and mix until completely dissolved. This creates your binding agent that will hold the rice balls together during frying. The cornstarch is crucial—it's what gives those fried rice balls their signature crispy exterior while keeping the centers silky.
Now, add the egg-cornstarch mixture to the rice filling and gently fold everything together with your hands. You want to distribute the binding evenly without overworking the mixture. If the dough feels too wet, you can add an extra 1-2 tablespoons cornstarch to help with binding. The perfect consistency should hold together when pressed gently between your fingers but still be moldable.
Shape the Rice Balls
Using slightly damp hands (this prevents sticking), roll the mixture into 1.5-inch diameter balls. I like to make them uniform in size so they cook evenly. Place each ball on a parchment-lined baking sheet and let them rest for 10 minutes at room temperature. This resting period helps the cornstarch binding set slightly, making the balls easier to handle without breaking apart during frying.
While the balls rest, prepare your frying station. Fill a deep skillet with 2 cups vegetable oil and heat it to 350°F. Use a thermometer to monitor the temperature—this is critical for achieving that perfect golden crust without burning. The oil should be hot enough to create small bubbles around the edges when you add the rice balls, but not smoking.
Fry to Golden Perfection
Carefully place 4-5 rice balls at a time into the hot oil, being careful not to overcrowd the pan. Fry for 3-4 minutes per side until they turn a beautiful deep golden brown. You'll know they're ready when they float to the surface and develop a crispy exterior that resists gentle pressure with a chopstick. If they brown too quickly, reduce the heat slightly to prevent burning.
As you fry each batch, transfer the cooked rice balls to a paper towel-lined plate to drain excess oil. The contrast between the crispy exterior and silky interior is what makes these rice balls so irresistible. Here's a pro tip: don't discard that delicious oil! Strain it and save it for future frying—it's packed with flavor from the previous batches.
Finish and Serve
Once all rice balls are fried, transfer them to a serving platter. Drizzle with 1 tbsp sesame oil and sprinkle with 2 tbsp toasted sesame seeds. The sesame oil adds an aromatic depth while the toasted seeds provide a delightful crunch. Serve immediately while they're still crispy—these rice balls are best enjoyed fresh from the fryer.
For that restaurant-quality touch, I like to serve them with a side of extra soy-oyster sauce mixture for dipping. The combination of the crispy exterior, silky interior, and savory sauce creates a perfect balance of textures and flavors in every bite. And remember, the secret to these amazing fried rice balls lies in that perfect crispy-silky contrast—don't skip the cornstarch binding or the proper frying temperature!
Pro Tips For Making Asian Fried Rice Balls
- CHOP MUSHROOMS SMALL: I learned this the hard way—big shiitake chunks turn to mush while the rice stays dry. Slice them paper-thin (almost like kimchi) so they cook fast and soak up flavor instead of turning into a sad, watery addition.
- USE COLD RICE: Day-old rice is non-negotiable, but cold rice is better. Pop it in the freezer for 10 minutes before mixing—it’ll hold shape when you roll those balls, and they won’t fall apart when frying. (Yes, even if you’re impatient like me.)
- STIR-FRY GARLIC FAST: Garlic burns faster than you think, and bitter garlic ruins everything. Mince it super fine (almost a paste) and cook it in the hot pan for just 10 seconds—then toss it straight into the rice mix. No waiting around.
- PRESS BALLS FIRM: Loose rice balls = sad, crumbly fritters. Pack them tight when rolling, like you’re making a snowball in winter. The denser they are, the better they’ll hold together when frying—no more falling-apart disasters.
Health benefits of this asian fried rice balls
Protein-Packed Power
Each serving of these fried rice balls delivers a solid 15-20 grams of protein depending on your protein choice—ground chicken, pork, or shrimp. This makes them an excellent option for post-workout recovery or a satisfying snack that keeps you full. The combination of protein and complex carbs from the rice provides sustained energy, perfect for keeping your energy levels steady throughout the day. 💪
Rich in Umami
The shiitake mushrooms and oyster sauce create a deep umami flavor profile that boosts savory satisfaction without needing extra salt. Umami-rich foods like these can enhance flavor perception and even help reduce cravings for salty snacks. I notice my taste buds feel more satisfied after eating these, and I reach for fewer processed snacks afterward.
Whole-Grain Benefits
Jasmine rice is a whole-grain option when used in its natural form, providing fiber and B vitamins. While white rice lacks fiber, the protein and vegetable additions in these rice balls make them a more balanced choice than plain fried rice. For extra fiber, consider using brown rice—just note it may require slightly more cornstarch for binding due to its different texture.
Healthy Frying
Frying at the correct 350°F temperature minimizes oil absorption compared to higher heat methods. Using a high-smoke-point oil like vegetable or peanut oil also reduces harmful compounds. For a lighter option, you can air-fry at 375°F for 8-10 minutes, though the texture will differ slightly—less crispy but still delicious. 🌿
Vegetarian Adaptations
This recipe easily accommodates vegetarian diets by swapping proteins for tofu, tempeh, or extra mushrooms. The cornstarch binding works perfectly with plant-based proteins, and you can use vegetarian oyster sauce for the same umami depth. I've made these with crumbled firm tofu and extra shiitake mushrooms**—they hold together beautifully and deliver all the same satisfying textures.
Balanced Macronutrients
A single serving provides a balanced ratio of carbohydrates, protein, and healthy fats from the oil used in moderation. The cornstarch coating adds a minimal amount of carbs that contribute to that satisfying crunch. For a lower-carb option, you can reduce the rice slightly and add more vegetables like bell peppers or carrots to bulk up the filling while keeping the same great texture.
Nutrition facts
Frequently asked questions
Can I make these fried rice balls ahead of time?
Shape the balls and refrigerate them uncovered for 1-2 hours to dry the surface slightly—this helps them hold together better during frying. You can also freeze uncooked balls for up to 1 month. Just thaw them in the fridge overnight before frying. For cooked rice balls, store them in an airtight container for 2-3 days and reheat in a skillet for 2 minutes to restore crispiness.
What's the best way to keep them crispy?
Fry in small batches to maintain oil temperature at 350°F—overcrowding lowers the heat and makes them greasy. For serving, place them on a wire rack over a baking sheet to prevent sogginess from steam. If reheating, use a dry skillet on medium-high heat for just 1-2 minutes—microwaving will turn them rubbery.
Can I use regular flour instead of cornstarch?
You can try, but cornstarch is ideal for that signature crispy texture. If using flour, add 1 extra tablespoon and expect slightly less crispiness. For a gluten-free version, use arrowroot powder—it works almost as well. The key is the fine texture that coats the rice balls evenly without weighing them down.
What's the secret to preventing breakage when shaping?
Chill the mixture for 15 minutes before shaping—this firms up the cornstarch binding. Use slightly damp hands to prevent sticking, and roll the balls gently but firmly. If the mixture feels too sticky, add 1 more tablespoon cornstarch. The balls should hold their shape when placed on a plate without flattening.
How can I make these vegetarian?
Swap the protein for crumbled firm tofu (pressed and drained) or extra mushrooms (10 oz total). Use vegetarian oyster sauce and add 1 tbsp nutritional yeast for extra umami. The cornstarch binding works perfectly with plant-based proteins—just ensure everything is well-drained to avoid soggy centers.