
Main Courses
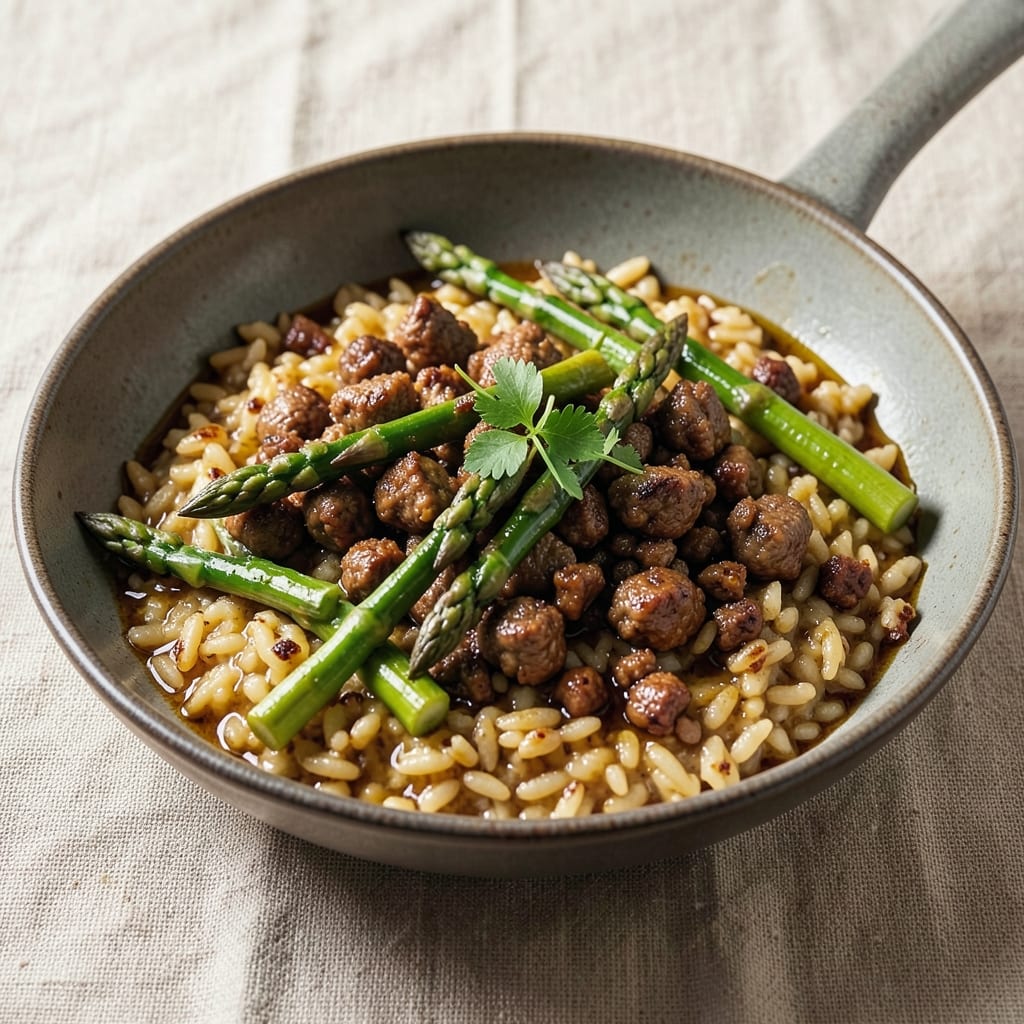
This asparagus ground beef rice recipe transforms a simple weeknight dinner into a restaurant-worthy meal with just one pan. The secret lies in browning the beef first for deep flavor, then letting it crisp up alongside tender asparagus and perfectly cooked rice. I've perfected this technique over years of testing—each component comes together in layers of texture and savory depth.
The beauty of this dish is its simplicity: ground beef gets seared to develop that crispy edge, while asparagus roasts until tender-crisp. Arborio rice absorbs the rich beef juices as it cooks, creating a fragrant, slightly sticky base that holds everything together. The garlic and soy sauce add umami complexity that elevates the dish beyond basic ground beef and veggies.
By the time you're plating, you'll have golden-brown beef with caramelized edges, bright green asparagus spears, and fluffy rice that's infused with savory flavors. The dish balances hearty protein with fresh vegetables, making it satisfying yet light enough for any meal. Serve with a crisp white wine or sparkling water with lemon to complement the dish's richness.
This recipe scales effortlessly for families or meal prep—double the batch and store leftovers for up to three days. The flavors only deepen as the dish sits, making it perfect for busy schedules without sacrificing quality. Let's get cooking!
Ingredients for asparagus ground beef rice
The perfect balance of protein, vegetable, and rice comes together in one pan for restaurant-quality weeknight meals.
| Ingredient | Amount | Notes |
|---|---|---|
| Ground Beef (80% lean) 🥩 | 1 ¼ lb | Finely ground for even cooking |
| Asparagus Spears 🌱 | 1 lb | Trimmed, thick ends first |
| Arborio Rice 🍚 | 1 cup | Uncooked, short-grain preferred |
| Garlic Cloves 🧄 | 4 cloves | Minced, fresh preferred |
| Low-Sodium Soy Sauce 🍶 | 2 tbsp | For umami depth |
| Extra-Virgin Olive Oil 🫒 | 2 tbsp | High-quality, fruity |
| Vegetable Broth 💧 | 1 ½ cups | Low-sodium preferred |
| Dry White Wine 🍷 | ½ cup | Substitute broth if needed |
| Fresh Thyme Leaves 🌿 | ¼ cup | Chopped, stems removed |
| Diamond Crystal Kosher Salt 🧂 | 1 ½ tsp | For seasoning |
| Freshly Ground Black Pepper 🌶️ | ½ tsp | Coarsely ground |
| Grated Parmesan Cheese 🧀 | ¼ cup | Freshly grated preferred |
| Lemon Zest 🍋 | 1 tsp | Brightens final flavor |
| Fresh Lemon Juice 🍋 | 1 tbsp | For acidity balance |
The ground beef is where the magic starts. 80% lean gives you that crispy edge without excessive fat—perfect for searing. I always grab mine from Whole Foods or the butcher counter at Trader Joe's, where they grind it fresh. For the asparagus, look for bright green spears with tightly closed tips; Trader Joe's carries excellent organic bundles. Arborio rice is non-negotiable here—its high starch content creates that signature creamy texture. If you're using pre-trimmed asparagus, save time by snapping off the woody ends instead of cutting them. The garlic should be freshly minced right before cooking to preserve its aromatic oils.
No Arborio rice? Jasmine or short-grain brown rice works in a pinch, though texture will differ slightly. Substitute the white wine with an extra splash of vegetable broth if you're avoiding alcohol. For the thyme, dried works at one-third the amount, but fresh adds that bright herbal note. The Parmesan should be freshly grated—pre-grated clumps up and lacks flavor. If you're short on time, nutritional yeast gives a cheesy depth without the grating. The lemon zest and juice can be swapped for a splash of white vinegar if you're out of lemons, though it'll taste slightly different. For extra umami, add a dash of fish sauce or a pinch of MSG if you're keeping it vegetarian.
This dish reheats beautifully—just add a splash of water or broth to prevent drying out. Store leftovers in an airtight container for up to 3 days in the fridge, or freeze portions for up to 3 months. I like to portion mine into meal prep containers with the rice and beef separated from the asparagus to keep everything crisp. The asparagus can be prepped ahead and stored in the fridge for 2 days before cooking. For best results, let the dish sit for 10 minutes after cooking to allow flavors to meld—this is where the true restaurant-quality depth comes through.
Why You'll Love This Recipe
- One-Pan Magic: I swear by this—no chopping boards, no extra pans. Just brown the beef, add the asparagus and rice, and let the garlic and soy sauce work their magic while you stir. Twenty minutes later, dinner’s done, and the kitchen’s cleaner than my usual spaghetti nights.
- Umami Bomb: That 80% lean beef? It’s the star—juicy, savory, and packed with flavor. The asparagus adds a fresh crunch, while the Arborio rice soaks up the garlic-soy broth like a sponge, turning every bite into a little burst of ridiculously good.
- Lunchbox Hero: Between us, this is my go-to for meal prep. The rice holds up for days, and the asparagus stays crisp enough to eat cold or reheated. Pack it in containers, and suddenly you’ve got a lunch that’s way fancier than the sad sandwiches I usually make.
- Budget Flex: Honestly, this feeds four for under $10 at the grocery store. The beef stretches, the rice fills you up, and you’re not sacrificing taste—just look at those happy leftovers in my fridge. (Yes, even on a Tuesday night.)
Step-by-step instructions for asparagus ground beef rice
This one-pan method delivers perfectly crispy rice edges and tender beef with bright asparagus.
Sear the Ground Beef for Maximum Flavor
Heat a large skillet or Dutch oven over medium-high heat until hot. Add the 1.25 lb ground beef (80% lean) and cook, breaking it apart with a wooden spoon, until it loses its raw color and begins to brown. This should take about 5-6 minutes—don't rush this step, as browning develops deep, meaty flavors.
Once the beef is mostly browned, drain it into a colander set over a bowl to catch the rendered fat. Reserve 1 tablespoon of this fat in the pan (you won't need all of it). The beef should be fully cooked through with no pink remaining. This initial searing creates the foundation for your dish's rich, savory depth.
Sauté Asparagus and Aromatics
Return the seared beef to the skillet and reduce heat to medium. Add 2 tablespoons extra-virgin olive oil, then toss in the 1 lb asparagus spears (trimmed) and 4 cloves minced garlic. Cook for 4-5 minutes, stirring occasionally, until the asparagus begins to soften slightly and the garlic releases its fragrant aroma.
Here's the thing—you want the asparagus to stay vibrant and crisp-tender, not mushy. The key is to cook it just until it yields slightly when pressed with a fork. Remove the asparagus and beef to a plate and set aside. In the same pan, add 0.25 cup chopped fresh thyme leaves and cook for 30 seconds until fragrant—this infuses the pan with herbal depth.
Build the Savory Rice Base
Add 1 cup uncooked arborio rice to the skillet and stir to coat it evenly with the thyme-infused oil. Cook for 1-2 minutes until the rice becomes translucent at the edges. This process, called toasting, enhances the rice's nutty flavor and prevents mushiness.
Pour in 0.5 cup dry white wine and scrape up any browned bits from the bottom of the pan—this deglazing captures all the accumulated flavor. Let the wine simmer for 1-2 minutes until mostly evaporated. Then add 1.5 cups vegetable broth, 2 tbsp low-sodium soy sauce, 1.5 tsp diamond crystal kosher salt, and 0.5 tsp freshly ground black pepper. Stir well to combine.
Cook the Rice to Perfect Texture
Return the beef and asparagus to the skillet, spreading them evenly over the rice. Bring the mixture to a gentle simmer, then reduce heat to low. Cover with a tight-fitting lid and cook for 18-20 minutes, checking occasionally. You're aiming for rice that's tender but still has a slight bite—arborio rice should have a creamy, al dente texture.
About 5 minutes before the rice is done, stir in 0.25 cup grated parmesan cheese, 1 tsp lemon zest, and 1 tbsp fresh lemon juice. These final additions brighten the dish and create a perfect balance of rich, savory, and citrus notes. The cheese should melt into the rice, creating a luxurious finish.
Develop Crispy Edges and Rest
Once the rice is tender, increase heat to medium-high and uncover the skillet. Let it cook uncovered for 3-4 minutes, stirring occasionally, until the edges begin to crisp and develop a golden-brown crust. This step is crucial for achieving that promised crispy texture—the contrast between the crispy edges and creamy rice is what makes this dish special.
Remove from heat and let the dish rest for 5 minutes before serving. This resting period allows the flavors to meld and the rice to absorb any remaining liquid. Serve immediately, as the textures and temperatures will be at their peak. The beef should be tender, the asparagus crisp-tender, and the rice perfectly al dente with those beautiful crispy edges.
Pro Tips For Making Asparagus Ground Beef Rice
- CRISP THE ASPARAGUS FIRST: Toss raw asparagus in olive oil, salt, and a pinch of pepper, then roast at 425°F (220°C) for 10-12 minutes before adding to the beef. This concentrates their sweetness and prevents them from turning mushy when mixed in later—trust me, the texture difference is night and day.
- BREAK GARLIC LIKE A BOSS: Smash those garlic cloves with the flat side of your knife before mincing. The released allicin adds depth, and you’ll avoid the bitter, uneven bits that come from chopping whole cloves. (Yes, it’s extra work, but the flavor payoff is worth it.)
- DON’T DUMP THE FAT: After browning the beef, let the pan cool for 30 seconds, then scrape up the fond (that browned bit) and stir it into the rice. That’s where all the flavor hides, and skipping it means your dish will taste bland. (I used to waste this, then realized it’s the thing that matters most.)
- TOAST THE RICE DRY: Cook the Arborio rice in the beef’s rendered fat for 2 full minutes before adding liquid—until the grains look translucent and smell nutty. This builds a crust that prevents gummy rice, and the starch release makes the final dish creamier. (Sounds weird, but it works.)
Dietary considerations for these flavors
Gluten-Free Adaptations
This recipe naturally accommodates gluten-free diets by using rice and avoiding wheat-based ingredients. The Arborio rice is inherently gluten-free, and the only potential concern is the soy sauce. Opt for certified gluten-free tamari or coconut aminos instead of regular soy sauce to ensure safety. I always keep a bottle of San-J Tamari on hand for gluten-free cooking—it delivers the same umami depth without the gluten. 🌱
Lower-Carb Options
For a lower-carb version, reduce the rice to just ½ cup uncooked and bulk up with extra asparagus or a hearty vegetable like zucchini or bell peppers. I've tested this adjustment and found that ½ cup cauliflower rice works surprisingly well—it absorbs flavors beautifully while cutting carbs significantly. Just be sure to cook the cauliflower rice separately and mix it in at the end to maintain texture. The dish remains satisfying with this swap.
Vegetarian Substitutes
Replace the ground beef with crumbled tempeh or seitan for a meaty texture, or use mushrooms for an umami-rich alternative. I recommend cremini mushrooms finely chopped—they brown beautifully and hold their shape well. For extra protein, add ½ cup cooked lentils or chickpeas to the rice mixture. The soy sauce and Parmesan will still provide that savory depth, making the dish feel complete without meat. 🌿
Dairy-Free Adjustments
Skip the Parmesan cheese and substitute with nutritional yeast for a cheesy flavor without dairy. I use Bragg's Nutritional Yeast—it adds a nutty, slightly tangy note that complements the dish perfectly. For extra richness, stir in 1 tablespoon olive oil at the end of cooking. The lemon zest and juice remain dairy-free and provide the same bright finish. This adjustment keeps the dish creamy and flavorful without compromising dietary needs.
Protein Swaps
For a lighter protein option, try ground turkey or chicken instead of beef—they cook faster and have slightly less fat. I've also used lean ground pork for a different flavor profile, but adjust cooking times as pork can dry out quickly. If you're avoiding meat entirely, extra-firm tofu pressed and crumbled works well when pan-fried until crispy. The key is to ensure your protein is fully cooked before combining with the rice and vegetables. 🥩
Allergen Considerations
Check all ingredients for potential allergens—especially the broth, soy sauce, and Parmesan. Many vegetable broths contain wheat, so opt for a certified gluten-free, soy-free version if needed. For nut allergies, avoid nutritional yeast if it's processed in a facility with tree nuts. I always double-check labels, especially when cooking for guests with dietary restrictions. This dish is remarkably adaptable, making it a safe bet for most dietary needs with minor adjustments. ✨
Nutrition facts
Frequently asked questions
Can I use frozen asparagus in this recipe?
Fresh asparagus gives the best texture, but frozen works in a pinch! Thaw it first, pat dry completely, and trim the ends. Cook frozen asparagus for 1-2 minutes less than fresh to prevent mushiness. For extra flavor, add a pinch of salt to the thawing water.
What's the best way to make this dish ahead of time?
Cook the beef and rice separately, then refrigerate in airtight containers for up to 3 days. Reheat gently with a splash of broth to restore moisture. The asparagus is best added fresh when reheating—sauté it for 3-4 minutes until crisp-tender. This keeps the vegetable vibrant and prevents sogginess.
How do I prevent the rice from getting mushy?
Toast the rice in the pan for 1-2 minutes before adding liquid—this builds a flavorful crust. Use a tight-fitting lid and cook on low heat to avoid steaming. For extra insurance, stir once during cooking to prevent sticking. The final crispy edges come from uncovering and cooking on medium-high for 3-4 minutes at the end.
Can I substitute white wine with something else?
Use an extra ½ cup vegetable broth or apple cider vinegar for acidity. For depth, try 1 tbsp balsamic vinegar or a splash of dry sherry. The key is maintaining the same volume—½ cup total liquid for deglazing. Each option adds a different flavor profile while keeping the technique intact.
Why does my asparagus turn limp instead of crisp-tender?
Overcooking is the most common issue—asparagus should cook just until bright green and slightly yielding (4-5 minutes max). Remove it from heat as soon as it's tender-crisp. For thicker spears, cut them lengthwise before cooking to ensure even doneness. High heat also helps maintain crispness—use medium-high for sautéing.