
Main Courses
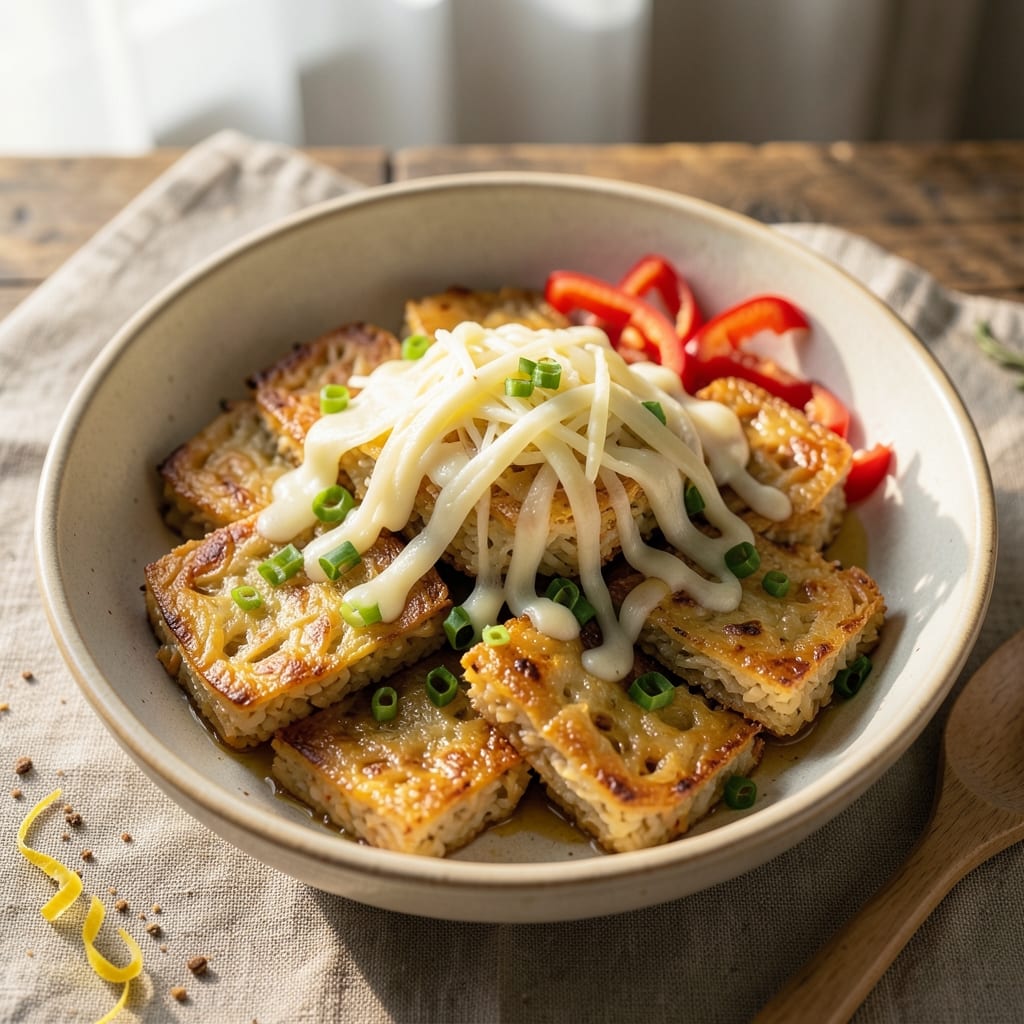
Crispy-fried Asian rice cake recipe ideas with melty cheese centers deliver that perfect balance of texture and flavor—crunchy outside, gooey inside. These bites are inspired by traditional Japanese okonomiyaki and Korean tteok but elevated with a cheesy twist that makes them irresistibly addictive. The key lies in the rice flour batter, which creates a delicate yet sturdy shell that holds up beautifully during frying.
This recipe transforms simple pantry staples into a restaurant-worthy appetizer in just 30 minutes. The secret isn’t just the crispy exterior—it’s the way the mozzarella melts into pockets of creamy goodness while the outside stays perfectly golden. Seasoned with garlic, onion, and a touch of soy sauce, each bite carries a savory depth that pairs beautifully with sweet chili sauce for dipping.
What makes these rice cakes special is their versatility—serve them as a standalone snack, pair with miso soup for a light meal, or use as a topping for ramen. The crispy texture holds up well even when reheated, making them ideal for meal prep. Whether you’re hosting a gathering or craving a quick bite, these cheesy fried bites will disappear faster than you can say kore wa totemo oishii desu.
The process is straightforward: mix the batter, shape the cakes, fry until golden, and finish with a tangy dipping sauce. No advanced techniques required—just patience for the frying step to ensure that perfect crispy shell. Once you try these, you’ll never go back to store-bought versions again.
Ingredients for asian rice cake recipe ideas
Golden bites with crispy exteriors and melty cheese centers—these Asian-inspired rice cakes are your new obsession!
| Ingredient | Amount | Notes |
|---|---|---|
| Rice Flour 🍚 | 1 ½ cups | Glutinous rice flour preferred |
| All-Purpose Flour 🌾 | ½ cup | For structure and crispiness |
| Shredded Mozzarella Cheese 🧀 | 1 cup | Low-moisture, freshly shredded |
| Large Eggs 🥚 | 2 whole | Room temperature for even mixing |
| Vegetable Oil 🫒 | 3 cups | High smoke point for frying |
| Baking Powder 🧂 | 1 tsp | For extra lift and crisp |
| Salt 🧂 | ½ tsp | Kosher or sea salt preferred |
| Ground Black Pepper 🌶️ | ¼ tsp | Freshly ground for flavor |
| Garlic Powder 🧄 | ½ tsp | For savory depth |
| Onion Powder 🧅 | ½ tsp | Adds subtle sweetness |
| Sweet Chili Sauce 🍶 | ¼ cup | For dipping and glaze |
| Soy Sauce 🥢 | 1 tbsp | For post-fry brushing |
| Sesame Oil 🌿 | 1 tbsp | For aromatic finish |
The rice flour is non-negotiable here—glutinous rice flour gives that signature chewy texture, but regular rice flour works in a pinch. Bob's Red Mill or King Arthur brands are my go-tos, but any Asian market will have it in bulk for better value. If you can't find glutinous, a 50/50 mix with all-purpose still delivers crispy results. The mozzarella? Low-moisture, freshly shredded is key—pre-shredded gets gummy when fried. Shred it yourself for that perfect melt. Eggs should be room temp to blend smoothly into the batter, and vegetable oil with a high smoke point (like Avocado Brand) ensures crispy edges without burning.
No mozzarella? Cheddar or Monterey Jack work too—just shred it yourself. Short on rice flour? Substitute half with cornstarch for extra crispiness, but texture will differ. The sweet chili sauce can be swapped for soy glaze or hoisin—whatever you've got on hand. For a spicy kick, add a pinch of red pepper flakes** to the batter. The sesame oil is optional but adds that authentic umami punch—Trader Joe's has a great affordable bottle. Pro tip: Toast your sesame seeds separately for garnish if you're feeling fancy.
These keep for 2 days in an airtight container at room temp, but honestly? They disappear faster. Reheat in a 350°F oven for 5 minutes to restore crispiness. Freeze extras between parchment sheets—up to 3 months—and fry straight from frozen (add 1-2 minutes). Double the batch and freeze half; you'll thank me later. Store-bought sweet chili sauce? Check the ingredients—some brands add weird fillers. Maesri or Thai Kitchen are my top picks for that perfect balance of sweet and tangy.
Why You'll Love This Recipe
- No-Fuss Batter: I swear by the mix of rice flour and all-purpose—just whisk, no sifting, no stress. The eggs bind it all together while you’re still scrolling through your phone, and the mozzarella melts into those little pockets like magic.
- Crispy-Creamy Magic: That first bite? Crunchy outside, gooey inside—it’s the oil’s fault, really, for making the edges golden while the cheese stays warm and stretchy. Honestly, I didn’t think I’d miss takeout after this.
- Lunchbox Hero: Between us, these are my go-to for packed lunches. They reheat in seconds (microwave or toaster—no judgment), and the kids actually eat them cold too. (Yes, even on a Tuesday.) Double batch on Sundays, and you’re set for the week.
- Budget Win: A handful of cheap staples—flour, eggs, cheese—stretches to feed four for under $5. I’ll be real: my grocery bill dropped when I started making these instead of buying pre-packaged snacks. Plus, leftovers? They last forever in the fridge.
Step-by-step instructions for crispy-fried rice cake bites
Transform simple ingredients into golden, crispy bites with gooey melty centers using this precise method.
Mix Dry Ingredients for Perfect Texture
In a large bowl, combine the 1.5 cups rice flour and 0.5 cup all-purpose flour. Add the 1 tsp baking powder, 0.5 tsp salt, 0.25 tsp ground black pepper, 0.5 tsp garlic powder, and 0.5 tsp onion powder. Whisk everything together until fully integrated—you want to eliminate any lumps so the cakes cook evenly.
The rice flour provides that signature crispy texture, while the all-purpose flour adds structure. I like to use a whisk for this step because it aerates the dry ingredients slightly, which helps create light, airy pockets in the finished cakes. Sift if needed to ensure no flour clumps remain.
Combine Wet Ingredients for Smooth Batter
In a separate bowl, beat the 2 whole large eggs until frothy but not fully mixed. Add the 1 cup shredded mozzarella cheese and stir gently to distribute it evenly. The cheese should be freshly shredded and low-moisture to prevent soggy cakes.
Gradually pour the dry ingredients into the wet ingredients while stirring continuously. Mix just until combined—overmixing develops gluten and makes the cakes tough. The batter should be thick but still pourable, like a very stiff cookie dough. If it's too dry, add 1 tablespoon of water at a time until it reaches the right consistency.
Heat Oil and Shape the Cakes
Pour the 3 cups vegetable oil into a deep skillet or Dutch oven and heat over medium-high heat until it reaches 350°F on a deep-fry thermometer. You can test the oil by dropping in a small piece of batter—it should sizzle and float immediately.
Using a cookie scoop or tablespoon, drop rounded portions of batter into the hot oil, spacing them about 2 inches apart. Don't overcrowd the pan—this prevents the oil temperature from dropping too much. The cakes will puff up slightly as they cook, so give them room to expand.
Fry Until Golden and Crispy
Fry the cakes for 2-3 minutes per side until they turn a deep golden brown color. The cheese inside should be fully melted, and the exterior should be crispy enough to hold its shape when transferred. You'll know they're done when they float to the surface and maintain their shape.
Use a slotted spoon to carefully remove the cakes from the oil and drain them on a wire rack or paper towels. Let them sit for 2-3 minutes to firm up slightly before serving. The residual heat will continue cooking them, so don't rush this step—patience ensures maximum crispiness.
Finish with Flavorful Sauce
In a small bowl, mix together the 0.25 cup sweet chili sauce, 1 tbsp soy sauce, and 1 tbsp sesame oil. Drizzle this mixture lightly over the warm cakes or serve it on the side for dipping. The sauce adds a perfect balance of sweet, spicy, and umami flavors that complement the crispy exterior and melty cheese.
For an extra touch, sprinkle a pinch of black pepper or a drizzle of sesame oil directly on top of each cake right before serving. These bites are best enjoyed immediately while still crispy and warm—each one should have a satisfying crunch that gives way to creamy, melted cheese inside.
Pro Tips For Making Asian Rice Cake Recipe Ideas
- WHISK EGGS UNTIL THICK: I learned this the hard way—whipping the eggs until they’re ribbon-like (not just frothy) keeps the rice cakes from falling apart when frying. Use a fork first to break up the yolks, then a whisk for 30 seconds longer than you think you need.
- SIFT FLOURS TOGETHER: Mixing rice flour and all-purpose flour separately means lumps. Sift them together in a bowl first—this also aerates the batter for lighter, crispier cakes. Skip this, and you’ll end up with dense, greasy results.
- DON’T OVERMIX THE BATTER: Once you fold in the cheese and eggs, stop after 10 strokes. Overworking the batter makes the cakes tough and chewy. The cheese should be just distributed, not mashed into oblivion.
- USE COLD CHEESE: Take the shredded mozzarella out of the fridge 10 minutes before using—it melts more evenly and doesn’t turn the batter greasy. Warm cheese = soggy cakes. Trust me, I’ve fried batches where the cheese oozed out mid-bite.
Essential equipment for perfect results
Deep Fryer Essentials
For perfect rice cakes, a deep fryer is a game-changer—I swear by the Presto 02811 for its even heat distribution and safety features. If you don’t own one, a heavy-bottomed Dutch oven (like Le Creuset) works just as well. The key is maintaining a steady 350°F oil temperature—use a deep-fry thermometer (I recommend Thermoworks Smoke) to avoid guesswork. 🔥
Oil Selection Matters
Choose oils with a high smoke point—avocado oil or vegetable oil are my top picks for their neutral flavor and stability at high heat. Avoid olive oil (it burns easily) and stick to refined versions for a cleaner taste. I buy Avocado Brand in bulk because it’s affordable and performs consistently. Always use enough oil to submerge the batter completely—about 3 cups for this recipe.
Batter Tools for Precision
A cookie scoop (like OXO Good Grips) is perfect for portioning consistent, even-sized cakes. If you don’t have one, a tablespoon works, but weigh your portions for uniformity. For mixing, a whisk aerates the dry ingredients better than a spoon, and a silicon spatula helps scrape every last bit of batter from the bowl. I also keep a fine-mesh sieve handy to sift the flours and eliminate lumps.
Draining and Serving Setup
Invest in a wire cooling rack (I love the OXO Good Grips design) to drain fried cakes—it keeps them crispy instead of soggy from sitting on paper towels. A slotted spoon with long handles makes transferring cakes from oil to rack easy. For serving, I arrange the cakes on a wooden board or ceramic platter and keep the sauce in a small dipping bowl (like Le Creuset’s mini ramekins) for an elegant touch.
Optional Extras for Flair
Add a sesame seed toaster (like KitchenAid’s) to toast seeds for garnish—just 30 seconds in the toaster adds a nutty crunch. A small brush (I use silicon pastry brushes) helps apply sauce evenly. For extra crispiness, a mandoline slicer (set to ¼ inch) lets you create thin, even slices if you’re making layered versions. These tools aren’t mandatory, but they elevate the final presentation. ✨
Nutrition facts
Frequently asked questions
Can I make these rice cakes without frying?
For a healthier version, try baking at 375°F for 12-15 minutes on a lined baking sheet. Use a cookie scoop to shape the batter into small rounds or squares, spacing them 1 inch apart. The texture will be lighter but still delicious—just brush with a mix of soy sauce and sesame oil after baking for extra flavor.
What's the best cheese substitute if I don't like mozzarella?
Try sharp cheddar, Monterey Jack, or even Gouda for a richer taste. For a vegetarian option, nutritional yeast adds a cheesy flavor without dairy. Just shred the cheese yourself—pre-shredded varieties contain anti-caking agents that make the cakes gummy. If you're avoiding cheese entirely, fold in ½ cup mashed sweet potato for moisture and binding.
How do I store leftover rice cakes?
Keep them in an airtight container at room temperature for 2 days—they'll lose crispiness but stay tasty. For longer storage, freeze them between parchment sheets for up to 3 months. To revive, reheat in a 350°F oven for 5 minutes or air-fry at 375°F for 3-4 minutes. Avoid microwaving—they'll turn soggy instantly.
Can I add other fillings besides cheese?
Yes! Try chopped scallions and kimchi for a savory kick, or mashed red bean paste for a sweet twist. For spicy versions, mix in diced jalapeños or sriracha into the batter. Keep fillings to ½ cup total per batch to maintain structure—too much will make the cakes dense. Fold them in gently after combining wet and dry ingredients.
Why did my rice cakes turn out dense instead of crispy?
Overmixing the batter develops gluten, making them tough. Also check your oil temperature—if it's too low (325°F or below), the cakes will absorb oil and become greasy. For extra crispiness, add 1 tbsp cornstarch to the dry ingredients or chill the batter for 30 minutes before frying. Finally, ensure your rice flour is fresh—old flour loses its binding properties.